Uncategorized iBlock Topics

3 Back-to-School STEAM Activities for Little Learners

Child playing with clay

Back-to-school season is a time of new procedures, learning opportunities, friendships, and so much more. For all students, we want to provide engaging activities that get them excited for the school year ahead. Specifically, for little learners, creating hands-on and interactive STEAM activities will help to promote a positive learning environment that empowers student voice and creativity.

Of course, we want to include “get-to-know-you” icebreakers, classroom routines, and literacy-based activities to start the school year strong, but how can we do this in a unique way? The answer is providing students with STEAM experiences to take learning to the next level. Let’s explore some specific STEAM activities that you can try with even your littlest learners this school year.

1) Get creative with clay

As an elementary school teacher, I always loved starting off the first day of school with something lighthearted and engaging, while also providing teachers with opportunities to learn a bit more about their students. By giving students something like clay, which they have used before, they’ll feel comfortable entering a new environment and showing off their art skills! Here are some steps to get you started:

  • Provide students with a block of clay. You can choose to also provide them with specific instructions of what to create or let them make anything they want!
  • If you provide them with instructions, consider putting it on a laminated worksheet or mat that they can build their creations on. Some ideas of what students can make are:
    • Their name (or nickname)
    • Favorite animal
    • Something that represents who they are
    • Activity they like to do
    • An invention
  • Give students ample time to create. Remember that they don’t need to create multiple items, it can just be one or two.
  • Have students share with their classmates. This would be a good opportunity for them to share 1:1, as a table, or even just with the teacher.
  • Use this as a launching point for further discussion to learn more about your students.
Template for students to make clay creations
Providing templates for students, such as this one for clay creation, is a great way to bring a structured approach to STEAM activities.

2) Go on a STEAM scavenger hunt

A scavenger hunt is always a great way to start the school year. It allows for students to learn more about their classroom environment, while also building relationships with one another. Adding in a STEAM focus adds a unique component that enables students to start building and creating at the start of the school day. Students will gather consumable materials or classroom items and can then use them to create something. Let’s explore some tips for a hands-on learning experience:

  • Set-up a simple scavenger hunt checklist filled with specific classroom items. Remember that these items can be used later on for students to create something out of.
  • Students can work in partners or small groups to complete this task. This is the perfect chance for students to get to know each other.
  • Have students get up and move around the classroom to search for these items. Remember, even your littlest learners can complete this task with the help of visual aids!
  • Once they have found all of the different items, have them use what they found to make a creation that they will then share with the rest of the class.
STEAM scavenger hunt checklist
Class-wide scavenger hunts are a great way to promote interaction, collaboration, and movement within students.

3) Use literature as a launching point.

Readalouds are always a strong option for getting students engaged. Picture books spark inspiration, promote conversation, and teach various skills along the way. There are so many books out there that can be used to inspire STEAM-based activities. You can find a list of recommended books from Teach Outside the Box to use with your students. Here is an example of a STEAM activity that can be used with the book, The Dot, by Peter H. Reynolds:

  • Read the book aloud as a class. Right from the start, this will get students brainstorming and buzzing with ideas for their own dot creations.
  • Provide students with a designated space for creating their own “dots.”
  • Provide ample time for students to build their dot creations. You can also encourage them to add in different materials such as popsicle sticks, pom-poms, felt, etc.
  • As always, be sure to have students share their creations with one another.
  • Remember that International Dot Day is September 15th, which is perfect for an activity early in the school year!
Dot Day activity for students to decorate their own dots
Even the littlest of learners will be able to express their creative side as they utilize different materials with this “Dot Day” activity.

For your young learners, STEAM activities are a wonderful addition to your back-to-school curriculum. These activities teach collaboration, perseverance, and creativity. Try out these activities with your students to start the school year and watch as their imagination soars! Be sure to check out many other courses in the OTIS Course Library for more inspiration!


For more tips, tricks, and tools for teaching in and out of the classroom, check out more content on the Teq Talk blog or our YouTube channels OTIS for educators and Tequipment.

We also offer virtual professional development, training, and support with OTIS for educators. Explore the technology and strategies that spark student success — no matter where teaching or learning are happening!

Follow us on social:

  edteq           Twitter icon  OTIS4educators  |  Teq Products  |  iBlocks         facebook icon  OTIS4educators  |  MyTeq        LinkedIn icon  Teq 


The post 3 Back-to-School STEAM Activities for Little Learners appeared first on Teq.

3 PBL Experiences with KUBO and iBlocks

KUBO for PBL

KUBO across the curriculum

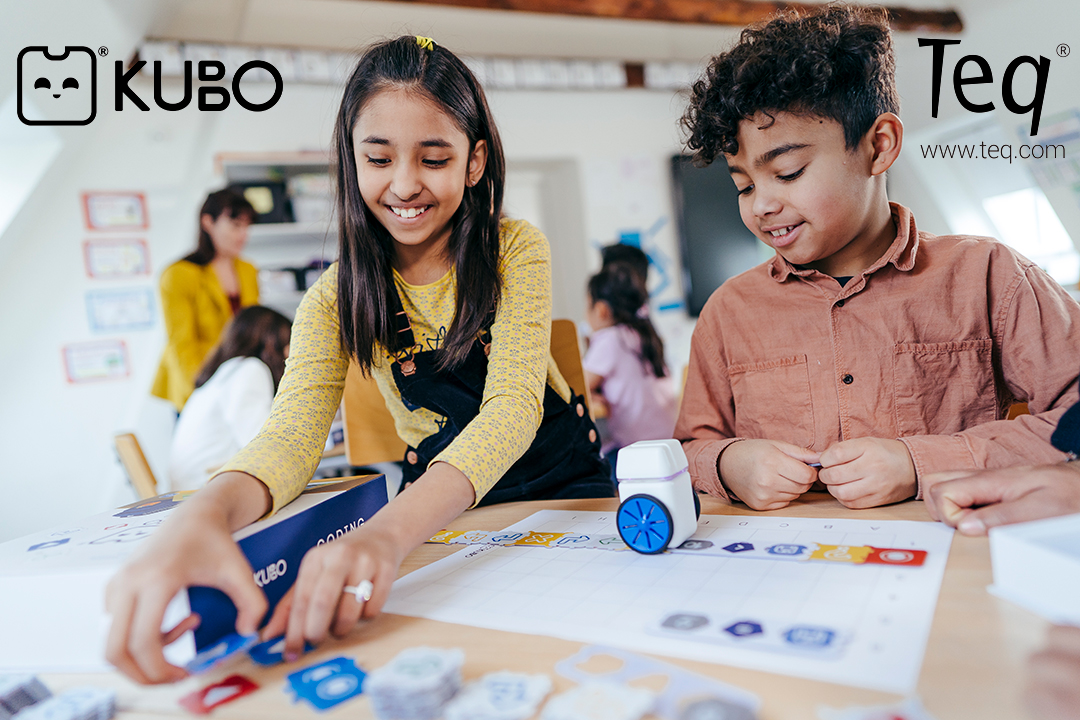
In this blog post, Nicola Kleiser, a teacher and consultant in the UK, shares some of her experiences of using KUBO to teach coding across the curriculum. She demonstrates how KUBO can be used to teach Math including Geometry and Measurement, to recreate the Viking invasion of Britain as well as using KUBO as a random selector. All of these ideas allow students to tackle coding while also working on other important curriculum subjects.

This blog will provide you with ideas to try out in your classroom. Instead of teaching discrete computing lessons, KUBO can enable you to embed computational thinking across the curriculum. Let’s get started!

KUBO can be a great asset when teaching position and direction in Maths (Geometry) using the turn TagTiles® from KUBO Coding+

TagTiles from KUBO Coding

Have KUBO record a function like this before the lesson. The students can then be asked to describe KUBO’s movement when the program is played, without seeing the additional help of the TagTile.

Extend this activity by doing quarter turns using the 90-degree Turn TagTiles. The students can then be challenged to get KUBO to do a three-quarter turn.

As the TagTiles have the degrees printed on them it is really easy to start introducing numbers and mathematical vocabulary. They can also start to distinguish between clockwise and anticlockwise turns.

In the next example, KUBO has been used to teach measurements. To begin with, program KUBO as shown here.

KUBO for teaching measurements

You can also use different KUBO’s to travel different distances. Initially, the students could measure using non-standard units (the squares on the mat) and then move on to measuring in cm. To extend the activity, program KUBO to change direction and measure the total distance traveled. You can also have students set up different programs for each other to measure to make it a playful and collaborative experience.

Another example could be to use KUBO as a random selector. Here KUBO has been programmed to randomly choose the name of a student. Remember to place KUBO on the TagTile facing the same direction he ended his last turn.

This can be used in a wide range of lessons, where students all need to take turns.

In this last example, I will show you how simple costumes can be made for KUBO using a bit of creativity. You can also use the template on the KUBO portal (you can find a blank costume under the Super Hero Obstacle Course activity). In this example, I have created a costume for KUBO and programmed him to recreate a historic event.

Using a large map, recreate Viking KUBO’s journey from Scandinavia to find new settlements in Saxon Britain.

Want to dress KUBO up as shown here?

KUBO robot dressed as a Viking for PBL


For more tips, tricks, and tools for teaching in and out of the classroom, check out more content on the Teq Talk blog or our YouTube channels OTIS for educators and Tequipment.

We also offer virtual professional development, training, and support with OTIS for educators. Explore the technology and strategies that spark student success — no matter where teaching or learning are happening!

Follow us on social:

  edteq           Twitter icon  OTIS4educators  |  Teq Products  |  iBlocks         facebook icon  OTIS4educators  |  MyTeq        LinkedIn icon  Teq 


The post 3 PBL Experiences with KUBO and iBlocks appeared first on Teq.

3 Ways Rube Goldberg Machines Can Engage Your Students

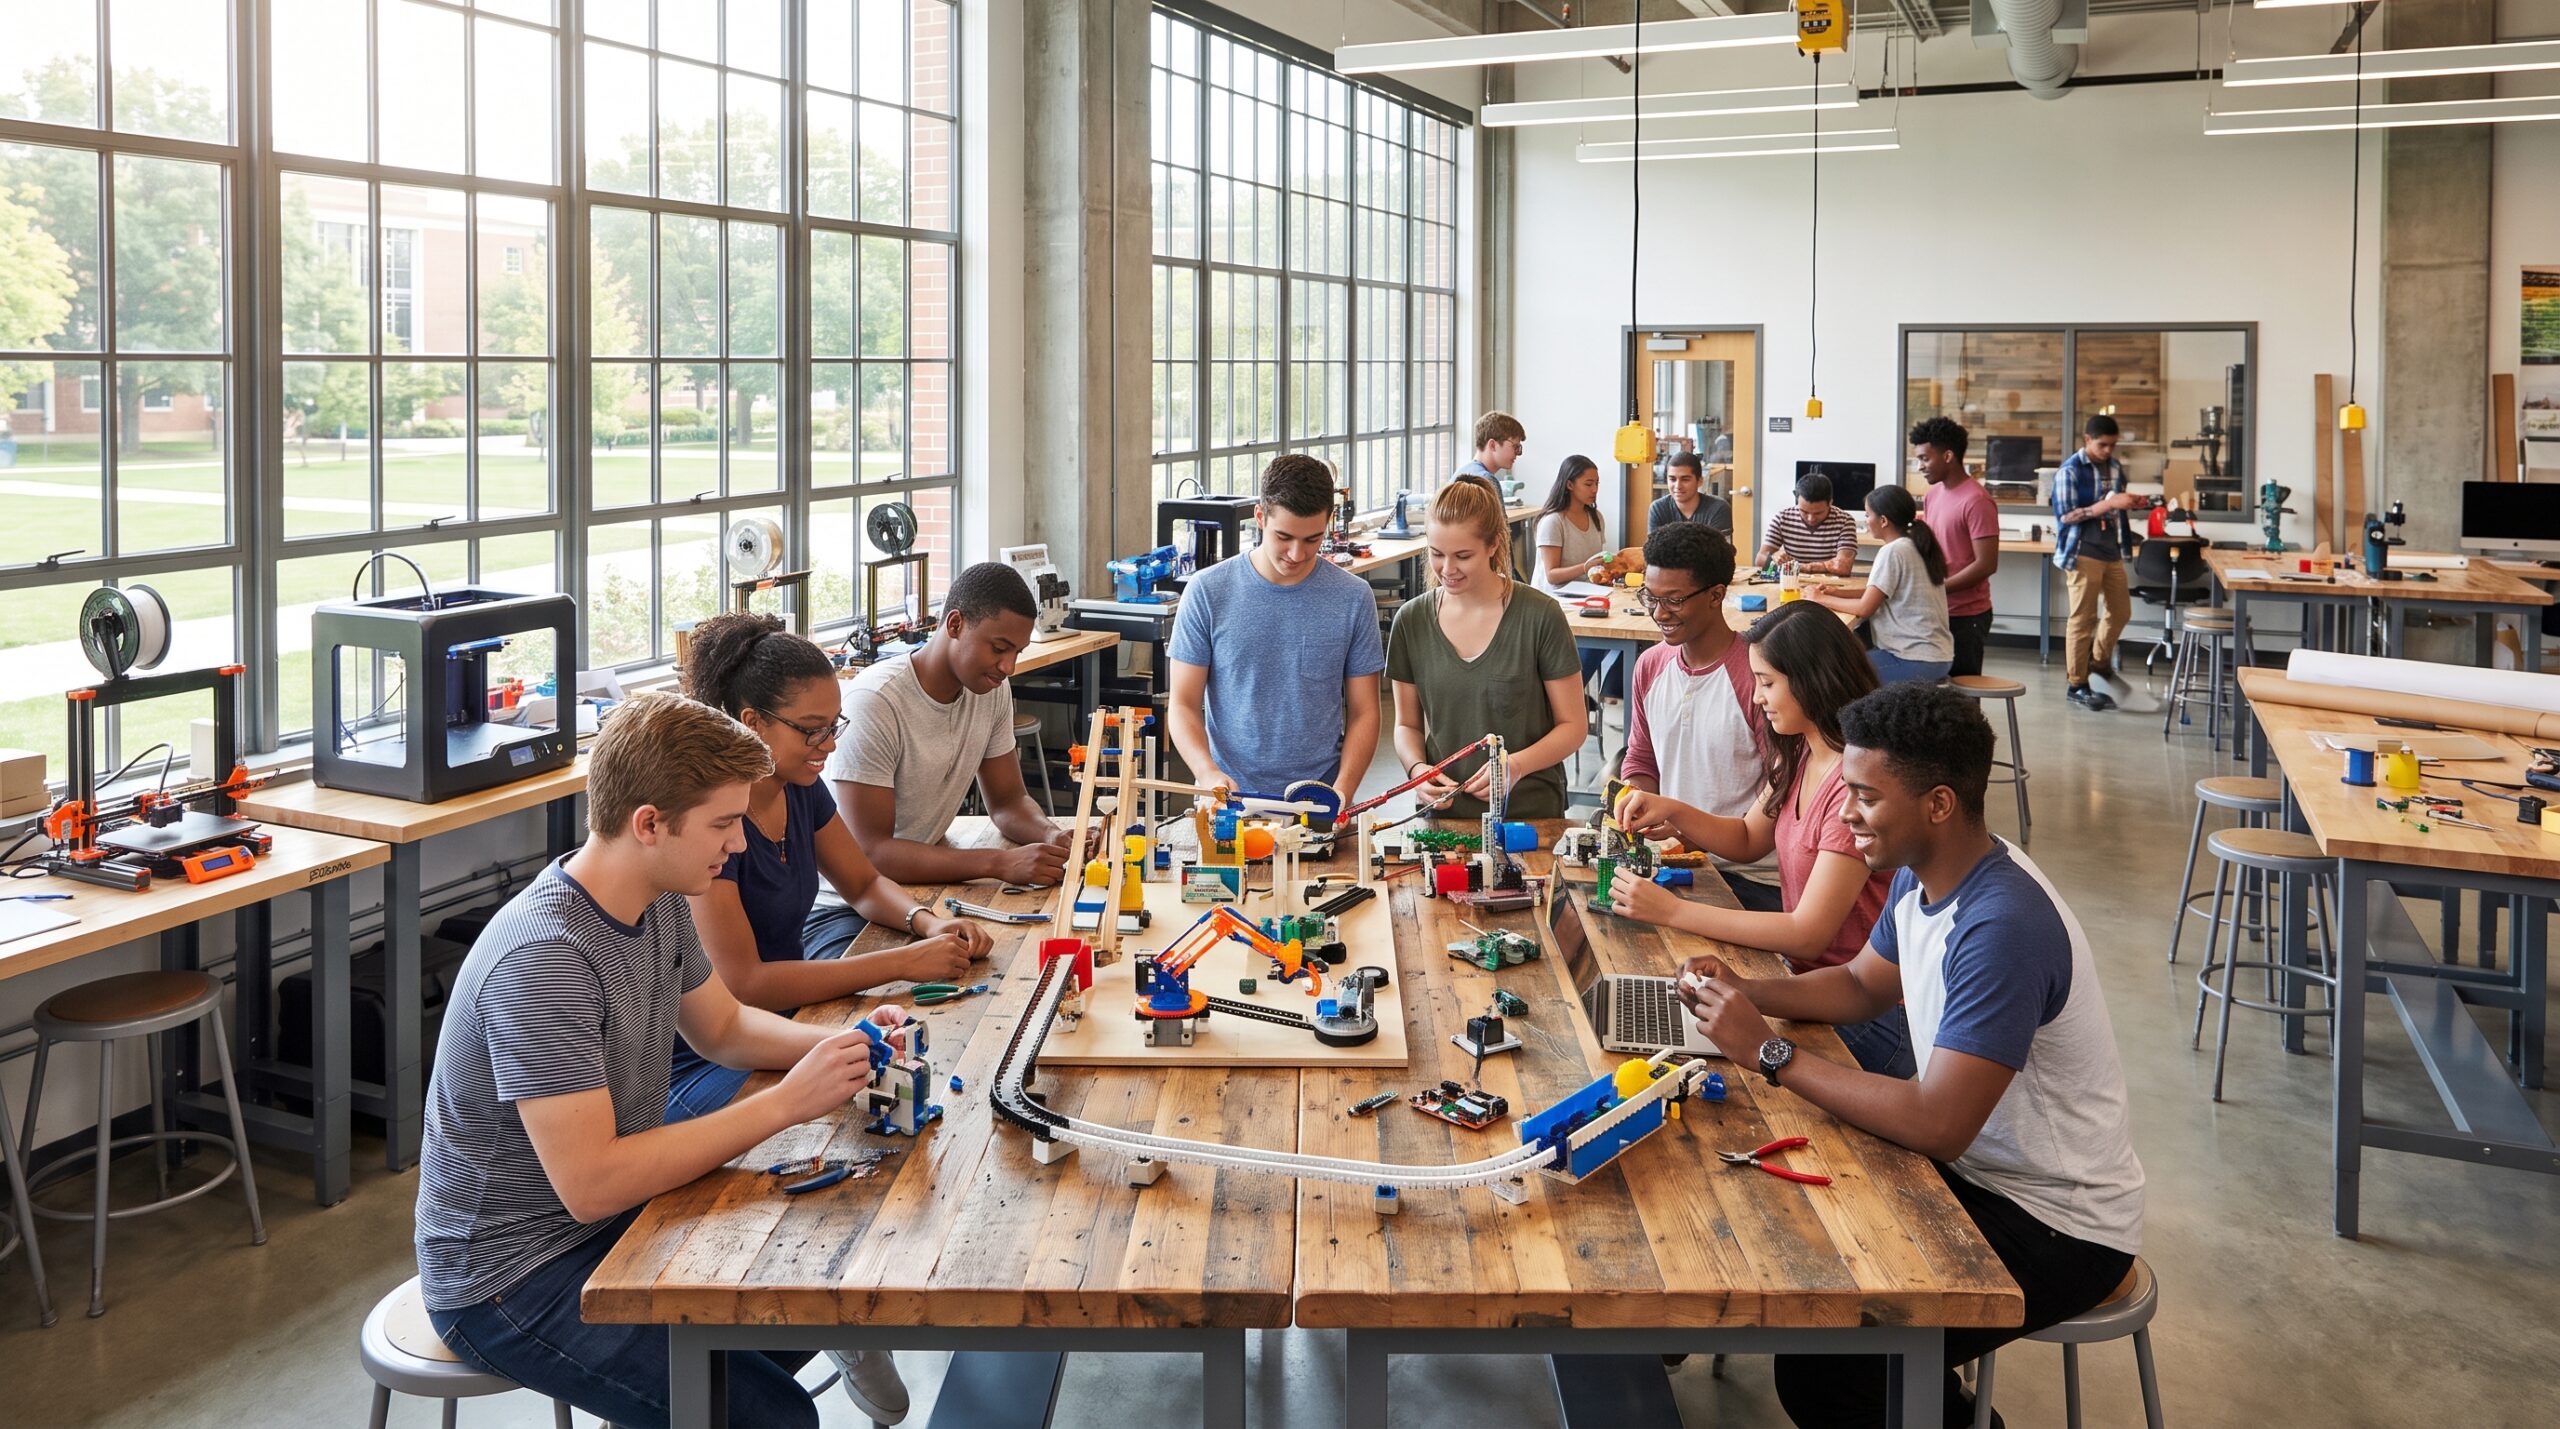
Looking for a fun and extravagant way to stretch your students’ creativity? Or perhaps you want to exercise their social skills?  Then the challenge you have been looking for may be building Rube Goldberg machines. A Rube Goldberg machine is a fun, outrageous, and wacky invention that performs a simple task. The process requires bizarre methods that challenge students’ problem-solving skills while encouraging outside the box thinking. Read on to learn more about why you should consider building Rube Goldberg machines at your school.

1. Increase student social interaction

Students are super tech-savvy and highly engaged in the world of technology through social media and gaming. This comes at the cost, as it isolates them from the experience of socializing with their peers in person. What’s great about creating a Rube Goldberg machine is that it allows students to disengage from their devices while simultaneously immersing them in a highly engaging activity. Additionally, students can work together in teams to create their machine. Teamwork on a Rube Goldberg machine increases social interaction, collaboration, and critical thinking skills. Students will experience a great deal of trial and error, which in turn will require them to communicate with each other to achieve their desired result.

2. Enhance creative problem solving

The engineering design process enables students to develop a discerning, scientific mindset when dealing with problems. Creating Rube Goldberg inventions sparks all the skills required of an engineer, including creative problem solving. Although the task may be simple, like opening a book, the diversity of materials utilized to perform that specific task won’t always lead to instant success. This process requires a great deal of creative problem solving on the students’ behalf as they strive to make each piece function in accordance with a common goal.

3. Exercise accountability

Accountability is crucial as it teaches students the importance of taking ownership over their choices and decision making. While inventing a Rube Goldberg machine is a lot of fun, it also demands continuous trial and error. Students are responsible for the invention from start to finish, and required to work effectively as a team in order to perform the task. As a result, students will learn the impact of developing and maintaining a reliable decision- making process.


With these elements in mind, it is easy to see how Rube Goldberg machines can be a great asset to your classroom instruction! To learn more about integrating Rube Goldberg machines into your curriculum, check out our enrichment course on our online professional development platform OTIS for Educators. While you are there, check out some of our other courses in our STEM category on OTIS. For other resources or possible lesson plans for Rube Goldberg machines, check out the Rube Goldberg Foundation website.


For more tips, tricks, and tools for teaching in and out of the classroom, check out more articles on the Teq Talk blog.

We also offer virtual professional development, training, and remote learning support for educators with OTIS for educators. Explore the technology, tools, and strategies that can spark student success — no matter where teaching or learning are happening.


The post 3 Ways Rube Goldberg Machines Can Engage Your Students appeared first on Teq.

3 Ways to Use 3Doodler to Support Student Learning

Students using the 3Doodler pen

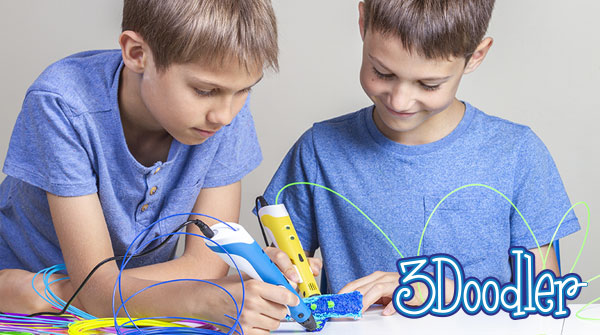
You’ve definitely heard about 3D printing, but do you know about 3Doodler? 3Doodler is a 3D pen that extrudes heated plastic from the pen’s nozzle. With a 3D pen, you can draw graphics on any flat surface. You can even “draw” 3D structures in mid-air! Use 3Doodle to create anything from STEM engineering projects to handmade jewelry. As a result, 3Doodler brings endless possibilities to the classroom, with everything from crafts to design thinking.

1) Start+ as an adaptive tool

One of my favorite ways to use 3Doodler with students is by using it as an adaptive tool. This is where using the Start+ model comes into play. The 3Doodler Start+ pen can be used with any student. This includes pre-literate students, elementary level students, students with accessibility needs, and more. 

This pen is ergonomically designed with a limited interface to make it easier for users to hold and use the pen. Additionally, 3Doodler is committed to making their products accessible to all users so more people are able to use them and create. Start+ is even RNIB (Royal National Institute for the Blind) approved, since it is designed with tactile markings to make the pen easy to navigate and operate. 

2) Creation through tracing

How can this tool be used to help students process information or create new things? It’s surprisingly very easy to bring into everyday instruction as a support tool. There’s no need to make separate lessons or reinvent the wheel when using 3Doodler Start+. Students can use the 3D pens to trace shapes, letters, and numbers. 

Tracing can be used as a pre-writing and reinforcement tool. As a result, it can help students improve recognition, practice fine motor skills, increase spatial awareness, and become better writers through muscle memory. Additionally, tracing can help students feel more confident to try and write the letters independently, whether doing so using their 3Doodler or another writing instrument. 

3) Transdisciplinary applications and skill building

Tracing is not the only way you can use the 3Doodler pen. Students can also use it to solve math problems, create number lines, circle/underline unknown words in a text, create physical models of abstract or hard to see concepts being discussed in class, and more. Additionally, many students can improve participation by using a different communication tool like 3Doodler. Visually impaired students will also benefit from being able to draw out something with their pen. This way, they can feel their drawings on paper using their fingers. 

Bringing a tactile component into your lessons and activities can have tremendous benefits for students. Using 3Doodler with students requires them to concentrate on the task at hand. This is especially beneficial for students who have difficulties concentrating due to ADHD or other factors. Plus, 3Doodler builds essential 21st century skills. For example, when students face challenges while using 3Doodler, they are able to persevere by using problem-solving skills in order to complete the task.

Along with lessons and structured tasks, the benefits of 3Doodler don’t stop there. 3Doodler Start+ is a fantastic tool to provide students with brain breaks, rewards for completing tasks, calming spaces with self-directed learning, and more! I hope that you’ll begin to brainstorm ideas for how you can use your 3Doodler Start+ to support even more students. 


For more tips, tricks, and tools for teaching in and out of the classroom, check out more content on the Teq Talk blog or our YouTube channels OTIS for educators and Tequipment.

We also offer virtual professional development, training, and support with OTIS for educators. Explore the technology and strategies that spark student success — no matter where teaching or learning are happening!

Follow us on social:

  edteq           Twitter icon  OTIS4educators  |  Teq Products  |  iBlocks         facebook icon  OTIS4educators  |  MyTeq        LinkedIn icon  Teq 


The post 3 Ways to Use 3Doodler to Support Student Learning appeared first on Teq.

4 Elements Required to Create an Effective Rubric

Guide to create an effective rubric

Project-Based Learning or PBL, is an effective teaching method, in which students learn by actively engaging in meaningful and real-world projects. These projects are student-led and designed to foster the growth of 21st-century skills, such as collaboration, problem-solving, and communication. With PBL, you can blend content mastery and meaningful work to create powerful learning experiences, such as an effective rubric.

Don’t shy away from PBL assessments!

One of the top reasons teachers shy away from implementing PBL into their classroom is that they are unsure about how to align it to state standards, as well as how to grade the project. Luckily, our dynamic PBL solutions, iBlocks, align to curriculum-standards and can help create student-led projects.

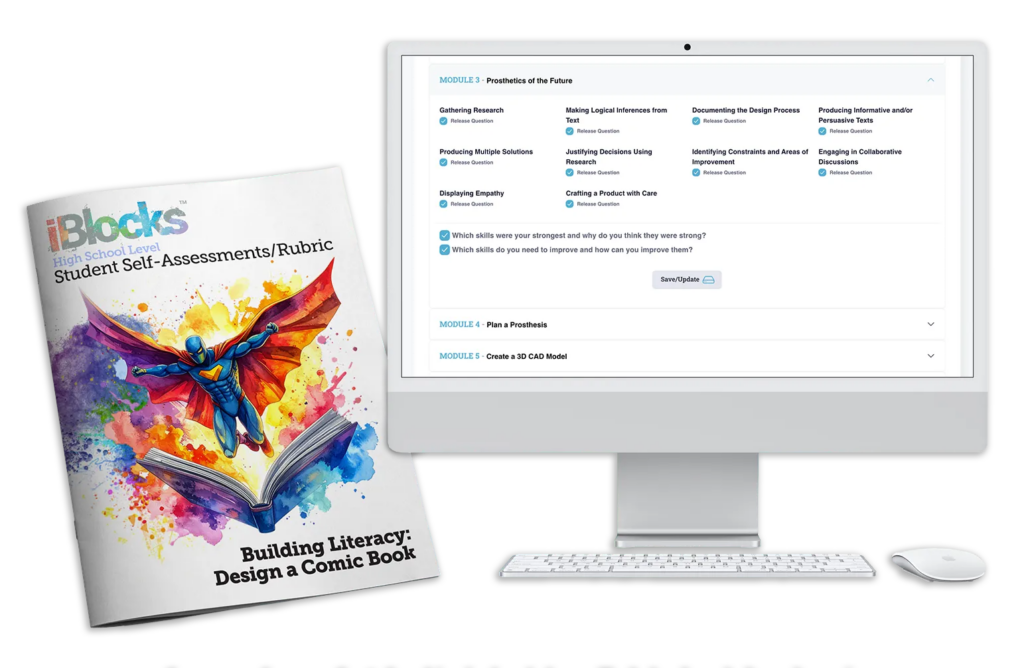
Creating a rubric used to be a daunting task, but with the help of iBlocks and AI educational tools, it’s now easier than ever! If you know the desired outcome of your PBL project, you’re one step closer to creating an effective rubric for assessment.

Here are four elements required to create an effective rubric:
1. Know your criteria

Working backwards and knowing the outcome you want students to achieve helps create  specific and measurable skills that are aligned to your learning objectives and classroom goals.

2. Performance Levels

When creating an effective rubric for a project, students need to know the level at which they need to perform. Create a rubric in which you describe the quality of work. Using clear labels such as “exemplary, proficient, beginning, and failure” are some of the most effective words to use when describing the grading scale.

3. Descriptions

An effective rubric includes specific details that explain exactly what a student’s work should look like. Go into depth by explaining the criteria for each performance level. Don’t forget to lay out a checklist of goals that students should meet to excel in their projects.

4. Scale/Points

The final component of creating an effective rubric is assigning a numerical value or percentage to each performance level. This allows for straightforward grading that is consistent and objective across the board.

See, that wasn’t so hard. Now it’s time to take advantage of the AI tools available to you and get on the path to implementing Project-Based Learning in your classroom. Check out some of our amazing courses on Assessment in PBL, Project-Based Learning for ELLS, and Best Practices for Using AI to Support Differentiation on OTIS for educators.

An overall look at OTIS for educators

Visit the online PD course calendar for a complete list of courses for November. Furthermore, with OTIS for educators, you’ll always get:

🧠 A diverse course library

In fact, OTIS now offers over 900 courses across 50+ categories, covering everything from instructional strategies to edtech tools. Moreover, these are designed by experienced educators and align with standards like ISTE, making them practical and relevant.

📅 Live weekly sessions

Additionally, new live content is broadcast weekly, so November will feature timely sessions on trending topics in education. These often include Google Workspace, AI tools, 3D Printing, management, and inclusive teaching practices.

📚 On-demand access

All courses are available anytime, anywhere, and also on any device–perfect for summer learning. Additionally, educators can explore tutorials, state-approved PD, and curated playlists to meet their goals.

🎓 For all roles

Whether you’re a teacher, admin, or paraprofessional, OTIS PD supports unlimited users per school or district license. This undeniably makes OTIS a great resource for team-wide growth.

You can visit OTISpd.com to sign up and also explore the full course catalog. Want help picking a course based on your interests or goals? In that case, we’d love to help with that! To learn more visit teq.com!


For more tips, tricks, and tools for teaching in and out of the classroom, check out more content on the Teq Talk blog or our YouTube channels OTIS for educators and Tequipment.

We also offer virtual professional development, training, and support with OTIS for educators. Explore the technology and strategies that spark student success — no matter where teaching or learning are happening!

Follow us on social:

  edteq           Twitter icon  OTIS4educators  |  Teq Products  |  iBlocks         facebook icon  MyTeq        LinkedIn icon  Teq 


The post 4 Elements Required to Create an Effective Rubric appeared first on Teq.

5 Benefits of Using Cricut in the Classroom

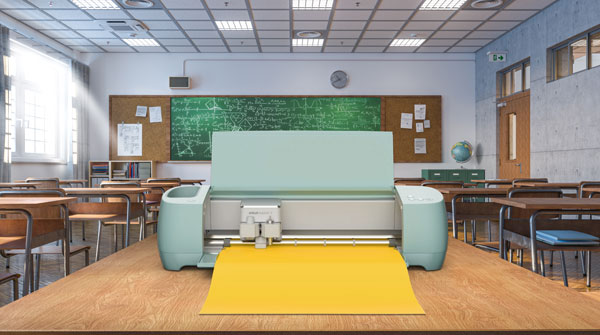
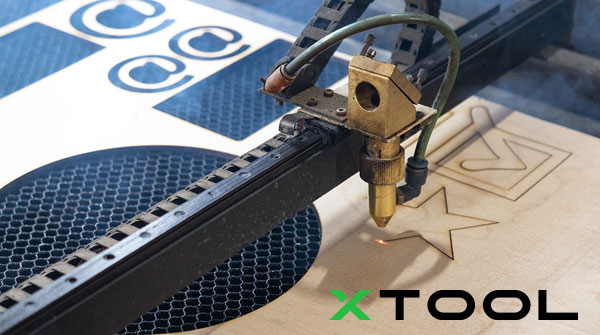
Educators are constantly looking for new and innovative ways to engage students. While core subjects such as math and reading are priorities, teachers are also looking for ways to encourage creativity in the classroom. In recent years, the Cricut cutting machine has gained popularity as a learning tool. Cricut machines were designed for crafting and are used mostly at home. Some teachers have brought their personal Cricut machines into schools. Now, more of these machines are being used in the education world. With this, Cricut has become a valuable tool for both teachers and students. Let’s look at some of the benefits of using Cricut in the classroom.

1) Beautiful, media-rich classrooms

In this age of digital technology, teachers are asked to create print- and media-rich classrooms. Visual aids can help to enhance comprehension; they also create a welcoming atmosphere in the classroom. Cricut allows educators to create visually appealing and customizable materials: such as colorful charts, detailed diagrams, or even learning aids. Additionally, Cricut makes learning more engaging and effective by helping to bring ideas to life in the classroom.

2) Personalized learning

Every student learns differently, and Cricut provides a way for teachers to differentiate and help with different learning styles. Teachers can personalize learning materials for individual needs. Cricut is also a wonderful way to promote inclusion and accessibility. Cricut promotes inclusivity by allowing teachers to create materials for students with special needs. Braille labels, tactile graphics, and other accommodations become more accessible with a Cricut.

3) Hands-on projects

With the importance of project-based learning in the classroom, Cricut can be integrated into various hands-on projects. Whether it’s designing 3D models, pop-up books, or interactive puzzles, Cricut helps students turn their designs and ideas into real creations. For example, PBL projects, like iBlocks PBL from Teq, promote critical thinking and problem-solving skills. Students can use Cricut with their teacher to work on content and decoration for their capstone projects.

4) Save valuable time

Teachers today have very busy schedules and creating teaching materials can be time-consuming. Cricut significantly reduces the time spent on cutting, crafting, and designing materials for the classroom. In addition, teachers have access to a large library of pre-made templates, fonts, and images. This will save them a lot of time when creating materials.

5) Transdisciplinary, schoolwide applications

Cricut is a versatile machine, as it can be used across various subjects. With Cricut, teachers can create historical timelines and geography maps, illustrations to stories, and even math manipulatives. This allows teachers to reach across grade levels and subject areas. It can also be used for creating engaging displays during open houses or school events. Parents and school communities can see the creativity happening in the classroom. With this, it can create a sense of pride and involvement for the students.

In sum, incorporating Cricut into the classroom is a win-win for educators and students. Its versatility, accessibility, and ability to enhance creativity make it a valuable tool. With this cutting-edge technology, that many users are familiar with from home use, teachers can create an inclusive and engaging learning environment for their students.


For more tips, tricks, and tools for teaching in and out of the classroom, check out more content on the Teq Talk blog or our YouTube channels OTIS for educators and Tequipment.

We also offer virtual professional development, training, and support with OTIS for educators. Explore the technology and strategies that spark student success — no matter where teaching or learning are happening!

Follow us on social:

  edteq           Twitter icon  OTIS4educators  |  Teq Products  |  iBlocks         facebook icon  OTIS4educators  |  MyTeq        LinkedIn icon  Teq 


The post 5 Benefits of Using Cricut in the Classroom appeared first on Teq.

5 Essentials for Good PBL

As the new school year starts, there are always new initiatives that schools want to put in place. A popular initiative that many schools have decided to take on is implementing more project-based learning (PBL) experiences for students. Many of us have heard of PBL, but what exactly does it mean, and how is it different from regular classroom projects? Many teachers follow the standard unit format of reviewing background knowledge, learning new content, giving assessments, and having students do a group or individual project at the end of the unit to demonstrate that they understood what they learned. Although students are completing a project together, that does not make it PBL. So if that is the case, what makes PBL different?

1) Authentic, real-world issues

To start, PBL is anchored around a real-world issue. This often manifests itself as a challenge, problem, or complex question that students need to research, and then come up with a solution for to solve the problem or answer the question. This process doesn’t happen overnight or over a few days, as project-based learning is long-term in nature and this real-world problem or question can drive instruction forward. They don’t have to be high-stakes, but they should be something meaningful for students so that the projects they end up creating are purpose-driven, and not just ‘busy work’ at the end of a unit.

2) Sustained inquiry and purposeful research

As students research their problem/solution or question/possible answers, they are developing a deep understanding of the content and meeting necessary standards. Teachers plan lessons that help expose students to critical information in addition to having them research independently. This way, the project becomes a means of acquiring and learning new information rather than just something pushed to the end of a unit to check off a few boxes. The research is purposeful – students are asked to solve a problem and so, from the start, they know why they are researching and why the content they are studying is important. Other questions, issues, and ideas will naturally occur during the project and students should be encouraged to address these as appropriate and part of their sustained inquiry. This research and problem-solving will continue all through the project creation process until they have their final, unique project.

3) Reflection, iteration, and improvement

As students research and work on their project, they’ll gain feedback that they can use to make their project even better. The assessments, and the task itself, should be authentic and related to what students may be asked to do. This can help give purpose and answer the “why am I doing this?” question. As students are engaged in the creation process, they should be guided by the teacher to stop, reflect, critique, and improve. Although PBL is primarily a student-led approach, the teacher’s role as facilitator is crucial, especially in helping to guide the process as a whole. Basically, you can think of the teacher as the architect/project manager and the students as the engineers/builders. The teacher creates the general structure, keeping track of progress, timing, materials, and other needs, while the students create the actual content, engage in the conceptualization and creation of the actual projects, and do the work required to make them the best they can possibly be.

4) Collaboration, choice, and skill building

Throughout the PBL process, students should have ample opportunities to practice and build on critical 21st century skills such as critical thinking, creativity, problem solving, digital citizenship, collaboration, and communication. This is not only important for students to become proficient in the use of these skills over time, but can also help contribute to that authentic learning experience. Because these skills are built into the project’s design, students should be afforded reasonable voice and choice. This can help increase student engagement, lead to greater outcomes, and encourage student ownership.

5) Share with the public 

We frequently have students complete some kind of culminating project and just post the evidence on the bulletin board. With PBL, students should be publicly sharing and explaining their work, whether it is with their class, other classes, the school community, or an even larger audience. Often, the problem or question that begins the process is something that directly affects the students or their surrounding communities. This takes on double-duty, as a way to make learning authentic and meaningful for the students, as well as providing a natural vehicle for making the projects public once they are complete. It has the added bonus of being something that will perhaps be adopted as a solution in a community, thereby increasing student accountability and pride. Designing a PBL experience for students does require thoughtful and purposeful planning on your part, but once you get started, you will never look back! Watch students deepen their understanding and be able to explain concepts with genuine understanding, rather than sounding like they swallowed their textbook or worse, not remembering the content at all.
For more tips, tricks, and tools for teaching in and out of the classroom, check out more content on the Teq Talk blog or our YouTube channels OTIS for educators and Tequipment. We also offer virtual professional development, training, and support with OTIS for educators. Explore the technology and strategies that spark student success — no matter where teaching or learning are happening! Follow us on social:   edteq           Twitter icon  OTIS4educators  |  Teq Products  |  iBlocks         facebook icon  OTIS4educators  |  MyTeq        LinkedIn icon  Teq 
The post 5 Essentials for Good PBL appeared first on Teq.

5 Reasons You Should be Using Inspirit Virtual Reality

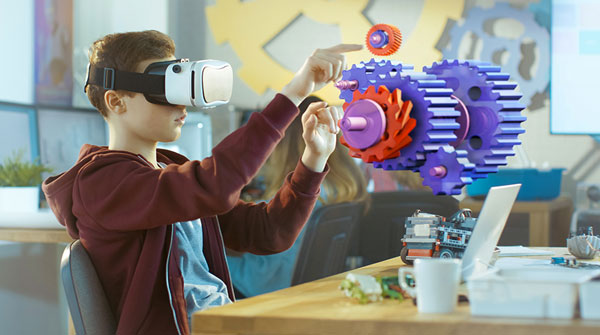
Student using an Inspirit VR headset to visualize a contraption

Today’s classrooms are becoming more technologically equipped to meet the needs of students in the digital age. According to CompTIA, 9 out of 10 students believe that using technology in the classroom can help prepare them for future careers, especially in the digital sector. Inspirit is a virtual reality education company that is looking to do just that. By providing students and teachers with an immersive learning platform, Inspirit allows for experiential learning through virtual reality experiences and 3D models. Students will be able to learn as they go while using this VR technology, gaining the technical and practical skills that they will need to become the workforce of tomorrow.

Inspirit virtual reality headsets

Benefits of learning through experiential VR

According to Forbes, “research suggests that learning through experience increases the quality of learning for students and improves retention by as much as 90%.” Students are able to achieve through experiential learning what would be considered impossible in a traditional classroom. With VR experiences, they can interact with an environment that simulates real life. For example, students can experience hazard-free experimentation in the science lab. Future surgeons and medical professionals can utilize VR and work on 3D models to become immersed in the anatomy of the human body. With Inspirit, the possibilities are endless.

New technology brought into the classroom can be very intimidating to teachers who feel unprepared. However, with Inspirit, those fears will be put to rest. Inspirit does a phenomenal job in creating a research-backed framework for teachers. This framework is created by Stanford education advisors and allows for easy integration into your classroom. Using VR is not only easier than you might think, it offers big gains for students. These benefits include:

  1. Students will be able to better develop their critical thinking and problem solving skills interacting with a VR platform.
  2. Teachers can facilitate active learning by allowing students to explore, experiment, and solve real world situations.
  3. VR allows for personalized learning simulations to suit the needs of the particular student.
  4. VR’s visual and interactive experiences allow all students to understand complex concepts, therefore improving comprehension.
  5. VR eliminates the need for costly lab supplies, spaces, and other equipment which saves time and effort. This can also increase efficiency and provide a safe environment for students.

Career discovery programs

Inspirit’s VR technology and curriculum enhances the traditional classroom experience, plus it includes career training and career discovery. Many library media centers and career & college readiness centers are in need of more resources. Students who want to learn trade skills such as mechanics, welding, or construction will need more than just a brochure or simple video. With Inspirit, students can explore various career pathways to determine a right fit for their career. Teachers can also prepare students for skilled trades with scalable, intuitive, and customizable training that is cost-effective.  

VR solutions like Inspirit allow students to become actively engaged in their education with hands-on experience. This technology is not only more effective, but also more practical for today’s students. If you are interested in learning more about Inspirit and virtual reality, check out the course, Introduction to Inspirit.


For more tips, tricks, and tools for teaching in and out of the classroom, check out more content on the Teq Talk blog or our YouTube channels OTIS for educators and Tequipment.

We also offer virtual professional development, training, and support with OTIS for educators. Explore the technology and strategies that spark student success — no matter where teaching or learning are happening!

Follow us on social:

  edteq           Twitter icon  OTIS4educators  |  Teq Products  |  iBlocks         facebook icon  OTIS4educators  |  MyTeq        LinkedIn icon  Teq 


The post 5 Reasons You Should be Using Inspirit Virtual Reality appeared first on Teq.

5 Ways Combining AR and 3D Printing Can Transform Learning

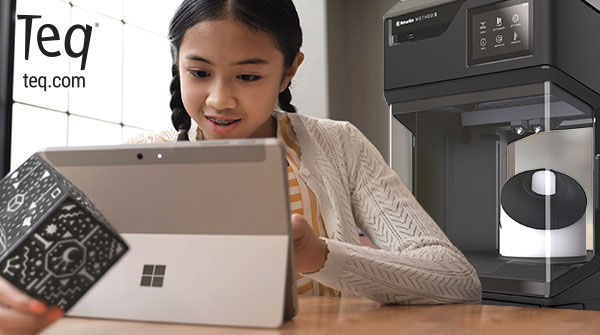
Girl using a Merge cube with a tablet. MakerBot 3D printer behind her. Teq logo.

As any educator knows, the tools of the classroom have undergone a drastic change in the last decade or so. The majority of schools around the country now boast STEM labs, makerspaces, 3D printers, interactive flat panels, and other educational technology. These tools have become indispensable in the 21st century learning environment. They will only continue to become more essential as educators prepare students for the careers of the future. MakerBot 3D printers and Merge AR are two such tools that, when used in tandem, can be game changers for students and teachers alike.

I recently watched a webinar on this topic called Building The Future: Innovative Learning With AR And 3D Printing.  In this webinar, they discuss the power of using computer aided design (CAD), 3D printing, and AR together. This talk was hosted by Andrea Zermeno of the MakerBot Education team, with guest speaker Shannon McClintock Miller, District Teacher Librarian and Innovation Director at Van Meter Community School in Iowa. Hearing from an educator about how 3D printers and AR have been used for grade levels from Pre-K through high school was invaluable because it offers a ‘boots on the ground’ view of these technologies in action. Additionally, it added some wonderful ideas and resources to help other educators in developing their own impactful and innovative programs. Here are my key takeaways on how combining these technologies can be transformative.

CAD, 3D printing, and AR together

Before we get excited about transformative learning, let’s first talk a bit about what these technologies are and get a bit of background on how to use them together. Sometimes it can feel like we are using our edtech just for the sake of using tech, to ‘check a box,’ so to speak. With MakerBot and Merge, this is definitely not the case. The way in which they can be used together is organic and purposeful, it’s almost as if they were originally designed to be used together (they weren’t). As McClintock Miller shares her experiences with using these technologies, it is evident that the use of the technology is not the sole focus. Instead, it implies that the concepts and curriculum are the primary concern and the technology is used to enhance the learning experience for students. 

CAD and 3D printing at Van Meter Community School

  • To start off, McClintock Miller got a MakerBot printer and began learning how to use it. Students printed a small project for the Olympics.
  • She then dove into various CAD and 3D printing tools like Tinkercad and Thingiverse. She began using the tutorials to teach students CAD and 3D design skills.
  • She discovered Selva, which she used to convert 2D pictures of student drawings into 3D objects. This opened up more possibilities for using the tech with different grades and subjects.
  • Students used Merge AR (which was already being used in some science classes) to view the 3D objects before printing. This made iterations and improvements more accessible and saved on print time and filament usage.

There you have it! It started small, with some Tinkercad tutorials and a quick 3D printing project and grew from there. Now, Van Meter has integrated these technologies across all grade levels and subjects. Van Meter’s program clearly shows that although the possibilities are extraordinary, starting off can be fairly simple. Transforming learning is a big task and may sound a bit high-flown. However, my big takeaway was that these technologies enabled the gradual growth of a program and inspired a mindset of change and evolution. Here’s 5 ways combining AR and 3D printing can transform learning.

1 – Build essential 21st century skills

When using CAD, AR and 3D printing together, students are deeply involved in the learning process. This process allows them to build skills like critical thinking, creativity, collaboration, communication, problem solving, perseverance, and more. For example, using the Object Viewer app with the Merge helped McClintock Miller’s students visualize CAD projects before printing them. This helped students identify areas of their creations that might have faults or need improvement.

By giving them a 360-degree view that can be manipulated, the project becomes more ‘real’ to students and helps them build critical thinking and problem solving skills as they identify areas that might have mistakes, and then work on solutions for the problems they have found. (It also doesn’t hurt that this technique will help teachers save filament and print queue time.) The ability to share objects in the app is also a very helpful feature that allows for collaboration as well as giving and receiving feedback. When using this feature, students will develop collaboration and communication skills.

2 – Incorporate transdisciplinary academic knowledge

In addition to developing 21st century skills, using these technologies together can help build academic knowledge. The most obvious use of these technologies is probably in a STEM or STEAM class or club, but the opportunities for use are not limited by subject. In the examples below, you’ll see how subjects like literacy, ELA, science, and art can be incorporated. There are also opportunities to involve other subject areas.

For example, if a social studies class is learning about a specific period in history, let’s say Ancient Rome, they can do research on what types of homes people lived in and construct their own, or create artifact reproductions from that time (vases, sculptures, tools, etc.). These are all things they can design, manipulate in AR, and eventually print. Plus, projects like these are inherently transdisciplinary, for example, you can involve math through measurement or formulas. The quickest way to get started on a highly-engaging transdisciplinary project like this is to look at what you are already teaching and see how a few tweaks or the addition of these tools might be incorporated. 

3 – Increase student confidence and self-efficacy

Not only are projects involving Merge and MakerBot highly-engaging, but they also have the ability to build enthusiasm and therefore confidence in students. When students are excited about what they are learning, they are much more likely to take ownership over their own learning. Building up a sense of self-efficacy, pride, and independence in students is invaluable. Students who feel good about what they have accomplished are more likely to help others and be successful in future endeavors.

In the webinar, McClintock Miller relates the story of Luke, a 10th grade student who was enthusiastic about the arrival of the school’s first MakerBot. McClintock Miller used this enthusiasm to build excitement in other students and had Luke become the resident 3D printing expert. His work assisting other students at all grade levels greatly increased his confidence and willingness to learn other technologies and create things independently. He ended up doing this by writing a novel, designing an eBook, and scoring it himself in his senior year.

One of McClintock Miller’s first projects was with a class of kindergarteners who learned about butterflies through reading a story, then doing research on different species, and finally designing and printing their own butterflies. She talks about how those students, now in sixth grade, still talk about their projects to this day. What teacher doesn’t dream of that kind of sticking power for their lessons? 

4 – Prepare students for the future

That type of staying power is what leads students to discover their passions, dreaming of futures and careers in which those passions play a role. Perhaps some of those students who completed the butterfly project will become entomologists or artists due to the experiences they had in kindergarten. The ability for technology to inspire is exponential. McClintock Miller discusses how she connected her students with Carla Diana, the author of LEO The Maker Prince. Diana is an expert working in the field of product design, robotics, and machine learning. Getting to speak with a working expert like this can be invaluable and inspirational for students both inside and outside the classroom.

Being public and relying on community is one of the major differentiators between doing a “project” and project-based learning (PBL). Taking steps like this can help educators build PBL experiences gradually out of their existing curriculum. (For more on getting started with PBL and incorporating tech, see our library of courses on OTIS and check out iBlocks PBL). The beauty of PBL and of building and incorporating the wider community in the classroom is that it reflects the ‘real world.’ It shows students how to work with others, opens their eyes to new possibilities. Additionally, it makes content more meaningful for them because the purpose and outcomes are very evident. 

5 – Grow and develop across grade and skill levels

Nothing beats a successful outcome, especially when students have worked so hard on designing and printing. The best part is that you can give your students a taste of what it means to work hard and then succeed at any level! One of the best parts of using Merge and MakerBot together is the fact that they can be used at any grade level, as shown in the examples from Van Meter. The teachers there use these technologies across subject areas and grade bands. From something as simple as a butterfly to something more complex like building a bridge to scale, there is a way to incorporate edtech that is both meaningful for students and purposeful for educators.

AR and 3D printing projects help get students comfortable with learning new technologies and build the skills and confidence needed to think critically, learn actively, problem solve, and work together to create and innovate. It’s not a one-and-done type of approach. Using these technologies together becomes a way of thinking, not just for students, but for educators as well. It also becomes something that is ingrained in the curriculum at all levels. Thereby, it builds skills from day one and helps students to increase those skills as they develop and mature. 

Example projects from the webinar:

Olympic symbol: 

  • Students learned about the Olympics, designed a new Olympic symbol, and 3D printed it.
  • Thematic and current-event based prints like this allow students to connect their learning with the wider world.

LEO the Maker Prince character prints

  • Students read the book and were able to speak with author Carla Diana to discuss 3D printing and ask questions about careers in robotics, machine learning, etc. They then 3D printed characters from the book.
  • This is an example of how to build community and discover career connections to classroom content.

Design a Butterfly

  • Kindergarten students read Velma Gratch and the Way Cool Butterfly, then learned about different species of butterflies. They put their research to use by designing their own butterflies on chart paper. After converting pictures to 3D objects, they viewed their creations in Merge AR with Object Viewer, then 3D printed the objects. 
  • Transdisciplinary projects like this one can incorporate many different subjects like science, ELA/literacy, art, and technology. 

Gingerbread house real estate

  • 4th grade students create gingerbread houses using Tinkercad. They then need to write a real estate ad attempting to sell the house. They are also able to view and give “tours” of the house using the Merge cube.
  • This is a great way to incorporate CAD and AR with or without using the printer itself if you are strapped for time.

Build a dream house together

  • 5th grade students worked in groups to create a house complete with details like a garden, yard, pond, etc. They were able to view those creations in Merge.
  • Group work like this encourages collaboration and communication skills as well as teaches students how to give and receive feedback. 

As you can see in the experiences and projects shared by McClintock Miller in the webinar, it can start with one printer, one student, one educator, and a simple little project. Just as with Rome, good PBL and edtech integration is not built in a day. Transformative learning starts with that first step and will grow from there.


For more tips, tricks, and tools for teaching in and out of the classroom, check out more content on the Teq Talk blog or our YouTube channels OTIS for educators and Tequipment.

We also offer virtual professional development, training, and support with OTIS for educators. Explore the technology and strategies that spark student success — no matter where teaching or learning are happening!

Follow us on social:

  edteq           Twitter icon  OTIS4educators  |  Teq Products  |  iBlocks         facebook icon  OTIS4educators  |  MyTeq        LinkedIn icon  Teq 


The post 5 Ways Combining AR and 3D Printing Can Transform Learning appeared first on Teq.

A Quick Guide to Incorporating AI into iBlocks

A quick guide to incorporating AI into iBlocks.

Welcome to the digital world! As technology continues to advance, Artificial intelligence (AI) has infused itself into nearly every aspect of our lives. As such, it is important for students and educators to understand how and why AI is used. In order to prepare learners with future-ready skills, we first need to learn how to responsibly integrate AI into real-world, inquiry-based learning opportunities and solutions. iBlocks are Teq’s premier project-based learning experiences. Here’s a quick guide to incorporating AI into iBlocks

What are iBlocks? How do I Integrate AI into iBlocks?

iBlocks are scalable, repeatable, and customizable solutions. Each iBlock provides an effective way to practice using AI responsibly. iBlocks use high-quality instructional materials and technologies that leverage AI capabilities and provide accessible STEM tools. Students can also use AI to explore how real-world systems function.

Whether you’ve been using iBlocks for a while or are just getting started, here is a quick guide to incorporating AI into iBlocks. Read more to refresh your teacher resources and provide personalized student learning.

1. Start with the fundamentals

Students should know and understand the basics of AI. Explore our Edu Resources to learn more and access our content on AI. Additionally, each iBlock purchase also includes access to our “AI Literacy Instructional Guide.”

Using an EDU resource to incorporate AI into iBlocks.
AI in Education Lumio interactive
2. Ask questions

When integrating AI into iBlocks, it’s important to ask questions. Questions such as, “Has AI been used to create real-world solutions that can be incorporated into iBlocks final capstone project?,””How could AI be used to support students in accomplishing/ reaching their desired outcomes?,” and “What technologies do you already have that integrate AI capabilities?” can be useful to understanding how to bring AI into iBlocks.


For instance, in the Tiny Houses iBlock, students explore energy consumption and engineer a tiny house model. Tiny houses can be simple, but they can also incorporate advanced technologies and transform into a SMART home. For instance, security systems can use cameras and sensors powered by AI. AI can recognize faces and, therefore, alert owners of strangers within the home. Further, AI can be used within lighting systems, thermostats, virtual assistants, and even for monitoring food inventory.

3. Map it out

Determine when and where students can explore AI functionalities in greater depth. Ideally, students should have time during the Research and Planning phase in an iBlock to explore AI fundamentals. Don’t forget to consider how AI might play a role in students’ projects. Students can implement these ideas as they design, construct, and modify their projects during the Testing and Learning phase. Alternatively, if you want students to start their design without AI, you can wait to incorporate AI technologies into iBlocks projects as an extension.

EdTech Capabilities

Teq’s top-notch educational technology products perfectly align with iBlocks. You can easily use products such as Maker and Coder or UGOT by UBTECH Education to integrate AI into iBlocks. If your classroom is equipped with these robots, then you already have the tools to get started!

Maker and Coder

Maker and Coder kits have a variety of tools to take students’ projects to the next level. The AIoT Kit features an AI camera, environmental sensors, and even Servo Motors. This enables the capturing and processing of images, remote communication, and location tracking. Having connectivity with the Internet of Things (IoT) also provides students with the ability to explore smart/AI-driven automation and gain advanced coding skills.

Additional sensors can be used for: temperature, humidity, light, color, soil moisture, weight, air quality, motion detection, and heart rate. With Maker and Coder, the possibilities for hands-on learning are endless!

Maker and Coder aiding in incorporating AI into iBlocks.
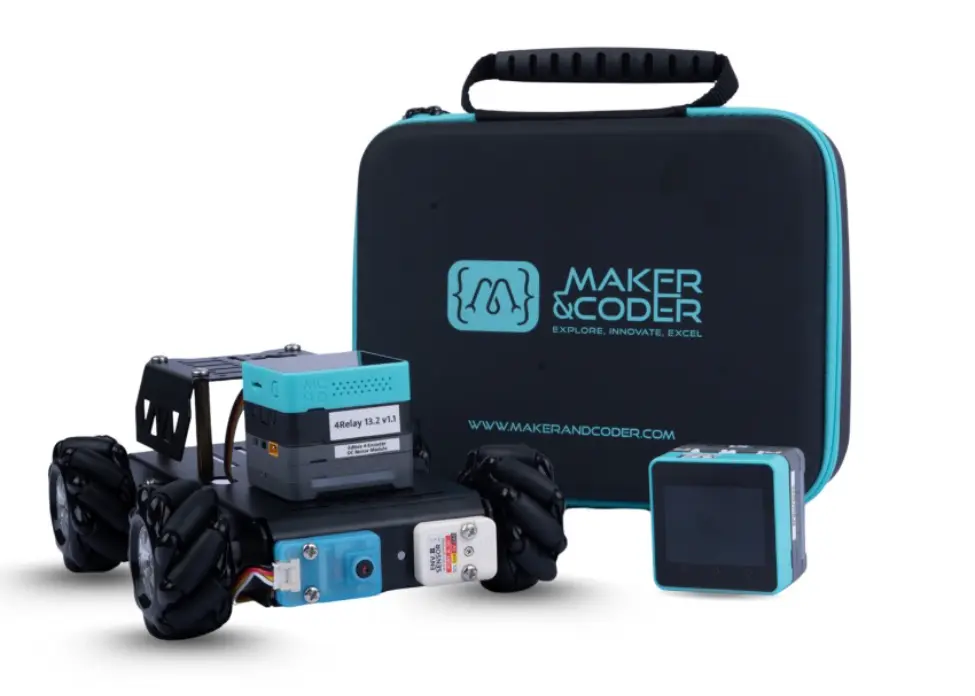
Maker and Coder’s MC 4.0 AIoT Kit
Incorporate AI into iBlocks with UGOT by UBTECH Education

UBTECH Education’s uKits provide a flexible AI module system that involves defining AI, interacting with and building with data, and language and vision. uKits have an AI-integrated Main Control Box (MCB) that gives students the opportunity to explore features such as natural language processing (NLP) and automatic speech recognition.

They also have a Foundations Curriculum that introduces real-world AI examples in an “unplugged” setting. The UGOT AI City Guardian Kit and AI Space Exploration Kit contain buildable robots that have advanced AI recognition features. Both kits include built-in algorithms to recognize gestures, postures, faces, text, objects, and more! Check out UBTECH Education and our blog on Pioneering AI in the Classroom with UBTECH Education.

Components of UBTECH’s UGOT AI City Guardian [robotic] Kit
KIBO by KinderLab Robotics

Even our youngest learners can be exposed to learning the basics of AI! The KIBO robot lets kids’ imaginations soar and introduces coding and AI concepts into early education without using screens. KIBO incorporates AI into iBlocks by using a variety of sensors, advanced AI recognition, and more. Therefore, if you are using KIBO with one of our K-2 iBlocks, be sure to download their free 5-lesson curriculum: Thinking with KIBO: Introducing Artificial Intelligence Early Grades. This guide easily pairs with project-based learning and enriches student outcomes. Topics include automation, sensing, reasoning, machine learning, natural interactions, and more!

KIBO's curriculum guidelines.
Thinking with KIBO curriculum guide
Pave the way for AI!

These edtech connections pave the way for career pathway exploration as students experience practical applications and ways AI can shape the world around us.

Further, in order to provide users with the best practices for incorporating AI into iBlock projects, educators can access Teq’s AI Literacy Instructional Guide and Teacher Tips. Teacher Tips are found in relevant iBlocks and are used to provide information or methodology pointers. These techniques are useful for educators during a specific portion of an iBlock, which includes tips for AI integration.

Your project-based learning journey starts now!

Remember, Teq is here every step of the way to ensure a smooth implementation, even before purchase. If applicable, we will help with curriculum mapping, standards alignment, and differentiation and scaffolding needs.

Now, just imagine the possibilities for building an AI system that can monitor your hydroponic garden or develop wearable technologies. With iBlocks, the possibilities are endless. We can’t wait to help you get started!

Learn more about iBlocks and discover our complete iBlocks Library, Sequences, and CTE programs at iblocks.com! 


For more tips, tricks, and tools for teaching in and out of the classroom, check out more content on the Teq Talk blog or our YouTube channels OTIS for educators and Tequipment.

We also offer virtual professional development, training, and support with OTIS for educators. Explore the technology and strategies that spark student success — no matter where teaching or learning are happening!

Follow us on social:

  edteq           Twitter icon  OTIS4educators  |  Teq Products  |  iBlocks         facebook icon  MyTeq        LinkedIn icon  Teq 


The post A Quick Guide to Incorporating AI into iBlocks appeared first on Teq.

A Quick Guide to Integrating AI into PBL

Welcome to the digital world! As technology continues to advance, Artificial intelligence (AI) has infused itself into nearly every aspect of our lives. As such, it is important for students and educators to understand how and why AI is used. In order to prepare learners with future-ready skills, we first need to learn how to responsibly integrate AI into real-world, inquiry-based learning opportunities and solutions.

Here’s a quick guide on how to refresh your teacher resources and provide personalized student learning.

1. Start with the fundamentals

Students should know and understand the basics of AI. AI literacy includes an understanding of what AI is and is not, the different types of tools, best practices for security and responsible use, prompting essentials, limiting bias, and its ever-changing applications. Students will experience enhanced outcomes when they understand effective strategies for handling AI systems and applying inquiry-based thinking skills. Explore Teq’s Edu Resources to learn more and access content on both AI and PBL.

Learn about bias with this AI Literacy interactive on Lumio.

2. Ask questions

When integrating AI into a Project-Based Learning (PBL) experience, it’s important to ask questions. For example, “Has AI been used to create real-world solutions that can be incorporated into a final capstone task?,””How could AI be used to support students in accomplishing/ reaching their desired outcomes?,” and “What technologies do we already have that integrate AI capabilities?” These questions can be useful in understanding how to bridge the gap between AI and PBL.

For instance, students might be exploring energy consumption and engineering a tiny house model. Tiny houses can be simple, but they can also incorporate advanced technologies and transform into a more complex smart home. For instance, security systems can use cameras and sensors powered by AI. AI technology can recognize faces and, therefore, alert owners of strangers within the home. Further, AI can be used within lighting systems, thermostats, virtual assistants, and even for monitoring food inventory.

3. Map it out

Determine when and where students can explore AI functionalities in greater depth. Ideally, students should have time during the research and planning phase of the Engineering Design Process to explore AI fundamentals. Don’t forget to consider how AI might play a role in students’ projects. Students can implement these ideas as they design, construct, and modify their projects during the testing and evaluation phase. Alternatively, if you want students to start their design without AI, you can incorporate it later as an extension.

4. Use an AI kit

Some products, like the kits from Maker and Coder, have tools to take students’ projects to the next level. The Maker and Coder AIoT Kit features an AI camera, environmental sensors, and even Servo Motors. This enables the capturing and processing of images, remote communication, and location tracking. Having connectivity with the Internet of Things (IoT) also provides students with the ability to explore AI-driven automation and gain advanced coding skills.

Additional sensors can be used for: temperature, humidity, light, color, soil moisture, weight, air quality, motion detection, and heart rate.

Maker & Coder
Maker and Coder’s MC 4.0 AIoT Kit

5. Know your resources

Pair this type of technology kit with a PBL project, like an iBlock from Teq, and you’ll have everything you need to take learning to the next level! In some cases (like with iBlocks) the curriculum mapping and standards alignment are included with the project, and you can receive support for differentiation and scaffolding.

Additionally, Teach AI provides the latest information on AI in education, including guidance, frameworks, and practical toolkits to further empower you to teach with and about AI. If you are looking for further professional development on the topic, check out the AI Literacy and Instruction mico-credential coming soon to OTIS for educators!

These edtech connections pave the way for career pathway exploration as students experience practical applications and the myriad of ways AI can shape the world around us. Just imagine the unprecedented opportunities these new technologies can uncover. Let’s unlock these possibilities together!

Benefits of Experiential and Project-Based Learning (PBL) for Student Engagement

Why PBL?
When you provide students with authentic, real-world challenges that promote students’ voice and choice, reflection, and the ability to reiterate their designs, you open a world of possibilities. At Teq and as educators, we’ve seen firsthand how project-based learning (PBL) benefits student engagement. By putting students in the driver’s seat, they demonstrate greater levels of excitement in their learning, which in turn leads to better retention, improved problem-solving skills, and enhanced communication. Through sustained inquiry, students will ignite their natural curiosity and continue to pay closer attention to detail, ask more relevant questions, and take the next step to being active learners.
How Do You Measure Success?
As explored in research by Brosens et al. (2022), shifting toward student-centered, project-based models—particularly in design education—provides a pathway for future-proofing because it fosters high-order skills that AI cannot easily replicate, such as organic creativity, complex problem-solving, and adaptability. These methods move beyond multiple-choice tests: rubrics, peer feedback, and self-reflection are all valid methods for measuring student growth. The journey is just as important as the outcome.
Rube Goldberg iBlock Experiment
The iBlocks Solution
iBlocks couple project-based learning with experiential and design practices that require out-of-the-box thinking. This is a learning experience that provides educator support, a designated workflow, and a carefully planned organization. Researchers at LEARN Platform also independently concluded through an ESSA Evidence Level IV report that iBlocks provide a variety of short- and long-term benefits, including, but not limited to:
  • Improved collaboration, communication, and critical thinking skills
  • Enhanced self-efficacy, achievement, and performance
  • Developing social and emotional learning skills
  • Improved advanced literacy and 21st-century skills
  • Greater engagement and motivation in STEM concepts
  • Opportunities for students to learn about engineering design processes, STEM careers, and industries that are not typically reflected in core curricula
  • Better preparation for making career path decisions
Testimonials from parents and teachers speak volumes, sharing how students proudly shared their projects and left them with lasting memories. 7th-grade teacher, Nyima Dejesus, notes that she “witnessed a great sense of passion, engagement, creativity, collaboration, and pride.” Students themselves described the experience as “really fun.” Just imagine students researching, planning, designing, and showcasing their very own tiny house, building an escape room, or developing a solution for clean water and sanitation? These are just some of the ways iBlocks pathways can transform your classroom experience!
References:
  1. Brosens, L., Raes, A., Octavia, J. R., & Emmanouil, M. (2022). How future proof is design education? A systematic review. International Journal of Technology and Design Education, 33, 663–683. https://doi.org/10.1007/s10798-022-09743-4 

For more tips, tricks, and tools for teaching in and out of the classroom, check out more content on the Teq Talk blog or our YouTube channels OTIS for educators and Tequipment. We also offer virtual professional development, training, and support with OTIS for educators. Explore the technology and strategies that spark student success — no matter where teaching or learning are happening! Follow us on social:

  edteq           Twitter icon  OTIS4educators  |  Teq Products  |  iBlocks         facebook icon  MyTeq        LinkedIn icon  Teq 


Block-Based vs. Text-Based Programming

block-based-text-based-programming

When we think of STEM or STEAM courses at school, we usually include opportunities for students to learn coding and programming. This can be done with block-based code or text-based code, or both! What is the difference, and should students in a K-12 system learn both? What are the benefits and priorities of these types of programming languages?

Apps and websites for block-based programming

Block-based programming systems use colorful, draggable shapes in a canvas work area to simulate coded language. Students choose from color-coded categories to join together (snap) and create a sequenced program. As you experience block programming applications or websites, you’ll see that the categories are very similar. There will be movement blocks, control or events blocks, blocks for adding loops (iteration), variables, and functions. A student using Scratch will be able to jump into Snap, for example. Here are some examples of popular block-based coding apps and websites.

Scratch

This platform is the starting point for most STEM/STEAM and Computer Science programs. It is very intuitive, easy to learn, and students can program games, animations, dialogue scenes, etc. A great deal of other block-based programming is a copy or extension of Scratch.

Ozoblockly

Built for Ozobot robots, this program is both a website and mobile app. Students can use five levels of blocks, starting with pre-readers. Very user-friendly for younger grades, and students can flash the program they’ve built directly to the robot on the screen to make it run (or test the program on a virtual robot first).

 Blockly

Both versions of Blockly are similar. The Wonder Workshop link takes you to the mobile app for block code for the Dash, Dot, and Cue robots. Google Developers have made Blockly available for programmers to create blocks that tie into JavaScript code language.

Snap

Again, a very easy-to-learn system for students. These blocks come in familiar categories such as Motion, Looks, Sound, Pen, Control, Sensing, Operators, and Variables. Very similar to Scratch.

Microsoft’s MakeCode

This block-based programming system created by Microsoft is a free web-based program. Built for the micro:bit, the blocks can be expanded by adding other block groups to the palette. If you have hardware added to your micro:bit, search for new blocks for your program. Very adaptable for expansion and creativity!

Apps and websites for text-based programming

As students get older, they will start to learn and use text-based coding languages. This is where the real computer science work gets done. In code language, programmers type into a code editor (Code Writer, Atom). The text will “call” packets of other code from libraries and modules, and rules of punctuation, spacing, and indentation are used to make things happen (this is known as “syntax”).

Each section of code in this text environment corresponds to the blocks students learned when they were younger. Most languages, such as the ones listed below, are color-coded to help us understand how the commands are used and implemented. 

Examples: 

  • Python
  • Java and JavaScript
  • C++
  • Swift
  • Ruby

Apps and websites for text-based and block-based programming

When students can use blocks to create a program and see what the text-based language of it looks like, then some real connections are made. It is critical that students understand the fundamentals of programming, such as events, sequencing, loops/iteration, functions, and variables. The programs, websites, and applications below do a good job of letting students build their programs with blocks or text and allow switching between both modes to help them understand how the program works (or doesn’t work!).

Arduino with ArduBlock

It is a bit of a process to add ArduBlock to your Arduino program. Once you place your ArduBlock downloaded library into the correct path, it becomes available in your Arduino program. Users program in either mode and switch back and forth as they develop their code.

Sphero EDU

Build your program for your Sphero robot in blocks — then show it in JavaScript.

VEXcode VR

VEXcode is a Scratch-like interface that was built to program virtual robots. Programmers can move their robot vehicles around in a playground space. It uses Scratch Blocks and Python code at the same time.


Code.org

Blocks can be shown in JavaScript.


Computer Science and STEM teachers of course need to give students experiences with both block-based and text-based coding. When students are ready to transition from blocks to text, I suggest using some of the tools listed above. Eventually, students who can get into text-based code for projects will be the most marketable in the industry.


For more tips, tricks, and tools for teaching in and out of the classroom, check out more articles on the Teq Talk blog.

We also offer virtual professional development, training, and remote learning support for educators with OTIS for educators. Explore the technology, tools, and strategies that can spark student success — no matter where teaching or learning are happening.

The post Block-Based vs. Text-Based Programming appeared first on Teq.

Bridging the Gap to Successful Project-Based Learning with Inspirit 

Bridge the gap to successful Project-Based Learning with Inspirit!
There is no better way to complement your Project-Based Learning (PBL) initiatives than by creating engaging and interactive experiences in virtual reality (VR). VR provides users with a computer-generated simulation of a 3D image or environment that can be interacted with in a seemingly real and physical way. Inspirit offers user-friendly, innovative VR headsets that are perfect for any makerspace!

What is Inspirit VR?

Inspirit VR powerfully merges the physical and digital worlds, immersing students with 360° views and visual and auditory stimuli. Students can dive into complex topics and work hands-on to develop practical, advanced skills within a stimulating 3D environment. Using the Inspirit Learning Hub platform, teachers can easily assign engaging experiences that make concepts more concrete and memorable. Educators can create AI-generated lesson plans, roster classes through LMS systems, and access detailed analytics to track learner progress for targeted support.

Inspirit VR has thought of it all when it comes to making VR learning easy for teachers and students. The comprehensive content library offers unique virtual experiences across a broad range of topics. Categories extend from  soft skill development to specialized CTE and Industrial Trades like construction, architecture, electrical engineering, and robotics.

A classroom bridging the gap to successful Project-Based Learning with Inspirit VR.

What is PBL?

Project-Based Learning (PBL) allows students to learn by investigation. It typically involves addressing a real-world problem explored through a comprehensive project. In this method of teaching, teachers take a back seat while students become active participants in their learning. Instead of lectures where students receive knowledge from the teacher, students learn the necessary content and skills through authentic investigation. Students develop transferable skills like cooperation, communication, critical thinking, problem-solving, and more!

Benefits of Combining Inspirit and PBL

A VR experience with Inspirit can be the launchpad to your cross-curricular PBL experience. Students can teleport to science labs to conduct hazardous experiments in a safe environment, explore concepts of force and motion to, practice skills like measuring, and more. Students will learn while immersing themselves in various environments, cultures, and more!

 Merge Inspirit and PBL with iBlocks

If you already love Inspirit VR and are looking for a way to effortlessly incorporate Project-Based Learning, look no further than iBlocks! iBlocks are pre-built, turn-key PBL experiences that easily align with your existing Inspirit VR offerings. Each iBlock culminates in a valuable capstone project, providing students with a complete, structured journey to take ownership of their learning.

No Poverty and Zero Hunger, as well as Clean Water and Sanitation iBlocks are built around real world solutions pertaining to the UN’s World Sustainability Goals. Students can explore labs while learning about  osmosis, water electrolysis, nutrients, and heavy metal extraction. Finally, they’ll design and engineer prototypes that can help solve global issues.

With the Tiny Houses iBlock, students will learn about energy efficiency to design and build their very own model tiny home. With the construction and career discovery simulations, students will gain ideas and skills they can put into practice!

The Mars Colony: Engineering Expedition, Robotic Amusement Park, and Rube Goldberg Machines iBlocks all have engineering, design, and robotic elements. Educators can introduce these concepts through the Robotics, Career Training, and CTE content libraries in the Inspirit platform.

Prepare students for future careers

Looking to help your high school students explore different careers and learn critical workforce skills? The Get Your Dream Job iBlock is a perfect fit! With Inspirit Soft Skill experiences like Common Interview Questions, Career Mindset Development, and Employability Skills, students will gain realistic experiences that build 21st-century skills and prepare them for future careers!

When considering the best technology to engage your students in Project-Based Learning (PBL), think of Inspirit VR! Each headset offers immersive learning solutions for transformative impact.

To learn more about Inspirit, check out our Intro to Inspirit course on OTIS for Educators!

For more information on iBlocks for PBL please visit www.iblocks.com or reach out to our team at teq.com!


For more tips, tricks, and tools for teaching in and out of the classroom, check out more content on the Teq Talk blog or our YouTube channels OTIS for educators and Tequipment.

We also offer virtual professional development, training, and support with OTIS for educators. Explore the technology and strategies that spark student success — no matter where teaching or learning are happening!

Follow us on social:

  edteq           Twitter icon  OTIS4educators  |  Teq Products  |  iBlocks         facebook icon  MyTeq        LinkedIn icon  Teq 


The post Bridging the Gap to Successful Project-Based Learning with Inspirit  appeared first on Teq.

Building AI Literacy in Classrooms: Hands-On Robotics and EdTech Tools for Future-Ready Skills 

Building AI literacy in classrooms with hands-on robotics and edtech tools for future-ready skills.

As AI technologies become embedded in our daily lives, educators are recognizing the importance of preparing students to interact with these tools and develop AI literacy. From voice assistants to recommendation algorithms, AI is everywhere. Understanding how these technologies work is no longer optional – it’s essential for building digital fluency, computational thinking, and future-ready skills.

In Teq’s Summer Webinar Series session on AI, Senior Product Specialist Nick Cilluffo broke down the fundamentals of Artificial Intelligence. He explained why AI literacy is critical for students and how robotics and AI can make complex concepts approachable, engaging, and fun. Additionally, the session featured two powerful EdTech solutions. UBTECH’s UGOT, a modular robotics kit designed to teach coding and AI principles, and Maker & Coder AIOT, an innovative platform that blends AI, IoT, and project-based learning. Both platforms aim to bring real-world AI applications into the classroom and prepare students for the future.

UBTECH UGOT: Modular Robotics for Hands-On AI Learning

UBTECH UGOT is a modular robotics kit designed to spark creativity and innovation in young learners. With intuitive knob-lock connectors, UGOT allows for tool-free assembly and easy reconfiguration, perfect for hands-on exploration. Powered by an advanced AI processor and camera, UGOT supports real-time computer vision tasks. These tasks include object detection, facial recognition, and lane tracking. It also features voice and gesture recognition for interactive experiences.

UGOT supports both block-based programming through its web-based platform, uCode4, and text-based programming via a web-based Python SDK for more advanced users. These platforms empower students to explore machine learning by coding the robots to recognize patterns in images, gestures, and sounds. Its curriculum aligns with national educational standards, making UGOT a powerful tool for STEM education.

UBTECH Education UGOT

Maker & Coder AIoT: Bridging AI and IoT Through Project-Based Learning

Maker & Coder AIoT takes learning a step further by merging AI with the Internet of Things (IoT). IoT is a network of interconnected devices that collect and exchange data through hands-on, project-based learning. This robotics kit includes an AI camera for object, color, and facial recognition, along with environmental sensors for real-time data collection. Students can explore data-driven decision-making and machine learning.

Maker & Coder AIoT allows students to interact with smart devices and automate tasks using multi-language coding support. The platform supports Scratch, Python, C++, and Arduino on the versatile MC 4.0 platform. This is a dynamic tool for teaching robotics, automation, and AI integration in real-world applications.

A Maker and Coder AIoT Kit

Empowering Students with Real-World Skills

Through AI robotics and smart technologies like UGOT and Maker & Coder, students can gain real-world insights into machine learning, automation, and data-driven decision-making. These tools support STEM education and foster critical thinking, computational fluency, and digital citizenship — while also preparing students for careers in AI development, robotics engineering, and emerging tech fields. They exemplify how immersive learning experiences can transform abstract concepts into tangible skills.

Want a deeper dive into AI and robotics kits?

Whether you’re a classroom teacher, curriculum designer, or EdTech advocate, this session offers valuable insights into how AI can be a catalyst for deeper learning, innovation, and 21st-century skill development. Check out this AI session to transform your STEM curriculum and gain actionable insights on AI-powered technologies.

Learn more and check out Teq’s Summer STEM Webinar Series!


For more tips, tricks, and tools for teaching in and out of the classroom, check out more content on the Teq Talk blog or our YouTube channels OTIS for educators and Tequipment.

We also offer virtual professional development, training, and support with OTIS for educators. Explore the technology and strategies that spark student success — no matter where teaching or learning are happening!

Follow us on social:

  edteq           Twitter icon  OTIS4educators  |  Teq Products  |  iBlocks         facebook icon  MyTeq        LinkedIn icon  Teq 


The post Building AI Literacy in Classrooms: Hands-On Robotics and EdTech Tools for Future-Ready Skills  appeared first on Teq.

Building Bridges at STEM & STEELS Summit 2025

Building Bridges: STEEL & STEM Summit 2025

Hey PA! We are so excited to be sponsoring the Building Bridges: STEM & STEELS Summit 2025, presented by Carbon Lehigh Intermediate Unit #21. Taking place on March 7th, 2025 at Lehigh Carbon Community College in Schnecksville, PA, this premier event will be showcasing some of the latest in STEAM and education technology.

Running from 9AM to 3PM ET, this summit is jam-packed with various learning experiences and opportunities for educators. Come prepared for a day full of live demos, vendors, teacher lessons, and networking! As a reminder, registration is closed, and CLIU will not be further accepting participants, we are looking forward to a productive event!

Sessions worth showing up for!

Learn more about some of our amazing vendors and the solutions they have to offer, including engaging sessions from: Maplewoodshop, Lü, xTool, and Rocket Drones.
Maplewoodshop
Maplewoodshop
10:10 – 10:55 AM | 207A
Rocket Drones
Rocket Drones
11:05 – 11:50AM | Main Room (203/205)
Lu
Lü
11:05 – 11:50AM | 207A
X Tool
xTool
1:00 – 1:45PM | 207A
Maplewoodshop
Maplewoodshop
1:55 – 2:40PM | Main Room (203/205)
Rocket Drones
Rocket Drones
1:55 – 2:40PM | 207A
But wait, there’s more! Our Teq team is gearing up to bring you amazing presentations, including an introduction to iBlocks, the out-of-the-box project-based learning solution, and how they align to STEELs standards.
Teq/iBlocks Intro
Chrissy Rebert
Chrissy Rebert-Long, VP of Instructional Solutions
10:10 – 10:55 AM ET
Main Room (203/205)Looking for a fun way to spark your students’ engagement in STEAM and inspire a future career? Join Teq to learn about iBlocks; innovative and engaging project-based learning experiences that foster advanced literacies, transferable skills, and career exploration. These cross-curricular, out-of-the box solutions are designed to complement and enrich existing curriculum, are standards aligned, and follow the engineering design process.
Teq iBlocks/STEELS Alignment
Chrissy Rebert
Chrissy Rebert-Long, VP of Instructional Solutions
1:00 – 1:45PM ET
Main Room (203/205)Join us to learn how iBlocks can support STEELS and provide a fun, engaging way for K-12 to implement and support the new standards. Project-based Learning (PBL) provides an ideal framework for delivering effective and engaging STEM learning experiences. In this session, we will take you through the experience of an iBlock and you will leave feeling inspired to bring these authentic learning pathways to your K-12 classrooms.

Other exciting opportunities

We will also be demonstrating a variety of STEM resources, which will be available in the CLIU STRM Lending Library. In addition, a complementary lunch and breakfast will be provided for participants.

The Teq team is bringing the works to the 2025 Building Bridges: STEM & STEELS Summit! We are so excited to meet and network with tons of exhibitors and attendees. Don’t forget to stop and say hello, watch a product demo, and grab some free swag!

We’ve got a ton in store, so make sure you connect with us on social media (links below).


For more tips, tricks, and tools for teaching in and out of the classroom, check out more content on the Teq Talk blog or our YouTube channels OTIS for educators and Tequipment.

We also offer virtual professional development, training, and support with OTIS for educators. Explore the technology and strategies that spark student success — no matter where teaching or learning are happening!

Follow us on social:

  edteq           Twitter icon  OTIS4educators  |  Teq Products  |  iBlocks         facebook icon  MyTeq        LinkedIn icon  Teq 


The post Building Bridges at STEM & STEELS Summit 2025 appeared first on Teq.

Building Fundamental Skills with Mia, Codie & iBlocks 

Finding and making authentic connections is often the first step to understanding complex concepts. Add in a dash of laughter, fun hands-on engagement, and a little imagination, all of which were thoughtfully designed by early childhood education experts, and you have a robust learning experience!

Meet Mia & Codie, and their loveable friends, Evu the emu, Velvet the elephant, and the world of The Mia & Codie Learning Experience!

Learn how to build fundamental skills with Mia, Codie & iBlocks!

The Mia & Codie learning experience features a variety of endearing characters. These include Mia, Codie the robot, Evu the emu, and Velvet the elephant!

Mia & Codie is a playful, hands-on system for building the Foundational Thinking Skills behind early computer science. It replaces text-heavy code with tactile play and visual iconography. Students choose Thinking Blocks (e.g., forward, turn, wait, etc.), place them into the Block Dock, and press play for instant visual feedback in the companion app. The system is continuously growing with screen-free learning materials and the short, thought-provoking Mia & Codie animated episodes that started it all.

Setting the Foundation

This intuitive system redefines early learning by combining standards-aligned instruction with deep character development. Through Mia & Codie’s easy-to-use platform and engaging short videos, students are challenged to practice teamwork, navigate emotions, and share empathy while building foundational thinking skills.

These cognitive foundations drive success in key areas such as literacy, math, and even AI readiness. They also provide the perfect first step for early learners before they dive into real-world inquiry with Teq’s iBlocks.

Build fundamental skills with Mia, Codie & iBlocks!

Mia & Codie transforms foundational skill-building into an exciting, interactive experience.

Aligning Mia & Codie with iBlocks Project-Based Learning Experiences

Why do Mia & Codie pair so well with the iBlocks journey? Well, the most conspicuous connection is the groundwork for STEM, coding, and robotics – a facet of many iBlock pathways. However, the correlation extends much deeper than early programming. It delves into critical thinking, reasoning, and problem-solving, along with cognitive flexibility and working memory. Students learn to navigate sequencing, pattern recognition, symbolic and spatial reasoning, cause and effect, predictive skills, debugging, iteration, and so much more.

By setting the foundation early with these skills, Mia & Codie and iBlocks equips pre-readers to take on innovative projects. When they embark on an iBlock, they’ll have a complete toolkit to navigate the Engineering Design Process. After mastering the core fundamentals with Mia & Codie, students will be ready to step into the Engineering Design Process and Inquiry-Based Thinking. Plus, both solutions offer turnkey experiences for teachers, including ready-to-use lessons, activities, practical tips, and professional development resources.

It’s the kind of solution you must see in action. From witnessing even the youngest preschoolers get captivated by the storytelling and hands-on manipulatives to seeing how seamlessly the learning scaffolds through the early years, the impact is clear! You have to check out Mia & Codie for yourself.
For more tips, tricks, and tools for teaching in and out of the classroom, check out more content on the Teq Talk blog or our YouTube channels OTIS for educators and Tequipment. We also offer virtual professional development, training, and support with OTIS for educators. Explore the technology and strategies that spark student success — no matter where teaching or learning are happening! Follow us on social:

  edteq           Twitter icon  OTIS4educators  |  Teq Products  |  iBlocks         facebook icon  MyTeq        LinkedIn icon  Teq 


Celebrate a National Day with Project-Based Learning

Students looking at a tablet screen

Did you know that almost every day of the year has a national day attached to it?  We, as a society, have created a reason to celebrate everything! There’s National Tartar Sauce Day, National Gumdrop Day, and a National Johnny Appleseed Day. There’s even a National Do A Grouch A Favor Day! 

With something to celebrate every day, you have plenty of inspiration for your next classroom project-based learning (PBL) experience. There are teachers who want to incorporate PBL into the classroom, and then there are those that may be required to incorporate it. Don’t stress, just take a look at the National Day Calendar!  

Any time of year is a great time to implement PBL. When you are feeling the need for more excitement, that’s a perfect time to incorporate PBL and re-engage your students. Engage your science class by celebrating World Habitat Day, have fun with measuring time and distance in your math class while celebrating National Walk and Bike to School Day, or set sail into learning about famous explorers while celebrating Leif Erikson Day.


Implementing PBL for a national day

Now that you have a plethora of topics to choose from, let’s walk through how to implement PBL. When thinking about which day to use as a theme, think of the skills your students could work on or content they could use to review while doing a themed project that day. Let’s use National Walk and Bike to School Day as an example. This is a great opportunity for students to utilize many of their core skills. Also, PBL is not only designed to teach the basics, but rather support deeper learning by getting students involved in activities that solve a real world issue or scenario. 

In honor of our holiday, we are going to pose an example problem to our students: what changes can students make in their daily routines to incorporate fitness? The hope with building this around National Walk and Bike to School Day will trigger students to think about exercise and daily routines. Students can focus on measuring and calculating walking/biking distances, time, muscles used, calories burned, and more. All of this work will go towards a capstone project to present their findings. 


Teacher preparation for PBL

As the teacher, your work will be on the front end, where you will need to:

  1. Have a learning plan for the project outlining standards that students will be meeting and the best approaches to finding solutions.  
  2. Create a timeline or schedule for the project to keep the groups on track.  Students working on a PBL solution should be given a clear structure to guide their project and when they will need to present their solution.  
  3. Assess the PBL assignment. Creating a rubric that grades student learning will provide effective feedback that students will use as they continue to work on enhancing their 21st century skills.

Collaboration is key

PBL is most successful in group settings, so your next step is to group students. Students should work collaboratively and brainstorm ideas to map out a solution. Additionally, when working within a team, students will be able to hone their critical thinking, creativity, and problem solving skills. Teachers should become the “guide on the side” and allow for the students to do the majority of the work.


Solutions and capstone projects

Students may come up with different solutions by answering additional questions like: how far will they have to walk or ride to school? What muscles will be used to accomplish this? How many calories are burned? Additionally, students could use that information to create a capstone project such as: an advertisement or public service announcement for the local community, a fitness competition or challenge, etc. The idea is that the solution should be a project to showcase to the local school and community.

Now you’re all set and can let your students get to work! Don’t forget to facilitate meaningful learning by giving feedback and checking in throughout the process. This will make this PBL experience worthwhile for the students.  

Check your calendars for a celebration that you can tie into your curriculum. Plan ahead. and you will be able to easily incorporate PBL into your classroom too! 

For another example, check out the course, Celebrating National Johnny Appleseed Day with PBL. Check out the PBL category in the OTIS Library for more details on how to implement PBL in your class


For more tips, tricks, and tools for teaching in and out of the classroom, check out more content on the Teq Talk blog or our YouTube channels OTIS for educators and Tequipment.

We also offer virtual professional development, training, and support with OTIS for educators. Explore the technology and strategies that spark student success — no matter where teaching or learning are happening!

Follow us on social:

  edteq           Twitter icon  OTIS4educators  |  Teq Products  |  iBlocks         facebook icon  OTIS4educators  |  MyTeq        LinkedIn icon  Teq 


The post Celebrate a National Day with Project-Based Learning appeared first on Teq.

Come On Down to NJASA TECHSPO 2023

The New Jersey Association of School Administrators (NJASA) is sponsoring TECHSPO 2023, the largest conference in the state, attended by educators, superintendents, board members, and curriculum directors alike. Join us at Harrah’s Waterfront Conference Center in Atlantic City, NJ from January 25-27 to take part in our PD session, attend our TECHSPO Pool Party with ClassLink, and discuss all Teq has to offer!

Events and Exhibitions

We’ll be located at booths 109 and 111 to answer questions about all our wonderful products and services. Come watch demonstrations on how you can integrate STEM products into your curriculum; sample our student-led, teacher-guided iBlocks PBL experiences; and see what our online and in person PD options can do for you!

Special Session Info

Additionally, our Professional Development and Curriculum staff members will be presenting a special session. Sessions will be held on both levels of the Waterfront Conference Center, in the Avalon rooms located on the second level.

Teaching Coding without the Code

Matthew Thaxter, Director of eLearning & Adam Fragale, Curriculum and Professional Development Support Specialist

Friday, January 27, 2023 | 10:30am – 11:30am

Avalon #16 | Session 12

Students as young as 1st grade can be introduced to coding concepts way before they ever maneuver their first block of code. In the session, we will show you how to teach coding concepts without the actual code! We will be demonstrating different techniques to get students to think like programmers so they can understand the functions behind writing code. With these basic techniques, students should be able to dive into actual coding with more confidence and better understanding of what code should do.

Make a Splash With Teq and ClassLink

Teq has partnered with ClassLink for a TECHSPO Pool Party! Located at The Pool at Harrah’s in the cabana area on 1/25 from 8PM-11PM, come chat with us over a drink, a bite to eat, and a live band! Conference attendees have until the evening of 1/24 to register for this event, so make sure to sign up at booths 109/111 if you have not done so!

We’re so excited to see everyone at NJASA TECHSPO ’23! We’ve got a ton in store, so make sure you connect with us online. Check out our iBlocks PBL library and our online professional development platform, OTIS for educators. Don’t forget to tag us in all your TECHSPO pictures on social media – links below. We’ll see you in AC!


For more tips, tricks, and tools for teaching in and out of the classroom, check out more content on the Teq Talk blog or our YouTube channels OTIS for educators and Tequipment.

We also offer virtual professional development, training, and support with OTIS for educators. Explore the technology and strategies that spark student success — no matter where teaching or learning are happening!

Follow us on social:

  edteq           Twitter icon  OTIS4educators  |  Teq Products  |  iBlocks         facebook icon  OTIS4educators  |  MyTeq        LinkedIn icon  Teq 


The post Come On Down to NJASA TECHSPO 2023 appeared first on Teq.

Coming Soon: Teq at OETC 2023

The Ohio Educational Technology Conference (OETC) is one of the premier P-20 state edtech conferences in the country, taking place from February 14th-16th at the Columbus Convention Center in Columbus, OH. OETC welcomes over 4,500 educational technology professionals and enthusiasts each year to innovate, collaborate, and cultivate partnerships at the forefront of education.

Event and exhibitions

We are excited to be attending OETC with various educators, administrators, curriculum designers, and technology specialists alike. We will be located at booth #807/809, so come on down to ask us more about our iBlocks project-based learning experiences, the student-led and teacher-guided solutions for hands-on learning. We also offer top-notch edtech products, including SMART interactive display panels, along with our online PD platform, OTIS for educators, with live and on-demand courses available anytime, anywhere.

Must-see sessions

In addition to our exhibitor booth, a member of our Professional Development team will be holding multiple PD sessions available for attendees. Make sure to visit the Session Agenda on the OETC site for correct times and locations.

Differentiated SEL Check-Ins with Google

Robert Abraham, Professional Development Account Manager

Wednesday, February 15, 2023 |9:15 AM – 10:15 AM

Room B240/241

The past few years have been difficult for students and teachers. Participants will explore creating differentiated social-emotional learning (SEL) check-ins using Google tools such as Slides, Forms, and Jamboard. Visual and text-based options will be explored as well as incorporating emojis for younger students or students with special needs. A teacher’s role is to advance students’ education, but it is also important to nurture and guide students emotionally. As the parent of a special needs child and a former teacher, I understand the importance of paying attention to the emotional needs of students. By using SEL check-ins with students, teachers can understand and adapt to the specific needs of their students throughout the day.


Virtual Road Trip with Google My Maps – PBL Activity

Robert Abraham, Professional Development Account Manager

Wednesday, February 15, 2023 | 3:30 PM – 4:30 PM

Room C162A/C162B

This session is a discussion on project-based learning (PBL) centered around Google apps and featuring Google My Maps. The purpose of this session is to introduce Google My Maps and integrate it into a PBL activity. This activity is multi-disciplinary and can be used in multiple grade levels. We will explore using Google Docs, Forms, Sheets, and Sites to gather information for a virtual road trip that will be mapped out using Google My Maps. Creating a virtual road trip PBL activity can give students the opportunity to virtually explore their country, use new tools, and gain important computer skills. Plus, projects can be shared with students around the world!


We’re so excited to see everyone at OETC ’23! Come by the Teq booth to chat PD, PBL, edtech, and more. We’ve got a lot to show, so be sure to connect with us on our online platforms and tag us in your OETC pictures on social media, we’ll see you in Columbus!


For more tips, tricks, and tools for teaching in and out of the classroom, check out more content on the Teq Talk blog or our YouTube channels OTIS for educators and Tequipment.

We also offer virtual professional development, training, and support with OTIS for educators. Explore the technology and strategies that spark student success — no matter where teaching or learning are happening!

Follow us on social:

  edteq           Twitter icon  OTIS4educators  |  Teq Products  |  iBlocks         facebook icon  OTIS4educators  |  MyTeq        LinkedIn icon  Teq 


The post Coming Soon: Teq at OETC 2023 appeared first on Teq.

Creating Your Own Games in Breakout EDU

Two kids sitting at a table with index cards brainstorming games in Breakout EDU.

Are you looking for a fun and interactive tool to engage your learners? Breakout EDU can help students unlock a love for learning by applying knowledge with higher order thinking, a developing growth mindset, and perseverance.

The Breakout EDU platform boosts teamwork, empathy, and problem-solving through learner-centered experiences. Students can solve digital and kit-based games, or even take on Lock of the Day, which is a daily 5-10 minute single lock puzzle. Additionally, you can have students participate in immersive point-and-click adventures with Breakout+.

Must-see features and game templates

One of the coolest features of Breakout EDU is the Game Design Studio! To get started, both students and educators are encouraged to participate in the Learn & Play course modules. After watching a video, they can complete practice games for six different levels, exploring the elements that make for a compelling game.

Screenshot of a user playing a game with the Breakout EDU Learn & Play Modules.
Let your imagination run wild with fun and interactive, yet educational games for students.

The creation of a successful game involves creating a great story that provides purpose, engages players, weaves clues together, and moves the game forward. These are all possible within the Game Design feature. Rubrics and templates are provided to further guide this process.

Example of a Game Design template that teachers can provide for students.
Don’t know where to start when designing your own games? Breakout EDU has you covered with helpful templates to guide you!

There are a number of elements that you can use to make your own Breakout games. Plus, the platform for building them is the same, regardless of whether you are a teacher or a student.

Get even more from Breakout EDU

Want even more of Breakout EDU? Here are our hand-picked reasons to use the platform:

  1. The platform is intuitive. Once you click “Create a Game,” the system walks you through the process.
  2. Locks can be sequential, one leading to another, but they don’t have to be! You can choose to have non-sequential locks that can be opened in any order!
  3. Lock types include text, numbers, shapes, colors, and even directions.
  4. You can also add “non-lock” content, such as videos, audios, or PDF documents. This content can further enhance the game with background information, context, additional clues, or even a brain break!
  5. Integration for creating with Adobe Express is directly embedded in the platform, but you can also upload your own images. Therefore, if you prefer to design in Canva or another software, you can!
  6. You can even customize the “end-of-game reveal” with an image, text, video, or Adobe Express.
  7. Breakout EDU also provides templates for creating kit-based/physical clues, such as a message to decode with the Red Lens Viewer.
  8. Student Game Design goes through a teacher-approval process and can be added to the class library for peers to enjoy.
  9. The platform helps develop brainstorming and planning with Game Design Strategies – implementing transferable skills like organization, creativity, and critical thinking.
  10. Games can follow themes on any topic. Therefore, you can always create a game that directly ties to student learning in the classroom in a fun and innovative way.
Example of a completed ocean-themed game created in Breakout EDU.
Here’s what your final product could look like! Choose from a variety of themes, activities, and more!

Creating and playing breakout games is not only a fun process, but it can also make the material “stick.” It’s all about making memorable experiences in the classroom.

If you want to see all of this in action, check out our OTIS session, Break into a New Year with Breakout EDU. So, what are you waiting for? Let’s get building! We can’t wait to hear about what you create!


For more tips, tricks, and tools for teaching in and out of the classroom, check out more content on the Teq Talk blog or our YouTube channels OTIS for educators and Tequipment.

We also offer virtual professional development, training, and support with OTIS for educators. Explore the technology and strategies that spark student success — no matter where teaching or learning are happening!

Follow us on social:

  edteq           Twitter icon  OTIS4educators  |  Teq Products  |  iBlocks         facebook icon  MyTeq        LinkedIn icon  Teq 


The post Creating Your Own Games in Breakout EDU appeared first on Teq.

Embedding VR Into PBL Projects 

VR and PBL?
Yes! Virtual reality (VR) experiences are an ideal way to enhance and extend student learning, particularly when integrated into project-based learning (PBL) initiatives. Why? VR headsets, particularly those from ClassVR, immerse students in targeted learning content through sessions lasting no longer than 15 minutes. They provide a unique avenue for students to explore, with 360-degree images and videos, 3D models and interactive scenes, and CTE modules designed for vocational training. With ClassVR, educators can easily embed VR into PBL projects!
Why ClassVR Stands Out
ClassVR resources include learning objectives to guide outcomes, curriculum-aligned content, discussion prompts to spark curiosity, worksheets and quizzes to merge lesson plans, and suggested activities for hands-on learning. They also provide cross-curricular connections, in addition to the ability for teachers to create their own resources.
Pulling It All Together
Imagine your students developing their own short stories based on their knowledge of literacy elements. Provide them with the opportunity to enter Literacy Land within Avanti’s World on Eduverse+, ClassVR’s premium online platform. Embedding VR into PBL projects brings stories like “Jack and the Beanstalk” or “Romeo and Juliet” to life, transforming classic tales into an immersive adventure! These experiences will spark ideas for students’ writing and let their creativity take flight! To take learning even further, try out the Engineering 3D Printed Instruments iBlock!  There’s no place for VR here, right? Wrong! Pull up the special collection playlist from the ClassVR Portal on “Musical Instruments from Around the World.” This interactive 3D model elevates students’ research with new connections and inspiration. Try out scenes such as “Energy in the Home,” “Heat Transfer,” or “Insulating Our Homes” as students explore energy consumption and prepare to engineer a tiny house model. The opportunities just keep growing!
Am I Ready for PBL?
If you aren’t quite sure how to get started with project-based learning, look no further than Teq’s iBlocks. This experiential solution is the perfect way to incorporate hands-on learning with the ability for students to investigate and study places and concepts that would otherwise be out of reach. Complete with guided questions, teacher tips, detailed lesson plans, and more–iBlocks contain everything you need to succeed! As a result, we put together the following guide to help you pair your iBlocks PBL projects with ClassVR’s content offerings and connections. We can’t wait to see how you use these tools to redefine what’s possible when you blend the power of VR with the impact of PBL.


For more tips, tricks, and tools for teaching in and out of the classroom, check out more content on the Teq Talk blog or our YouTube channels OTIS for educators and Tequipment. We also offer virtual professional development, training, and support with OTIS for educators. Explore the technology and strategies that spark student success — no matter where teaching or learning are happening! Follow us on social:

  edteq           Twitter icon  OTIS4educators  |  Teq Products  |  iBlocks         facebook icon  MyTeq        LinkedIn icon  Teq 


Enhance iBlocks and Classroom Learning with Killer Snails 

Enhance iBlocks and classroom learning with Killer Snails.

Imagine being able to put the excitement of making new scientific discoveries in students’ hands. Well now you can make your dream come to life, with Killer Snails! Through extended reality experiences and games, students are able to connect with real-world issues in a fun, engaging, and immersive way. This is the perfect complement to a variety of Teq’s own iBlock solutions.

We designed iBlocks as project-based learning pathways to enhance students’ problem-solving & future-ready skills through a sequence of lessons and activities that culminate in a capstone project. After a brief demo of Killer Snails with co-founder, Jessica Ochoa Hendrix, I couldn’t wait to try these experiences and enhance iBlocks and classroom learning with Killer Snails!

An overview of Killer Snails

Each of the following products in Killer Snails includes interactive activities and a personalized digital science journal. Augmented reality experiences that users can view with a mobile device or using webVR on a browser also exist.From an educator’s perspective, I delighted in the easy-to-use assessment dashboard.I could effortlessly monitor student work, give feedback, and support classroom learning. Educator’s guides with NGSS alignment are included as well. Further, these activities were all funded by the National Institutes of Health or the National Science Foundation.

WaterWays

In WaterWays, students are empowered to become sustainability advocates. In these experiences, participants take on the role of a scientist in Chimhe City. This product includes a total of five, 40-minute modules. They explore the concepts of air and water quality, plastic pollution, marine biodiversity, and the Urban Heat Island effect. The Hudson River Park, the Wildlife Conservation Society, and Mount Sinai’s Transdisciplinary Center for Early Environmental Exposure collaborated to develop WaterWays.

Although this curriculum was written for students in grades 3-5, I could see this platform being included in middle school classrooms and beyond. The content gives insights into important topics such as sewer overflows, plastic pollution, and the benefits of oyster reefs. These activities further enhance iBlocks and classroom learning with background research and planning. Each topic perfectly aligns with iBlocks pathways, such as “River Management: Assessing Health,” “Engineering for Hazardous Weather: Taking Flood Control to New Heights,” “Clean Water and Sanitation,” “UN Sustainability: Managing Microplastics,” and more. Additionally, you can build a whole iBlock sequence to provide even deeper connections to these concepts!

Enhancing classroom learning with WaterWays.
An example of a sewage outfall activity in Killer Snail’s WaterWays.

BioDive

BioDive is geared for students in grades 6 and up. I felt like a marine detective as I got to dive into the world of venomous marine snails. In my experience, I collected abiotic data, made observations, and even built virtual models. I learned about turbidity, trophic levels, and ocean zones. In BioDive, I explored the importance of ecosystems and biodiversity. I loved that there were newspaper articles, maps, and a variety of interactive elements that brought the mission to life. BioDive was funded by the National Science Foundation (NSF).

Enhance classroom learning with BioDive.
A student getting started in BioDive.

Venom CoLab

While I enjoyed all of the experiences, Venom CoLab really impressed me! The experience seamlessly enables students to take on the role of a scientist. VenomCoLab enhances the classroom learning experience by allowing students to collaborate with other “professional peers” through solo and joint research, lab meetings, XR experiences, and even poster creation. I learned about how different organisms’ venom can be used to create medicines for a variety of human health issues, from pain to high blood pressure to diabetes and other health-related problems.

What is Venom CoLab?

So what exactly is Venom CoLab? It’s a collaborative experience designed for small groups of middle school students. Venom CoLab lets students analyze venom from a variety of animals to determine new health-related uses. These animals include snails, snakes, scorpions, and sea anemones. Each student in the group has a different role: zoologist, biochemist, molecular biologist, and pharmacologist. Together, they’ll learn about the peptides and proteins found within the venom as inspired by real research and experiments.

For instance, the drug Captopril was the result of 20 years of work. Researchers identified a molecule in snake venom that could lower blood pressure, while a peptide from the venom of the Magician’s Cone Snail (Conus magus) led to the development of Ziconotide (Prialt), a chronic pain medication.

Killer Snail’s modules take a complex process and present it in a way that anyone can understand. It also enables students to envision themselves in the role of a scientist, so that they can explore potential career pathways.

Co-founder, Jessica gave me several anecdotes of students truly getting into their roles, joking about “waiting for the pharmacologist,” and simply understanding the true nature of group work in real-world settings. In fact, students get to provide an overall rating of group collaboration in each section.

Enhance iBlocks and classroom learning by collaboratively creating a poster in Venom CoLab.
Students collaboratively create a scientific poster in Venom CoLab.

Additional products and facts

Killer Snails also has card games to enrich student experiences including “Assassins of the Sea” and “Biome Builder,” along with other immersive reality experiences such as “Scuba Adventure.”

Co-founders Mandë Holford, PhD and Jessica Ochoa Hendrix, along with their team have leveraged their professional experience to partner with a variety of leading institutions including Google, the American Museum of Natural History, New York Hall of Science, C & A Scientific, Mount Sinai, and others. They’ve both presented for TED as well.

These partnerships, along with features in Forbes, the New York Times, and Bloomberg Businessweek highlight the impact of using Killer Snails as a resource to enhance iBlocks and take classroom learning to the next level!


For more tips, tricks, and tools for teaching in and out of the classroom, check out more content on the Teq Talk blog or our YouTube channels OTIS for educators and Tequipment.

We also offer virtual professional development, training, and support with OTIS for educators. Explore the technology and strategies that spark student success — no matter where teaching or learning are happening!

Follow us on social:

  edteq           Twitter icon  OTIS4educators  |  Teq Products  |  iBlocks         facebook icon  MyTeq        LinkedIn icon  Teq 


The post Enhance iBlocks and Classroom Learning with Killer Snails  appeared first on Teq.

FETC 2023 is Almost Here!

The Future of Education Technology Conference (FETC) is around the corner. Join us in New Orleans to chat about edtech, project-based learning, educator PD, and much more. The 2023 conference will be held at the Ernest N. Morial Convention Center in New Orleans, LA from January 23rd into January 26th. We will be attending as exhibitors and our talented team members will be hosting five different sessions. We have something for everyone, so if you’re going to FETC, be sure to join us for a session, or a chat at our booth.

Event and exhibition details

We’ll be in the exhibition hall in the iBlocks PBL booth, number 1923, talking about our ground-breaking PBL experiences. An iBlock is a 10-part progression of student-led, teacher-guided activities that center on cross-curricular skill building and culminate in a capstone project. Come chat with us to learn how simple it can be to incorporate STEAM-based PBL in your school. We have a library of over 40 topics to choose from, with more topics on the horizon. Along with our sample iBlocks, the booth will also include some of our top edtech offerings. Our team members can show you how to seamlessly integrate edtech like robots, 3D printing, and more into your classroom. 

Request a meeting


Can’t miss sessions

In addition to discussing all things edtech and PBL at the booth, our Professional Development and Curriculum team members will be presenting special sessions. FETC Workshops require an additional registration fee or premium registration, so if you need to register or upgrade, visit the FETC Registration Page. All workshops are BYOD (Bring Your Own Device) for hands on participation. Here are the sessions we are offering:

Using Emojis to Manage Classroom Routines and Activities

Emma Foley, Senior Curriculum Specialist

Monday, January 23 | 1:30PM – 4:30PM CST

Room 211-13, Table 34 | Session #MMS T34

Who doesn’t love a good emoji? You may already be using emojis in some way in your classroom, but did you know that these little characters can be a great visual cue for students as they work through assignments? Join me as I share suggestions for incorporating emojis into your pre-existing assignments and explore how these fun characters can even help you to manage classroom routines!


Creating Student Driven Instruction with Lumio

Robert Abraham, Instructional Strategist 

Tuesday, January 24 | 8:00AM – 10:00AM CST

Room 352 | Session #$W136

The more technology advances, the more independent today’s learners can become! Lumio, formerly known as SMART Learning Suite Online, enables students to take control of their learning in a multitude of ways. Lumio is a collaborative learning tool made for student engagement. Contributing to workspace activities, accessing lessons outside of class, and manipulating individual handouts are just some levels of ownership students can take. Join us as we walk through what’s possible when students can access lessons from anywhere, at any time, and on any device! Design your next activity and be ready to implement as soon as you get back to your district!


3D Print Your Emotions

Cori Frede, Professional Development Specialist 

Tuesday, January 24 | 4:00PM – 4:30PM CST

STEM Theater Booth 618 | Session #STEM06

3D printing isn’t just for the STEM classroom. Join us as we explore the basics of getting started with Tinkercad and lesson ideas for social-emotional learning (SEL) where students can create models that represent their emotions.


Getting Started with Robotics Without Stocking Up on Robotic Products

Cori Frede, Professional Development Specialist 

Wednesday, January 25 | 10:00AM – 10:45AM CST

Room: R5, Table 5 | Session #C076 RT5

Whether you have twenty robots, one robot, or none, you can get started robotics in your classroom. Many popular robotic tools offer a virtual replication of their robot so students can program and test their codes. During this session, you will learn about a few platforms such as micro:bit, Ozobots, Sam Labs, Dot and Dash, and more which will allow your students to get started before getting their hands on equipment. Take on a virtual challenge and put yourself in the student’s seat.


Using Google Tools to Support PBL in the Science Classroom

Nicole Mathew, Curriculum Specialist 

Thursday, January 26 | 9:00AM – 11:00AM CST

Room: 345 | Session #$W255

Project-based learning, in conjunction with the productivity and collaboration tools available in Google Workspace, can support and enhance student outcomes. We’ll take a look at how a variety of Google tools including Google Earth, Google Maps, and Google Arts & Culture can support PBL experiences in the science classroom, from research to publishing and sharing.


We’re so excited to speak with you all at FETC 2023 – we’ve got giveaways and a few surprises in store, so make sure you connect with us! Don’t forget to check out our iBlocks PBL library, and our online professional development platform, OTIS for educators. We’ll see you in NOLA –  don’t forget to tag us in your FETC pics on social!


For more tips, tricks, and tools for teaching in and out of the classroom, check out more content on the Teq Talk blog or our YouTube channels OTIS for educators and Tequipment.

We also offer virtual professional development, training, and support with OTIS for educators. Explore the technology and strategies that spark student success — no matter where teaching or learning are happening!

Follow us on social:

  edteq           Twitter icon  OTIS4educators  |  Teq Products  |  iBlocks         facebook icon  OTIS4educators  |  MyTeq        LinkedIn icon  Teq 


The post FETC 2023 is Almost Here! appeared first on Teq.

Fun with Lasers in the Classroom Using xTool

The xTool in action, engraving a check mark and star design. xTool logo

When I was growing up, lasers were devices that you could only see in sci-fi movies or cartoons. Lasers were inventions from the distant future. It turns out that the distant future was not so distant! Lasers are now a part of everything from construction sites to medical procedures! We are able to have fun with lasers and give students a safe and hands-on way to learn STEM in the classroom.

I introduced myself to xTool and learned that they are the industry-leading brand for laser cutters and engravers. I learned that their  products were designed to fit any classroom project, meeting the needs of educators and students alike. Every product package comes with hundreds of free tutorials, a library of projects, and a free downloadable software that students can use to design and create with ease. It is amazing to see the capabilities of these machines and how they can engage students in STEM. Here are some of the ways that xTool can address the important aspects of STEM learning in the classroom:

  • Real-world skills: Designing and measuring
  •  Critical thinking skills: Fosters critical thinking through the creative design process
  • Hands-on learning: Allows students to demonstrate their understanding of a topic

xTool applications

As a core subject teacher, do you ever think, “How does this apply to me?” Luckily, xTool products are not only used just for STEM classes or makerspaces, but for so much more! Let’s get our students engaged and make connections to these products, core classes, and CTE skills.

Math teachers can have their students have fun with lasers by measuring, designing and cutting out different shapes as well as having students visualize mathematical concepts. Social studies teachers can have students create replicas of historical artifacts to allow for a deeper understanding of history. Science teachers can have students replicate lab equipment and create visual aids for experiments. Lastly, English language arts teachers can utilize xTool to design, cut, and customize bookends, bookmarks, story and drama props, as well as creations for visual storytelling. Again, these are all great projects that allow students to demonstrate their learning in a fun and engaging way.

xTool’s Creative Space allows users to create from scratch right on its platform! You can also easily create designs outside of the platform and then upload them online to Creative Space. It’s extremely easy to do, as converting any created image to an .svg file will make it that much simpler.

Creating a pyramid puzzle project

Let’s get our students engaged and make connections to these products, core classes and real world skills. As a former social studies teacher, I wanted to recreate a project I did with my students.

Students were tasked with researching a specific artifact from one of the ancient civilizations we studied and then had to present it to the class. To utilize xTool’s laser cutter, I imported an image of the Great Pyramid of Giza to xTool’s Creative Space, then overlaid a puzzle template on the image. The xTool engraved the image of the Great Pyramid and then began to laser cut the image into puzzle pieces. The students could now put together the puzzle while learning about the pyramids of ancient Egypt! This is a fun little project that will come out amazing, and the students will have fun making it.

Lasers are a thing of the future, and that future is now. This technology has been brought into today’s classrooms to engage students in building many necessary skills. Some of these skills even apply to CTE, as students can use what they’ve learned to prepare to enter the workforce. For more on how to get started with xTool in the classroom, check out our accompanying OTIS course, Fun Time with Lasers.


For more tips, tricks, and tools for teaching in and out of the classroom, check out more content on the Teq Talk blog or our YouTube channels OTIS for educators and Tequipment.

We also offer virtual professional development, training, and support with OTIS for educators. Explore the technology and strategies that spark student success — no matter where teaching or learning are happening!

Follow us on social:

  edteq           Twitter icon  OTIS4educators  |  Teq Products  |  iBlocks         facebook icon  MyTeq        LinkedIn icon  Teq 


The post Fun with Lasers in the Classroom Using xTool appeared first on Teq.

Get Ready for PETE&C 2023!

The Pennsylvania Educational Technology Expo & Conference (PETE&C) is an annual statewide conference that highlights the best of educational technology for teachers, administrators, technology directors, and school boards alike. With a schedule full of educational events and showcases, attendees can take part in a variety of sessions to learn, innovate, and collaborate. Join Teq at PETE&C 2023 from February 12th-15th at Kalahari Resorts & Conventions in Pocono Manor, PA to see all that we have to offer and attend our PD session.

Exhibition details

We are ready to showcase what big things we have in store! Teq will be located booth spaces 507, 509, 511, and 601 to chat and answer questions about all of our wonderful products and services, including: iBlocks project-based learning experiences, our online professional development platform, OTIS for educators, and a variety of state-of-the-art edtech products. We are looking forward to contributing to this year’s PETE&C, so stop by for a sample, come watch a demonstration, or pop by to say hello.

 A must-see session

Along with showcasing our products and services in the exhibitor hall, a member of our Professional Development team will be presenting a special session. All session info and descriptions can be found in the Program on the PETE&C site.

Turning Consumers into Creators

Cori Frede, Professional Development & Field Product Specialist

Monday, February 13, 2023 | 9:30AM-10:20AM

Suite 70

Students consume over three hours of video per day. From YouTube to TikTok, they are constantly watching others on screen. Help them become the creators by providing them with creative outlet for creating and sharing content with their peers. Explore student-safe video creation sites such as Flip, Loom, and more.

We’re so excited to meet you all at PETE&C 2023 – we’ve got a lot to show, so make sure to connect with us on social media, links below! Don’t forget to check out our iBlocks PBL library, and our online professional development platform, OTIS for educators. We’ll see you in PA, don’t forget to tag us in your PETE&C photos online!


For more tips, tricks, and tools for teaching in and out of the classroom, check out more content on the Teq Talk blog or our YouTube channels OTIS for educators and Tequipment.

We also offer virtual professional development, training, and support with OTIS for educators. Explore the technology and strategies that spark student success — no matter where teaching or learning are happening!

Follow us on social:

  edteq           Twitter icon  OTIS4educators  |  Teq Products  |  iBlocks         facebook icon  OTIS4educators  |  MyTeq        LinkedIn icon  Teq 


The post Get Ready for PETE&C 2023! appeared first on Teq.

How ACE Academy Implemented 4 PBL Experiences

It seems like every new school year brings a new initiative, updated pedagogical approaches, and new technologies to adopt. It can be frustrating for administrators and teachers to keep their schools and classes current while ensuring their students are learning. Project-based learning has been trending in education for quite a few years now, and like all popular methodologies, it has its detractors and its fervent fans. Full disclosure, we’re proponents. If you’re here, you’re looking to read a story about PBL implementation, but we don’t want to ignore the challenges of PBL either. It’s part of the reason we developed iBlocks to begin with – to address the challenges educators have and alleviate some of the difficulties they face. We’ll look at how iBlocks helped students at ACE Academy get the most out of their PBL experience, but first, let’s address why PBL is considered a daunting prospect for so many.  

iBlocks and PBL challenges and benefits 

One of the biggest arguments against PBL is that it takes an inordinate amount of time to plan and implement properly. This is often due to the shift in methodology required from the teacher and the shift in expectations for the students. If you’re new to PBL, you may want to take a deeper dive on what exactly it is and isn’t. There are a few ways to overcome this particular hurdle, and the rewards of properly implementing PBL are definitely worth the effort! Proponents of PBL laud its ability to make learning “stick.” When students are engaged in truly authentic, meaningful experiences that allow them to explore real world issues in a hands-on way, they become inspired and may inspire others. From launching future careers to connecting students more closely with their communities, good PBL can sometimes seem nothing short of miraculous. The impressiveness of PBL done well can also feed into the narrative that PBL is nearly impossible for teachers to do unless they have a ton of free time to plan, organize, and practice. It can all seem a little daunting at first. In truth, it’s simply different than other methodologies, and having the proper support and materials can make a world of difference.  

iBlocks PBL experiences, as I mentioned above, were designed to alleviate this pain point for educators. Each iBlock is a series of activities, based on the engineering design process and project-based learning methodology, that engages students in a particular topic and culminates in a capstone project. Essentially, all the groundwork has been laid for the teacher – from standards alignment and sequencing, all the way to lesson plans and specific scaffolding ideas. Meant as supplements to existing curriculum, they typically take about 20-25 classroom hours to complete. Topics include rigorous STEM projects like building a telescope or programming a robotic athlete, as well as humanities-oriented projects like creating comic books or discovering Native American culture. There’s something for every grade level, K-12, and each iBlock is guaranteed to be transdisciplinary and work on transferable skills like SEL and 21st century skills. With this in mind, let’s look at what implementation looks like in an actual classroom.  

Implementing PBL at ACE Academy 

5 Dash robots dressed like animals on a desk with the Class Pet Student Workbook in front.
Dash robot “class pets” designed by ACE Academy 2nd graders

At ACE Academy in New York, one teacher was able to implement project-based learning with iBlocks – and not just for one class, but four different projects for four different grade levels, all at the same time! While it may sound like a superhuman feat, ACE Academy teacher, Joanne Baker-Smith, was able to accomplish it with help from iBlocks. This wasn’t her first experience with PBL in the elementary classroom, as having previously implemented PBL gave her a great basis for comparison. According to Baker-Smith, “having done PBL before, it was nice that the planning and materials were done.” Taking the weight off teachers’ shoulders is what iBlocks are all about. Take for example, standards alignment; because each part of an iBlock is aligned to state standards, teachers don’t have to worry about standards compliance. As Baker-Smith points out, that’s especially great for when an admin pops in to see how the new PBL unit is going! What’s more, for Baker-Smith, the materials lent themselves especially well to her ambitious goal of implementing four PBL experiences with four different classes ranging from second to fifth grade. “The layout of the materials and lessons is great,” she says, “I could tell that the person who created these had experience in the classroom. They follow a similar pattern, so it makes it easy to do with different grade levels.” Let’s look at the implementation process and the specific projects that ACE academy students were able to complete.  

Learning how to learn: PBL in second and third grade 

In her second-grade class, Baker-Smith implemented the Class Pet iBlock, which combines early biology concepts with robotics and coding for young learners. After learning about different types of animals that typically make good class pets, students explored their features, habitats, and needs. They then used this information to design a robotic class pet. To do so, they got into some block-based coding with Wonder Workshop’s Dash robot. “Students adored the addition of the tech,” says Baker-Smith, “they thought it was so cool.”  The students found using technology during PBL to be challenging, but ultimately, each group of students was able to decorate and program their class pet robot then show off their hard work in a robotic pet parade! In her third-grade class, students completed the Reimagining Public Transportation iBlock, designing and testing a maglev model train. “Finding the right magnets that would repel strongly was tricky,” says Baker-Smith, “but once we did it was great – students really enjoyed the hands-on components of it, and they learned a lot.”  

Model trains made from consumables on a desk with 2 completed pages of student design and reflection work.
Model trains and student design and reflection work.

Overcoming challenges and experimenting with technology is all part and parcel of an iBlocks experience. Part of the beauty of PBL is that students will invariably develop essential and transferable skills. Aside from gaining academic knowledge, it is so important for children to develop learning habits. Part of this process is developing critical thinking skills, learning how to solve a problem, how to work with others, and what to do when things don’t go according to plan. In this way, PBL taps into social-emotional learning and 21st century skills. After learning about the topics at hand, students got firsthand experience with problem solving on multiple levels. For the second graders, they had to get used to using new technology and also had the bigger challenge of integrating ideas like animals and robots. The third graders tackled the small problem of finding the right magnets, and the larger problem of designing, testing, and improving a model train that would alleviate public transportation issues. In both cases, students were able to overcome challenges through perseverance, and took the leading role in their own learning, which resulted in projects worthy of showing off.  

Adaptable academic rigor: the fourth and fifth grade PBL experience 

In the fourth-grade class, students were tasked with engineering a model home to complete the Tiny Houses iBlock. This project, like all iBlocks, is flexible in how it can be implemented. In the case of Tiny Houses, that flexibility includes how exactly students build their model home – they can use consumable materials or be a little more tech savvy with 3D design and printing. Using a program like Tinkercad can help students explore what’s possible in 3D design and can be used for virtual designs or paired with a slicer to print their creations. Taking the more high-tech option allowed for some additional academic opportunities for ACE Academy students. “Tinkercad is in millimeters,” says Baker-Smith, “doing that conversion [from metric to imperial] was a learning process for them, but it was really awesome.”  Finally, Ms. Baker-Smith’s fifth graders explored space in the Space Systems: Create a Model of an Eclipse iBlock. This time, Baker-Smith found it best to have students complete the project using a combination of consumable materials and 3D printing. After studying the science behind eclipses, students combined science knowledge with modeling and artistic skills to create and eventually film an eclipse model.  

Being flexible in terms of implementation means that iBlocks can adapt to the needs of any classroom. This is true of the content as well. Short on time? IBlocks are easy to pare down; as Baker Smith says, “you can even leave parts out because there is so much content there.” Want to add a little something extra? Each iBlock comes with extension modules and ideas for optional content. For ACE Academy, the addition of a stop motion video illustrating an eclipse was a crowd (and teacher) favorite. As Baker-Smith says, “Stop motion was not something I would ever have thought to do… so it was great to see how well it worked.” Not only does PBL open students up to new ideas and academic challenges, it helps educators try out unique ideas and even use those ideas in different contexts. PBL with iBlocks opens the door to new and exciting avenues of discovery for everyone.  


The main point to be taken from this experience is that it’s all about being hands-on and letting students lead the way. As shown from the iBlocks implemented at ACE Academy, subject matter can vary widely and certainly isn’t one-size-fits-all in either content or approach. While this can sound like a large task to coordinate, using iBlocks can make implementation not just accessible, but fun for educators and students alike. PBL is the type of learning that sticks with students long after the class is over. Good PBL, like learning itself, should grow and change with your needs and goals. Once you’ve experienced how transformative it can be, you’ll want to do it repeatedly, and with iBlocks, you can do just that. iBlocks are the perfect blend of adaptable and dependable, or as Baker-Smith puts it, “I think I will appreciate these even more next year, I’m definitely doing them again!”  


For more tips, tricks, and tools for teaching in and out of the classroom, check out more content on the Teq Talk blog or our YouTube channels OTIS for educators and Tequipment.

We also offer virtual professional development, training, and support with OTIS for educators. Explore the technology and strategies that spark student success — no matter where teaching or learning are happening!

Follow us on social:

  edteq           Twitter icon  OTIS4educators  |  Teq Products  |  iBlocks         facebook icon  OTIS4educators  |  MyTeq        LinkedIn icon  Teq 


The post How ACE Academy Implemented 4 PBL Experiences appeared first on Teq.

How School Districts Make Project-Based Learning Painless for Classroom Teachers

How School Districts Make Project-Based Learning Painless for Classroom Teachers

Sit in on any district leadership meeting and the vision sounds great: deeper thinking, student-led inquiry, authentic problem-solving. But walk down the hall into an actual classroom three months later, and you might see teachers right back at the whiteboard handing out standard worksheets. That disconnect is not because teachers dislike hands-on learning. Most believe in it wholeheartedly. The problem is pure bandwidth. When a district rolls out an authentic project-based learning curriculum by handing staff a blank PBL planning template, they are asking teachers to write an entire textbook series during their 45-minute prep period. It just does not work.

Teachers were hired to teach, not to spend their weekends building multi-week units out of thin air. When school districts shift the heavy design lift away from individual teachers and provide solid, classroom-ready materials, adoption actually happens. Here is how curriculum directors and school leaders can bring a rich STEM curriculum and project-based learning into schools without pushing good teachers toward the exits.

What is Structured Project-Based Learning?

Structured project-based learning (PBL) guides students through a clear, organized sequence where solving a genuine, messy problem is how they learn the standard in the first place. That is very different from “dessert projects,” like the classic shoebox diorama or poster board slapped onto the end of a unit after all the lectures are finished. In a structured PBL unit, the project is not a fun reward after the test. It is the curriculum itself.

Kids feel the difference right away. In a 2024 study by Gallup, over half of K-12 students said they regularly feel bored and disengaged at school, but 46% said hands-on projects instantly pull them back in. And this approach does not sacrifice test scores for fun. Research led by Saavedra and published by Lucas Education Research (2021) showed that students in well-structured PBL classrooms scored 8 to 10 percentage points higher on AP exams than classmates who learned through traditional lectures. Hands-on work and real academic rigor actually go hand in hand.

Teachers Spending Too Much Time Designing PBL Units: How to Fix It

To stop teachers from spending too much time designing PBL units, districts have to stop handing them blank templates and instead provide complete, 10-module units that include pre-built pacing guides, clear standards alignments, and daily lesson plans.

Every veteran educator knows the cycle: attend an energetic professional development session, get a link to a blank planning template, and suddenly face 30 hours of unpaid weekend work trying to turn an idea into daily lessons. Teachers have to write driving questions, align state standards, design rubrics, and source materials. A study in the Electronic Journal for Research in Science & Mathematics Education found that while secondary STEM teachers understand and support PBL, 68% rarely use it simply because the prep time is overwhelming. When districts give teachers complete, ready-to-run instructional materials, that barrier disappears. Teachers can stop acting like solo curriculum publishers and spend their energy coaching students.

Reducing Lesson Planning Burden for STEM Teachers District-Wide

Reducing the lesson planning burden for STEM teachers across a district comes down to two things: giving them consistent instructional pathways across grade levels and choosing materials that work with the tools and supplies schools already have.

STEM educators have one of the toughest prep loads in any school. In a single afternoon, a science or tech teacher might need to prep safety goggles, untangle cables, troubleshoot finicky 3D printers, and figure out how to weave Next Generation Science Standards with math and computer science benchmarks. Districts take that pressure off when their curriculum does not depend on expensive or finicky hardware. A good project should work just as well with cardboard and masking tape as it does with an advanced robotics kit. Linking those projects directly to classroom software like Google Classroom also takes care of digital portfolios and rubric scoring, saving teachers from drowning in paperwork.

How to Make Project-Based Learning Easier for Teachers to Implement

The simplest way to make project-based learning easy for teachers is to give them a complete two-part system: clear, scaffolded workbooks for students, and practical, annotated facilitation guides for teachers.

Projects fall apart when expectations get murky. If students do not know what they are supposed to produce each day, classes quickly spiral into chaos. Anchoring every project in a consistent framework, like the four stages of the Engineering Design Process (Research, Design, Test, and Showcase), gives kids and teachers a familiar routine. Students know what comes next, which keeps them on task. Built-in, 4-level self-assessments (Emerging, Progressing, Proficient, and Exceeding) also encourage students to evaluate their own work and give each other feedback, taking a mountain of grading off the teacher’s desk.

A 4-Step Framework for Painless PBL Deployment

Districts that get project-based learning right without burning out their staff tend to follow four practical guidelines:

  1. Use Ready-to-Teach Materials: Ditch the blank templates. Give teachers fully developed units with clear skills matrices showing exactly how each project milestone connects back to grade-level standards.

  2. Stick to the Engineering Design Process: Walk students through four clear stages: Research and Planning, Design and Construction, Testing and Learning, and Presentation. When the rhythm is predictable, kids stay focused.

  3. Give Students and Teachers Matching Guides: Students need clear workbooks and graphic organizers to document their thinking. Teachers need practical facilitation notes with pacing tips, troubleshooting advice, and answers to common student hurdles.

  4. Keep the Digital Side Simple: Rely on platforms that hook right into tools teachers already use, like Google Classroom. That makes sharing assignments, reviewing portfolios, and recording grades painless.

The Turnkey Solution: Leveraging iBlocks for Scale

Instead of asking teachers to invent projects on their own time, many districts rely on developed programs like iBlocks, built by the instructional team at Teq. Written by former educators with over 125 years of combined classroom experience, iBlocks was designed specifically to solve the prep-time crunch that causes so many PBL initiatives to fizzle out.

Included in an iBlock is exactly what the teacher needs: classroom-tested components so they never have to scramble during planning periods.

  1. Skills Matrix: A clear pacing roadmap that links project skills across subjects.

  2. Curriculum Framework: A standards-based outline covering every project objective and milestone.

  3. Student Workbook: Printed or digital inquiry logs, organizers, and self-checks for every activity.

  4. Teacher Guide: Detailed day-by-day facilitation prompts, checkpoint questions, and pacing advice.

  5. Student Self-Assessments and Rubrics: Practical rubrics that help students reflect on problem-solving, teamwork, and critical thinking.

  6. Lesson Plans: Practical daily guides mapped specifically to standard 30- to 45-minute class periods.

Because demanding specific gadgets creates equity problems, iBlocks projects are hardware-agnostic. They work seamlessly whether a school has high-end maker gear, basic laptops, or just standard classroom supplies. Teachers also get digital support through iBlocks Online, which integrates with Google Classroom for pacing and rosters, plus have the option to invest in flexible online training through OTIS for educators. For administrators managing budgets, the pricing is refreshingly straightforward: a one-time purchase without recurring per-student subscription fees, although a subscription is also available.

Conclusion

If districts want project-based learning to actually happen in classrooms, they have to support the people teaching it. Moving away from blank PBL planning templates and providing a structured project-based learning curriculum alongside a flexible STEM curriculum gives students real hands-on inquiry without running teachers into the ground. When teachers have clear lessons, organized workbooks, and solid facilitation guides in hand, project-based learning turns from a stressful mandate into something teachers and students genuinely look forward to every week.

Ready to bring practical, low-stress PBL to your schools? Explore iBlocks modules or connect with an instructional specialist to preview turnkey units aligned with your grade levels and state standards.

Hybrid STEM Learning: Combining Physical Student Workbooks with Online Digital Delivery

Enhance your classroom with a hybrid STEM curriculum. Discover how combining physical student workbooks and project based learning materials boosts retention.

Many K–12 districts are taking a hard look at the all-digital classroom. Software and laptops make grading and distribution easy, but when students spend all day staring at screens, attention wanes and real comprehension takes a hit. That is why so many schools are shifting toward hybrid project-based learning (PBL). By combining tangible project based learning materials (like robotics kits, building supplies, and printed student workbooks) with an online learning portal, educators give students the hands-on practice they need without losing the convenience of digital tools.

What is Hybrid STEM Learning?

Hybrid STEM learning is an instructional model that combines hands-on engineering activities and physical paper workbooks with an online platform. Instead of forcing teachers to choose between isolated paper worksheets and all-digital screens, hybrid PBL blends both worlds. Students get the cognitive benefits of physically drawing schematics, taking notes, and assembling prototypes, while using digital tools for video tutorials, research, team collaboration, and automated rubric grading.

The Neuroscience of Tactile Note-Taking and Prototyping

Recent brain research and developmental psychology studies offer clear evidence for why physical handwriting and sketching still matter in STEM.

Neural Synchrony and Memory Encoding
Writing by hand lights up the brain’s sensorimotor and visual systems at the same time, coordinating physical hand movement, touch, and sight. An EEG study from the Norwegian University of Science and Technology, published in Frontiers in Psychology, found that handwriting produces significantly higher neural synchrony than typing on a keyboard. In particular, it boosts theta-band activity across the parietal and central areas of the brain. Theta waves are rhythmic electrical pulses that fire when the brain is actively absorbing, connecting, and locking in new information. When these parietal and central regions (which process sensory feedback and body movement) sync up, students build deeper, more durable memories of the material.

Visual Synthesis in STEM
STEM challenges often require students to map out logic paths, plan how components will move and connect, and sketch prototype iterations. Research in Instructional Science found that while typing on a laptop encourages students to copy down words mindlessly, taking notes by hand pushes them to draw concept maps, diagrams, and visual summaries. That physical sketching is essential for developing spatial reasoning and understanding how parts fit together.

Attention and Cognitive Load
A 2026 brain imaging study in Frontiers in Education (Shin et al.) showed that pen-based note-taking generates markedly higher alpha, beta, and gamma power in the occipital region (the visual processing hub at the back of the head) than working on a laptop. These frequencies indicate active, sustained visual focus, showing that students are genuinely paying attention rather than zoning out. Backing this up, a broad meta-analysis from the University of Nevada, Las Vegas covering 42 separate studies confirmed a clear recall advantage for students who write by hand compared to those who type.

The Complementary Value of Digital Management Platforms

Physical workbooks give students a distraction-free place to think and sketch, but digital platforms are where teachers manage workflow, media, and feedback.

Digital tools give classrooms access to interactive simulations, step-by-step video guides, and rich reference libraries that cannot fit in a printed booklet. As highlighted by EduDiv, online portals also support instant rubric grading, progress tracking, and timely teacher comments. Plus, students can easily record video walk-throughs of their physical inventions, log voice reflections, and share team portfolios.

Project Based Learning Platform With Print and Digital Workbooks

A project based learning platform with print and digital workbooks provides structured curriculum materials that combine physical design journals with an online hub for pacing, media submissions, and grading rubrics. For schools scaling PBL across multiple classrooms or grade levels, this dual format keeps instruction consistent without overburdening teachers.

iBlocks is built specifically around this dual-delivery approach. Rather than asking teachers to author multi-week PBL units from scratch in a generic LMS, educators can use the iBlocks search feature to browse dozens of ready-to-use curriculum pathways across grades K–12 by subject, academic standard, or classroom technology.

  • The Print Component: Full-color, grade-banded student workbooks guide learners step-by-step through the engineering design process, ideation, hand-drawn schematics, and physical prototyping without screen distractions.

  • The Digital Component: The companion iBlocks Online platform gives teachers centralized lesson pacing and student management. At the same time, students can submit milestone responses, upload build photos, link research sources, and review feedback against standards-aligned rubrics.

Conclusion

Pairing physical workbooks with a dedicated digital platform reduces screen fatigue while reinforcing retention through tactile writing and building. Bringing together physical sketching and digital management helps schools roll out project-based learning smoothly. As cognitive research highlights the benefits of handwriting and tactile design, hybrid learning offers a practical, grounded model for K–12 STEM education.

Ready to explore hybrid PBL for your district? Use the iBlocks search feature to browse customizable STEM pathways by grade and topic, or visit iBlocks.com to request a sample workbook and explore how iBlocks Online can support your classrooms.

Inspire Creativity and Invention with Rube Goldberg

Motivate your students to become inventors, artists, and problem solvers! Join Jennifer George, granddaughter of Rube Goldberg, for a series of courses on using Rube Goldberg Machines in any classroom.

This series of courses has something for everyone – from comic arts to Minecraft and technology integration. Get inspiration with any of these courses:

Rube Goldberg Machines in the Classroom
Tuesday, September 28, 3 PM, – Jennifer George, Cheryll Obendorf

In this session, Jennifer George and Cheryll Obendorf share how teaching Rube Goldberg in the classroom levels the playing field for all learners. They will talk about the history of the Rube Goldberg Institute for Innovation & Creativity, the origins of the Rube Goldberg Machine, and the machine contests that the family has run for over 35 years. They will also introduce a variety of new offerings for all grade levels to get started on creating Rube Goldberg Machines. Join us to learn how Rube Goldberg competitions benefit students, specifically with social-emotional skills. Twelve live attendees of our Rube Goldberg OTIS series will be selected to receive Rube Goldberg early reader chapter books for their school libraries! Register for FREE here

Rube Goldberg Machines in the Digital World of Minecraft
Tuesday, October 5, 4 PM, – Jennifer George, Eric Leitner, and Cathy Cheo-Isaacs

Join the team from Rube Goldberg, Inc. and Minecraft Global Ambassadors as they discuss bringing STEAM into the digital world of Minecraft through Rube Goldberg Machines. They will discuss the minecraft.edu tutorials based on simple machines and how those lessons will culminate in a digital Rube Goldberg Machine Contest with NASEF, set in the world of Minecraft. You will also learn how Minecraft has provided a platform to support Rube Goldberg Machine projects for remote instruction. Twelve live attendees of our Rube Goldberg OTIS series will be selected to receive Rube Goldberg early reader chapter books for their school libraries! Register for FREE here

Rube Goldberg Machines and Cartoons in the Classroom
Tuesday, October 19, 3 PM, – Jennifer George, Ed Steckley, and Brandon Snider

Illustrator Ed Steckly and author Brandon Snider will join Jennifer George in this special OTIS session where they will announce the new Rube Goldberg Cartoon Competition, in association with the National Cartoon Society and the Reuben Awards. This session will also expand on the topic of Rube Goldberg Machines to talk about the books Rube Goldberg’s Hum-Drum School Day, Rube Goldberg’s Definitely Different Day Off, and the new chapter book series, Rube Goldberg & His Amazing Machines. This session is a great opportunity to learn how to directly tie reading and literacy, along with illustration and cartooning, into your STEAM curriculum. Twelve live attendees of our Rube Goldberg OTIS series will be selected to receive Rube Goldberg early reader chapter books for their school libraries! Register for FREE here

How to Integrate Technology into Your Rube Goldberg Machine
Tuesday, November 9, 3 PM – Jennifer George, David Fox, Alefiya Master

In this session, you’ll learn how students are adding technology to their Rube Goldberg Machines with products like littleBits and Arduino. You’ll hear from Paul Church, Science Chair at the Fieldston School in New York City, about how his students use Rube Goldberg Machines. David Fox, creator of the “Rube Works” app, will talk about bringing the Rube Goldberg experience to an app in a fun and inspirational way. Alefiya Master from MAD-learn will talk about the importance of app development in STEM education. Twelve live attendees of our Rube Goldberg OTIS series will be selected to receive Rube Goldberg early reader chapter books for their school libraries! Register for FREE here

Rube Goldberg Machines with iBlocks
Tuesday, December 7, 3 PM – Jennifer George and the iBlocks team

Learn how to use the iBlocks framework to guide your students through the Engineering Design Process, first building context and understanding around Rube Goldberg, simple machines, and then how they come together in a Rube Goldberg Machine. IBlocks content leads students through the planning, design, and construction of their machine and finally, the testing and evaluation, where students learn the importance of refining, remixing, and redesigning. Register for FREE here

How Rube Goldberg Adds the “A” to STEAM Learning
Tuesday, December 14, 3 PM – Jennifer George, Jason Chatfield, Charlie Kochman

Join comedian, cartoonist, and President of the National Cartoon Society, Jason Chatfield, and Editorial Director for Abrams Comic Arts, Charlie Kochman, to learn how Rube Goldberg adds the “A” to STEAM learning. Jason, Charlie, and Jennifer George will discuss the flexibility of Rube Goldberg Machines and cartooning, as well as how they are great entry points for you to blend STEM learning with visual arts in a way that makes sense for you and your students. In this session we will also announce our raffle winners! Twelve live attendees of our Rube Goldberg OTIS series will be selected to receive Rube Goldberg early reader chapter books for their school libraries! Register for FREE here


About Jennifer George

Jennifer George is the granddaughter of Rube Goldberg, the famous cartoonist known for his cartoons depicting hilarious and overly elaborate machines. She is the Legacy Director of Rube Goldberg, Inc., a non-profit foundation committed to equitable access to STEAM education. Jennifer is focused on keeping the world of Rube Goldberg alive through numerous projects including the annual Rube Goldberg Machine Competition, publications, events, entertainment, and more.

Check more at: RubeGoldberg.com

The post Inspire Creativity and Invention with Rube Goldberg appeared first on Teq.

Integrating Coding, Robotics, and AR/VR into K-8 Project-Based Learning

K-8 school districts face an urgent mandate in 2026 to equip students with future-ready engineering, digital literacy, and computational thinking skills. However, simply purchasing standalone hardware—such as 3D printers, coding kits, and virtual reality headsets—often leads to low adoption rates among educators. To drive measurable gains in STEM proficiency, schools must transition from hardware procurement to purposeful project-based learning (PBL) pathways. By embedding emerging technologies into applied curricula—such as engineering Rube Goldberg machines—administrators can drive meaningful technology adoption and boost student achievement.

What is Turnkey PBL Integration?

Turnkey PBL integration integration pairs hands-on makerspace hardware with ready-to-teach, standards-aligned STEM curriculum. Rather than asking classroom teachers to design multi-week units from scratch, turnkey systems provide a complete instructional framework out of the box. This includes structured student workbooks, comprehensive teacher facilitation guides, lesson plans, and assessment rubrics. By grounding technology in real-world problem-solving, turnkey PBL turns classroom technology into a daily tool for learning rather than a short-lived gimmick.

The EdTech “Shelfware” Crisis in 2026

Buying classroom hardware without a curriculum is one of the most expensive ed tech mistakes a district can make. According to recent 2026 analyses by AOFIRS and the Education IT Reporter, roughly 67% of software licenses and specialized makerspace hardware go unused or underutilized in American schools.

This “shelfware” crisis stems from three core implementation barriers:

  • Cognitive Overload for Educators: Non-specialist teachers rarely have the time and bandwidth to independently align standalone hardware to Next Generation Science Standards (NGSS).

  • Hardware Outpacing Curriculum: Expensive robotics kits and makerspace tools are often unboxed for introductory demos or quick activities, then forgotten about in storage closets once the initial novelty fades.

  • Assessment Gaps: Without clear skill rubrics and concrete student workbooks, teachers struggle to measure and grade open-ended STEM learning.

Conversely, when technologies are properly integrated into PBL frameworks, the academic outcomes are substantial. For instance, a 2026 meta-analysis published in MDPI Applied Sciences found an average 23.4% increase in student conceptual understanding when Extended Reality (XR) was integrated into structured STEM models. The takeaway for school leaders is clear: whether students are testing physical robotics or engaging with immersive digital tools, integrated tech deepens learning across disciplines.

An Evidence-Based K–8 Learning Progression

A primary driver of the edtech shelfware crisis is the lack of vertical alignment—schools buy hardware without a plan for how skills build from grade to grade. Effective turnkey PBL solves this by providing a research-backed, progressive continuum:

Grades K-2: Unplugged Scaffolds & Tactile STEM

Computational thinking begins before students ever touch a screen. Research from the International Conference of the Learning Sciences (2025) emphasizes that implementing pre-coding scaffolds—like paper-based planning sheets and flowcharting workbooks—significantly reduces learner frustration. Pairing these offline tools with tactile robotics and basic augmented reality (AR) overlays builds core algorithmic sequencing and spatial skills early on.

Grades 3-5: Sensor-Driven Computing & Logic

Educational robotics yields maximum cognitive gains when students transition from basic motor control to sensor-driven, closed-loop systems. According to the International Journal of STEM Education, middle-grade learners excel when integrating ambient light triggers, ultrasonic distance sensors, and infrared line trackers. This phase embeds conditional logic, loops, and physical data collection directly into the student’s problem-solving toolkit.

Grades 6-8: Microcontrollers, Prototyping & AR

In middle school, students transition from basic robotics to engineering real-world solutions using microcontrollers, sensors, and hybrid block-to-text coding. Immersive technologies complement this hands-on work by helping students visualize abstract concepts. A comprehensive 2025 review in Education and Information Technologies confirmed that tablet-based Augmented Reality allows students to visualize invisible phenomena like magnetic fields and kinetic energy vectors directly within their physical prototypes. Integrating these digital simulations with physical hardware gives middle schoolers a dynamic environment for testing, debugging, and building foundational knowledge.

A Model Capstone Implementation: The Rube Goldberg Challenge

When a district establishes a clear K–8 progression, students don’t just learn isolated technology skills—they synthesize them through comprehensive engineering projects.

One of the most effective ways to synthesize coding, robotics, and physical engineering is to leverage an interdisciplinary capstone project. When students design a Rube Goldberg machine, using STEM technologies, they seamlessly blend Next Generation Science Standards with computer science benchmarks. Hardware is actively used rather than collecting dust in a storage closet.

A successful Rube Goldberg challenge guides students through a disciplined, five-phase engineering workflow:

  1. Research & Inquiry: Students explore simple machines and kinetic/potential energy transformations, calculating momentum transfer across inclined planes, pulleys, and levers.

  2. Blueprinting & Documentation: Design constraints are defined and documented within structured student workbooks to cultivate scientific documentation skills.

  3. Tech Hybridization: Teams construct physical chain reactions and code robotic triggers using microcontrollers (e.g., Arduino, micro:bit) that execute conditional actions upon physical collision.

  4. Iterative Debugging: Students systematically isolate mechanical and algorithmic failures, testing their designs to optimize physical tolerances.

  5. Community Showcase: The project culminates in a demonstration event where students present their multi-step mechanisms and self-assessments to an authentic audience.

Overcoming Implementation Barriers with iBlocks

Bridging the gap between disparate hardware and a fully structured capstone requires a cohesive system. iBlocks (by Teq) provides a turnkey K-12 Project-Based Learning ecosystem designed specifically to eliminate implementation hurdles for school districts.

Rather than leaving educators with unguided makerspace materials, iBlocks anchors physical tools inside authentic inquiry. An empirical evaluation in Frontiers in Education (2026) revealed that while students show high behavioral intent to use AR/VR tools (4.40/5.0), standalone hardware ranks lower in perceived ease of use (3.71) without structured teacher facilitation. iBlocks solves this gap by providing comprehensive scaffolding for both the student and the educator.

District Pain Point

The iBlocks Turnkey Framework Solution

Curriculum Alignment

Delivers fully articulated, grade-sequenced pathways, and skills matrices aligned to NGSS, ISTE, and state standards.

Student Scaffolding

Provides dedicated print and online workbooks guiding research, logic diagramming, and self-assessments.

Teacher Readiness

Equips non-specialist educators with comprehensive lesson plans, pacing guides, self-assessment rubrics, and integrated PD.

Hardware Utilization

Weaves existing robotics, 3D printing, and AR/VR directly into cross-curricular capstones (e.g., the Rube Goldberg Machine Sample iBlock).

Conclusion

The true educational value of emerging technology is unlocked through systematic, project-based inquiry. By shifting away from fragmented hardware purchases and embracing turnkey solutions like iBlocks, school districts can ensure their ed tech investments directly impact student achievement. Implementing well-structured pathways—such as dynamic Rube Goldberg projects—transforms abstract physics and coding concepts into highly engaging problem-solving experiences that narrow STEM achievement gaps and prepare K-8 learners for a technology-driven future.

Making Learning Click: A Look at Project-Based Learning in the Elementary Classroom

As educators, we’ve all seen that specific look on a student’s face where they aren’t just doing schoolwork but are lost in a problem they’re excited to solve. That shift from passive listening to active learning is the heart of Project-Based Learning (PBL). Let’s take a look at project-based learning in the elementary classroom! People sometimes talk about PBL like it’s some trendy new method, but honestly, it’s just how kids naturally learn. While traditional lessons were met with silence, hands-on projects transformed my classroom into a hub of activity. Suddenly, students were buzzing with questions, arguing over ideas, testing things out, and proudly showing me every discovery. It reminded me of the old-school science fairs, except now the excitement was happening right inside the classroom instead of once a year.
What Exactly Is PBL? (It’s Not Just a “Poster Project”)
It’s common to confuse traditional projects with project‑based learning, but the difference is more significant than most people realize.
  • The Traditional Project: You teach a unit on photosynthesis, and at the very end, students make a poster of a leaf. The project is the focus.
  • Project-Based Learning: You start with a real-world meaningful question such as “How can we design a garden that feeds local butterflies?” Students gain science, math, and literacy skills as they work to answer questions. The learning process is the focus, and the project is the final step.
The Core Pillars of Project-Based Learning in the Elementary Classroom
For a project to be true PBL, it needs a few specific features, including:
  1. A Driving Question: This is the hook. It needs to be open-ended and challenging.
  1. Sustained Inquiry: This isn’t a one-period activity. It’s a process of several weeks where kids research, plan, and test ideas.
  1. Authenticity: The work must be meaningful. Writing a letter to the principal about a real school issue feels a lot more important than writing a practice essay for a letter/number grade.
  1. Student Voice and Choice: When students are allowed to decide how they solve a problem, they take ownership. One group might make a video while another might build a physical model.
  1. Public Product: This is the magic moment. Instead of handing a paper to the teacher, students present their findings to an audience.
Why Does It Work for Younger Kids?
The natural curiosity of young students makes it the perfect time to implement project-based learning in the elementary classroom. They want to tinker, experiment, break objects apart, and put them back together. It changes the narrative from “When am I ever going to use this?” to “I need to learn how to measure my prototype because my birdhouse won’t 3D print properly if my math fails.”
  • Social-Emotional Growth: Students learn how to work collaboratively and solve conflicts, how to delegate tasks, and how to bounce back when their first idea fails.
  • Differentiated Learning: Because projects are often complex, there is room for every type of learner. The student who struggles with writing might lead the design phase, while the strong reader handles the research.
  • Memory Retention: We remember what we do. A student might forget a worksheet on the water cycle, but they’ll never forget the time they built a filtration system to clean polluted water.
iBlocks – A PBL Solution
iBlocks are a fantastic solution for elementary schools because they take the guesswork out of project-based learning. They provide structured, out-of-the-box units to make learning meaningful and fun. Each iBlock includes ten standards-aligned modules that guide students through hands-on, real-world challenges, such as building a Rube Goldberg Machineor designing a Tiny House. These solutions save teachers hours of prep time while ensuring the lessons are educationally sound. Since these units focus on student-led discovery, they naturally build essential life skills like critical thinking, collaboration, and creativity in a way that feels like play. Kids become so immersed in solving the problem that they develop critical thinking and collaboration skills without even realizing it. Because the work feels like play, concepts stick in a way that traditional worksheets simply can’t match. Project-based learning isn’t about ignoring the standards; it’s about uncovering them through active inquiry and diving into the curriculum. There might be some hurdles along the way, but they are essential to the learning process. The first time my class tried this, it was a bit of a disaster. We ran out of tape, two groups couldn’t agree on a design, and I wasn’t sure we’d finish. However, that’s actually when the best learning happened. By tackling real-world problems, students gain 21st-century skills to prepare them for future careers. Learn, grow, and succeed through iBlocks project-based learning solutions!
For more tips, tricks, and tools for teaching in and out of the classroom, check out more content on the Teq Talk blog or our YouTube channels OTIS for educators and Tequipment. We also offer virtual professional development, training, and support with OTIS for educators. Explore the technology and strategies that spark student success — no matter where teaching or learning are happening! Follow us on social:

  edteq           Twitter icon  OTIS4educators  |  Teq Products  |  iBlocks         facebook icon  MyTeq        LinkedIn icon  Teq 


NGSS and CSTA Alignment in PBL: Implementing 3-Dimensional Assessment and Capstone Rubrics

NGSS and CSTA Alignment

As school districts and state education agencies accelerate the integration of STEM disciplines in 2026, instructional coaches and curriculum directors face a critical challenge: ensuring project-based learning (PBL) curricula deliver genuine academic rigor. Evaluating whether a PBL unit meets dual requirements for science and computer science standards requires looking past surface-level engagement. A rigorous curriculum must intertwine the Next Generation Science Standards (NGSS) and the recently updated CSTA K–12 Computer Science Standards. By utilizing a complex interdisciplinary engineering challenge—such as designing an automated Rube GoldbergTM mechanism—educators can architect instructionally embedded, standards-validated capstone assessments.

What is 3-Dimensional Assessment in Project-Based Learning?

Three-dimensional (3D) assessment is an instructional framework that simultaneously measures a student’s proficiency across three distinct domains of science education. According to the National Research Council (NRC) Framework for K–12 Science Education, genuine scientific literacy requires the integration of Disciplinary Core Ideas (DCIs), Science and Engineering Practices (SEPs), and Crosscutting Concepts (CCCs).

To effectively measure 3D learning in a PBL environment, curricula must utilize Evidence-Centered Design (ECD). Pioneered by researchers at SRI International and the Stanford NGSS Assessment Project (SNAP), ECD ensures that every task elicits specific, observable evidence of multidimensional knowledge.

In high-quality PBL curricula, traditional linear grading is replaced by phenomenon-anchored challenges. The Strengthening Claims-based Interpretations (SCILLSS) Project notes that assessing these domains requires multi-component prompts where students cannot succeed through rote memorization. As researchers from SRI International note: “Principled assessment design requires articulating learning performances… ensuring that every capstone task and rubric feature elicits direct, observable evidence of student mastery.”

Aligning PBL with 2026 CSTA Computer Science Standards

Computer science is rapidly shifting from an isolated elective track to a core component of interdisciplinary STEM. As outlined in the 2026 CSTA PK–12 Computer Science Standards, modern PBL units must seamlessly embed computational thinking alongside traditional science instruction.

Integrated PBL leverages the symmetry between the NGSS Engineering Design Process (ETS1) and CSTA Computational Thinking Practices. Successful implementations focus on four core strands:

  • Algorithms and Programming (AP): Constructing iterative control structures, parameterizing functions, and executing systematic debugging.

  • Computing Systems (CS): Integrating hardware components like actuators and microcontrollers with software routines.

  • Data and Analysis (DA): Collecting telemetry from sensors and transforming input values into operational variables.

  • Impacts of Computing (IC): Employing team-based project management, version control, and ethical design considerations.

Step-by-Step Exemplar: Designing an Automated Rube GoldbergTM Task

An exemplary capstone project that unifies physical science, engineering design, and computational thinking is an authentic Rube Goldberg task. In this challenge, students construct an elaborate, multi-step chain reaction to complete a simple end goal (such as watering a plant or releasing a latch).

Here is a guide to how a rigorous Rube Goldberg mechanism integrates both NGSS and CSTA standards across a three-stage progression:

Step 1: The Mechanical Stage (NGSS Focus)

Students design physical components utilizing simple machines and ramps. The focus is on energy transfer, specifically converting potential energy to kinetic energy.

  • Standard Alignment: NGSS MS-PS3-1 and MS-PS3-2 (Energy).

  • Actionable Evidence: Students must construct graphical models of kinetic energy relative to mass and speed, calculating thermal or sound dissipation losses during mechanical transfers.

Step 2: The Electro-Mechanical Stage (Cross-Curricular Synthesis)

The mechanism transitions from purely physical to electro-mechanical. For example, a rolling steel marble ultimately closes a physical circuit switch.

  • Standard Alignment: NGSS MS-PS3-3 and CSTA 2-CS-02 (Hardware and Software Integration).

  • Actionable Evidence: Students create annotated circuit schematics detailing how the physical event successfully triggers an electronic response.

Step 3: The Automated Microcontroller Stage (CSTA Focus)

A microcontroller reads the closed switch and runs conditional algorithmic code to trigger a servo motor, continuing the chain reaction automatically.

  • Standard Alignment: CSTA 2-AP-12 and 2-AP-13.

  • Actionable Evidence: Students design nested loops and compound conditionals (e.g., “IF the marble breaks the infrared beam AND the light sensor reads low, THEN activate the motor at 90 degrees”).

How to Implement Multidimensional Capstone Rubrics

Evaluating these complex intersections requires criterion-referenced, multidimensional rubrics compliant with the Achieve EQuIP Rubric for Science. Traditional compliance-based grading must be replaced with scales that measure simultaneous dimension mastery.

A proficient capstone defense for an automated mechanism requires specific evidence across categories:

  • NGSS DCI (Physical Science): The student accurately identifies and explains potential-to-kinetic energy transformations across each stage with clear causal logic.

  • NGSS SEP (Engineering Design): The student iterates mechanical components based on observed failure points and documents design adjustments across multiple trials.

  • CSTA Algorithms & Programming: The student successfully implements conditionals and loops to trigger electronic actuators based on physical sensor inputs.

  • Cross-Curricular Synthesis: The student delivers an articulate, evidence-backed technical defense explaining mechanical efficiency, code logic, and team iteration history.

Evaluating Turnkey PBL Solutions for District Scalability

Designing custom, standards-validated 3D capstone units requires hundreds of hours of curriculum mapping per teacher. To bridge this implementation gap in 2026, curriculum directors are turning to comprehensive systems like iBlocks (by Teq).

When evaluating turnkey PBL solutions, district leadership should utilize this strategic checklist:

  1. Explicit 3D Element Tagging: Ensure instructional materials delineate exact bulleted elements of the DCI, SEP, and CCC within lessons, rather than merely listing broad standard codes.

  2. Instructionally Embedded Formative Calibration: Look for embedded diagnostic rubrics that alert teachers to student misconceptions before the high-stakes final capstone build.

  3. Turnkey Material Coherence: Validate that hardware, such as microcontrollers and simple machine kits, aligns perfectly with pre-written student workbooks and teacher guides.

  4. Authentic Computational Problem-Solving: Verify that coding tasks interface with physical environments and scientific phenomena, moving beyond gamified on-screen coding exercises.

As an industry leader in K–12 Project-Based Learning Curriculum, iBlocks addresses these specific needs by providing pre-packaged, grade-sequenced units that seamlessly marry NGSS 3D learning performances with CSTA computational thinking benchmarks. By utilizing turnkey capstone evaluation frameworks and structured scoring guides, scalable solutions like iBlocks ensure that assessment integrity remains uniform across every classroom.

By insisting on multi-dimensional assessment and leveraging high-fidelity curricula, educational leaders can ensure their STEM programs provide rigorous, authentic preparation for the complexities of modern engineering and computer science.

PBL Is Not PB&J

In writing about project-based learning and using the initialization PBL, we could not help but think of our favorite lunch, which is a peanut butter and jelly sandwich, otherwise known as a PB&J. Despite the similarity in abbreviations, the two are quite different (and not just because one is a sandwich).   Think of a PB&J, what words come to mind? Conceptually, it’s a very common and basic object — not unlike a traditional classroom routine.  Just like the sandwich, it works well and gets the job done.  But, when you take a fresh look at your classroom and implement the project-based learning model, you now create a classroom of executive chefs capable of creating any meal you desire! Where PB&J is pedestrian, PBL is gourmet.

When using the PBL model in your classroom you are looking to put the learning into the hands of your students. Now, we know what you’re thinking, that you cannot just give kids the keys to the car and expect them to be expert drivers. There is involvement on your part and that is to create a project that is focused on student learning goals framed by a meaningful problem to solve or question to answer.

After that, you must provide specific guidance as to what is expected and then leave the rest up to your students. When the students are excited to tackle a meaningful problem with possible real world context, and where they get to make some decisions about the project, it increases the effectiveness of the project.

Research has shown that project-based learning can increase student motivation and retention.1 With all the technology that has entered the classroom in recent years, it gives students and teachers alike something that they can both work with to create a meaningful presentation.  They will develop a deeper understanding being a part of the creation process and teaching others about it. Here are a few reasons why PBL helps motivate students.

Students are able to gain control of their work by becoming involved in the conception to completion process.  The classroom becomes a collaborative community in which students work together sharing ideas on real world problems.  The students become more active— physically and mentally, while being encouraged to test, tinker, and create. With PBL, we give our students the time, space, and support they need to persevere, learn, and succeed. They in turn, develop passion and grit as lifelong learners.2

Let’s be real, you won’t remember the difference between a PB&J you ate years ago as compared to the one you ate most recently, but you will remember when you had that grilled chicken with pesto and melted mozzarella on fresh ciabatta bread!  Similarly, when we think back to our schooling days, we tend not to remember all the textbook material or lectures that were presented to us.  But we bet you remember that project you worked extra hard on and were so proud to display, the problem you solved, or the time you got to learn something hands-on. The gourmet sticks with us – whether it’s on a menu or in the classroom.


For more tips, tricks, and tools for teaching in and out of the classroom, check out more articles on the Teq Talk blog.

We also offer virtual professional development, training, and remote learning support for educators with OTIS for educators. Explore the technology, tools, and strategies that can spark student success — no matter where teaching or learning are happening.


The post PBL Is Not PB&J appeared first on Teq.

Scaling the Magic: How to Implement Project-Based Learning at the District Level   

We’ve all seen that one rockstar teacher who creates an incredible project-based learning (PBL) experience in their classroom. The kids are buzzing, the parents are thrilled, and the results speak for themselves. But then the bell rings, the year ends, and all that magic stays trapped inside one single classroom. The challenge, as well as the real opportunity, is figuring out how to take that spark and turn it into a district-wide fire. Scaling PBL isn’t a matter of increasing the project count; it’s about completely redefining our approach to education. Discover how to successfully implement project-based learning at the district level!
Phase 1: Build the “Why” Before the “How”
You can’t just send out a memo from the central office saying, “We’re doing PBL now,” and expect it to stick. If teachers view this as another passing trend, they will smile, nod, and quietly return to their traditional methods.

Create a Shared Vision:

Start by asking your most important stakeholders, including teachers, parents, and local business leaders, what a high school graduate truly needs. The answers rarely involve bubbling in a test sheet; instead, they focus on skills such as:
  • solving real-world problems
  • collaborating well as a team
  • thinking critically and creatively
Once everyone agrees that these real-world skills matter, PBL stops feeling like an add-on. It becomes an obvious path to get students where they need to go.
Phase 2: From Gatekeepers to Enablers
District leadership must shift from a compliance mindset to a support mindset. This is where the real impact begins.

Pacing Guides with Breathing Room:

If your pacing guides and curriculum deadlines are too rigid, teachers will prioritize coverage over spending three weeks on a meaningful project. To make PBL sustainable, give teachers the flexibility and permission to fully commit to deep project work.

Shift What You Celebrate:

We value what we measure! If standardized test scores remain the only benchmark for success, instruction will be driven by the exam. However, by celebrating student exhibitions, community presentations, and portfolios, we redefine what success looks like. If the goal is to cultivate well-rounded individuals rather than efficient test-takers, we must expand our definition of achievement.
Phase 3: Structured Support – The iBlocks Model
One of the biggest barriers to districtwide PBL is prep time. Asking hundreds of teachers to design their own 4‑week, standards-aligned, authentic projects from scratch is a recipe for burnout. This is where a structured solution like Teq’s iBlocks becomes a game changer. By providing ready-to-use PBL units, districts can:

Ensure Equity:

Every student receives access to high-quality PBL, regardless of which school they attend or which teacher they’re assigned.

Lower the Barrier to Entry:

Teachers who are nervous about PBL receive a clear, step-by-step roadmap. It’s like giving them training wheels while they build their confidence.

Standardize Quality:

The projects are aligned, rigorous, and instructionally sound, which streamlines administrative buy‑in and systemic support.
Phase 4: Focus on the “Messy Middle”
In my experience, district‑wide PBL initiatives often falter when leaders expect immediate perfection. I’ve seen it happen on many occasions throughout my career. There will be a messy middle where some projects will fall short, while others will brilliantly succeed. District leaders should act as “guides on the side” while supporting principals and teachers through these inevitable difficulties. If a project doesn’t go as planned, don’t panic. Instead, ask the students what they’ve learned from the experience of failure. Think of it as an opportunity to “fail forward.” It’s important to celebrate the risks, not just the polished outcomes.

Wrapping Up: The Long Game

Implementing project-based learning across a district is a marathon, not a sprint. It requires shifting away from a system that prizes covering content to one that focuses on uncovering student potential. The process won’t always be quiet, and it certainly won’t be neat. However, it’s exactly the kind of learning that prepares kids for a world without an answer key.
For more tips, tricks, and tools for teaching in and out of the classroom, check out more content on the Teq Talk blog or our YouTube channels OTIS for educators and Tequipment. We also offer virtual professional development, training, and support with OTIS for educators. Explore the technology and strategies that spark student success — no matter where teaching or learning are happening! Follow us on social:

  edteq           Twitter icon  OTIS4educators  |  Teq Products  |  iBlocks         facebook icon  MyTeq        LinkedIn icon  Teq 


Solving PBL Teacher Burnout: Why Turnkey Units Outperform Homegrown Curriculum

Solving PBL Teacher Burnout: Why Turnkey Units Outperform Homegrown Curriculum

Project-Based Learning (PBL) delivers proven gains in student engagement, critical thinking, and academic achievement. However, district-wide implementation frequently stalls for one primary reason: teacher burnout. When school systems require educators to build complex, cross-curricular PBL units from scratch—whether structuring an elementary community research project or figuring out how high school students will design a Rube Goldberg machine—teachers are forced to act as full-time instructional designers on top of their primary classroom duties. This guide provides educational leaders and curriculum directors with an evidence-based roadmap to alleviate educator prep exhaustion by transitioning from “DIY” curriculum to turnkey, standards-aligned instructional units.

What is the PBL Planning Deficit?

The PBL planning deficit is the unsustainable gap between the limited preparation time teachers receive and the excessive hours required to design authentic learning experiences. U.S. public school teachers currently receive an average of 266 minutes (about 4.4 hours) of dedicated planning time per week, according to recent 2026 data from the National Council on Teacher Quality (NCTQ).

Against this tight allocation, educators are heavily overburdened. Research synthesized by PBLWorks reveals that teachers spend an estimated 7 to 12 hours every week searching for or writing their own instructional materials. Because the RAND Corporation notes that nearly 50% of teachers regularly build curriculum materials themselves, mixing and matching disparate supplemental resources adds massive unpaid weekly planning time. This structural deficit is a primary driver behind the fact that over 60% of teachers report acute burnout, according to literature reviews by TNTP.

The Hidden Costs of Homegrown Curriculum

Designing authentic PBL units requires far more cognitive load than drafting a standard daily lesson plan. A teacher building a unit from scratch must simultaneously manage curricular architecture across Next Generation Science Standards (NGSS) and Common Core State Standards (CCSS), build scaffolding and differentiated student workbooks, and design multi-trait rubrics evaluating both core academics and durable skills.

Furthermore, teachers are forced to act as logistics managers, sourcing consumable materials and troubleshooting hardware like 3D printers and microcontrollers. As curriculum expert Dr. Candice Wilson notes in Avoid Asking Teachers to Be Curriculum Designers, forcing teachers to retrofit traditional materials or invent modules from scratch causes immense friction: “Talented educators spend countless hours on curriculum development instead of focusing on what they do best—teaching.”

Homegrown vs. Turnkey PBL: A Comparative Breakdown

When administrators evaluate curriculum models, the apparent cost savings of having teachers write units during professional development days mask steep hidden expenditures in substitute costs, teacher attrition, and instructional drift.

Critical Dimension

Homegrown (DIY) PBL Curriculum

Turnkey PBL Units

Teacher Prep Time

High (7–12 hrs/week building materials, worksheets, and rubrics).

Low (Already created for the educator).

Standards Alignment

Fragmented; often relies on unvetted online worksheets or superficial themes.

Explicitly mapped horizontally and vertically to NGSS, CCSS, and CTE pathways.

Cross-Grade Consistency

Highly variable between classrooms, grades, and schools.

Standardized frameworks and skills matrices ensuring equitable rigor across K–12.

Assessment & Rubrics

Inconsistent grading criteria; subjective evaluation of group artifacts.

Validated student self-assessments, formative checkpoints, and capstone rubrics.

Scalability & Sustainability

Vulnerable to staff turnover; when the author-teacher leaves, the unit disappears.

Permanent district asset; turnkey onboarding for new hires.

Vertical Scaffolding in Action: The Rube Goldberg Challenge

A persistent challenge with homegrown PBL is the “island effect”—an individual 4th-grade teacher may design an exceptional engineering project, but 3rd- and 5th-grade teachers may lack the capacity to build contiguous units, leaving students with gaps in skill acquisition.

Consider how schools approach the widely adopted Rube Goldberg challenge. When assigned as a homegrown project, this activity often deteriorates into unstructured trial-and-error with craft supplies, lacking rigorous academic grounding. In contrast, a high-quality, pre-packaged module structures the project into sequenced cognitive milestones across grade bands:

  • Grades K–2 (Foundational Mechanics): Students focus on pushes, pulls, gravity, and cause-and-effect to create a 3-step physical chain reaction.

  • Grades 3–5 (Energy Transfer): Content elevates to potential vs. kinetic energy and simple machines, culminating in a multi-stage mechanical contraption with precise measurement documentation.

  • Grades 6–8 (Integrated Physical Computing): Students integrate 3D printed components and digital sensors to build a hybrid mechanical/robotic apparatus solving a functional task.

  • Grades 9–12 (Advanced Systems Engineering): Projects incorporate applied physics, microcontrollers, and automated timing constraints, meeting client-defined parameters.

How iBlocks Solves the PBL Implementation Gap

To successfully mitigate prep exhaustion, schools must adopt High-Quality Instructional Materials (HQIM) that provide immediate infrastructure. Developed by Teq, iBlocks is a comprehensive, turnkey K–12 Project-Based Learning system designed specifically to resolve the tension between pedagogical rigor and educator workload.

The iBlocks ecosystem eliminates the need for midnight lesson planning by providing a complete instructional package for every unit. This includes a curriculum framework and skills matrix outlining all learning standards, step-by-step teacher facilitation guides, and differentiated intervention pathways. Instead of forcing teachers to figure out how to calibrate 3D printers or program robotics independently, iBlocks directly pairs thematic challenges with leading classroom hardware and software. Furthermore, scaffolded student workbooks, design logs, and standards-aligned performance rubrics guarantee that capstone projects blend cross-disciplinary learning effectively.

Administrator’s Guide: 3 Steps to Sustainable PBL Implementation

To successfully transition from exhausting DIY PBL to a sustainable turnkey model, district leaders should follow a structured three-phase rollout.

Phase 1: Diagnostic Audit

Calculate the hidden fiscal and human costs of homegrown curriculum. Survey instructional staff to identify exactly how many hours they spend weekly searching for supplementary project materials and modifying unvetted digital files. Identifying these curriculum gaps provides the data necessary to build consensus for a systemic change.

Phase 2: Turnkey Adoption

Shift teacher roles from “curriculum author” to “instructional facilitator.” Position turnkey resources not as restrictive scripts, but as instructional launchpads. High-quality materials free educators from the burden of building worksheets and answer guides, allowing them to redirect their energy toward small-group coaching, formative feedback, and student relationship building. This time also allows for the piloting of modular units (such as STEM or CTE blocks) and provides facilitator support.

Phase 3: Scale and Sustain

Avoid one-off classroom purchases that contribute to the island effect. Establish vertical Professional Learning Communities (PLCs) and adopt curriculum pathways that provide consistent terminology, rubric criteria, and engineering design loops from kindergarten through high school. Track student growth on assessment rubrics to scale successful units across all grade levels.

Conclusion

The transition from homegrown units to a comprehensive turnkey system is the most effective way to protect educator well-being while elevating student outcomes. Whether educators are facilitating a complex Rube Goldberg challenge or guiding a digital app development cycle, they deserve the structural support of pre-packaged, standards-aligned curriculum. By eliminating the structural deficit of PBL planning, districts can transform cross-curricular projects from isolated, exhausting teacher experiments into scalable, sustainable assets.

Starting the School Year Recycled

According to the United States Environmental Protection Agency, the average American produces 4.9 lbs of trash a day. Additionally, public schools are estimated to produce over 14,500 tons of waste every day across the United States, via earthday.org. These statistics are startling, and it’s easy to get overwhelmed. However, schools can make small and simple changes that can, over time, have profound effects on the environment. Make a commitment to reducing the amount of consumables used and start recycling in your classroom this year! Now, how exactly can you start the school year recycled?

Making changes in the classroom

Changing habits requires a mindset shift and thoughtful reflection. Consider what types of projects you plan on implementing with students during the upcoming school year. What materials are required to complete these projects? Where do you normally get these materials?

Next, consider what recyclable materials you could realistically use as substitutes for those materials. Some solutions include using cereal boxes instead of construction paper, recycling old packaging materials instead of purchasing new ones, and building with plastic bottles instead of paper. There are a lot of ways recycling can be used.
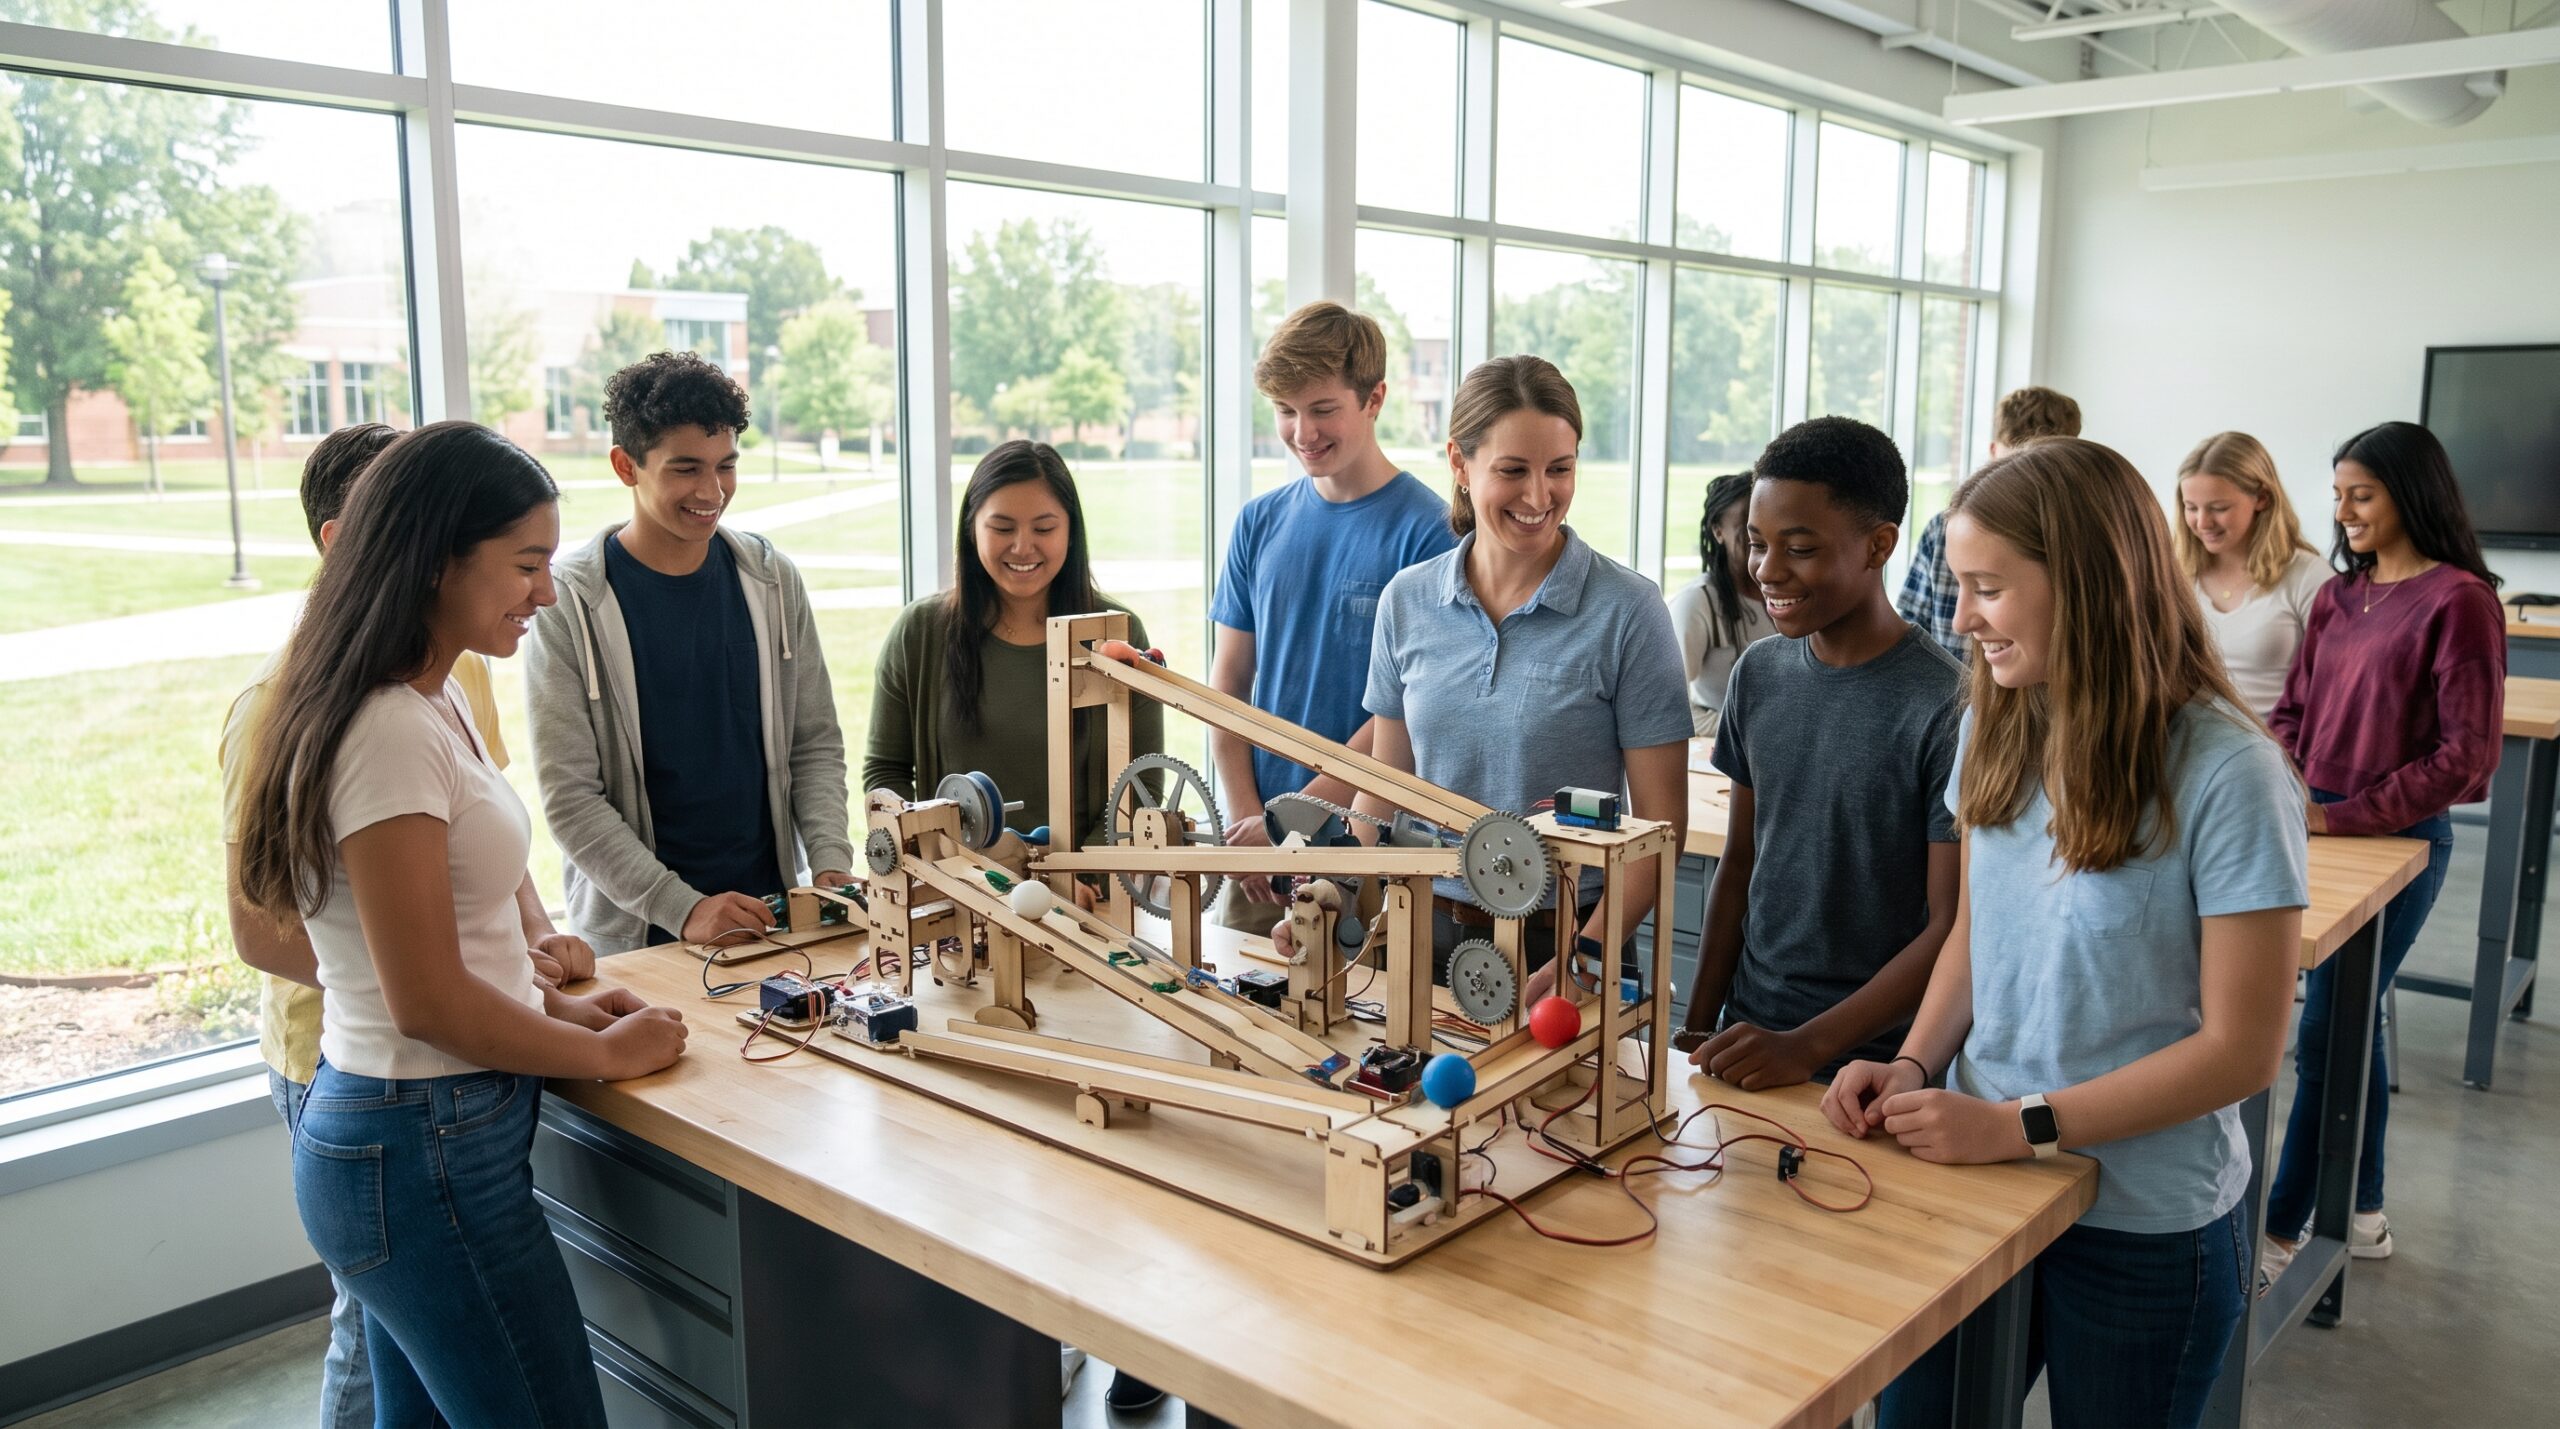
In terms of sourcing these materials, you can go about this a few different ways. You can ask students or staff to bring in different materials per assignment. You can also start building a repository of supplies that can be used throughout the school year. Don’t be afraid to involve the community as well. You’ll be surprised how local businesses may respond by donating!

Preparing your consumables

Not every supply will have a direct swap. It is important to think about what consumables you will need to purchase, and which ones are consumable and/or can be used multiple times.

Some supplies like tape or glue can be a little tricky, since they are used to piece everything together. In these cases, try a plant based-adhesive, such as ONYX & Green glue products, or other other eco-friendly swaps. Additionally, you can challenge students further by reducing the amount of adhesives required in a project to see what they come up with! Not only will this cut down on the use of materials, but it will also push students to think more creatively and problem solve.

School-wide storage

If you really want to create a school-wide initiative and get more teachers involved, consider creating a space where recycled materials can be stored for others to use. Real estate within school buildings is very valuable, so start small if you need to.

A storage bin, cart, or even a supply closet can suffice as a designated space for recycled materials. If supplies are readily available, teachers and students may start to see the benefits and great ideas that can come when they make a small, yet bold change.

Hopefully, you come up with some great ideas and activities when it comes to going green in your school or district. Check out the OTIS for educators site for more back-to-school tips and tricks, including this resource on how you can create a school-wide Recycling Project Action Plan.


For more tips, tricks, and tools for teaching in and out of the classroom, check out more content on the Teq Talk blog or our YouTube channels OTIS for educators and Tequipment.

We also offer virtual professional development, training, and support with OTIS for educators. Explore the technology and strategies that spark student success — no matter where teaching or learning are happening!

Follow us on social:

  edteq           Twitter icon  OTIS4educators  |  Teq Products  |  iBlocks         facebook icon  OTIS4educators  |  MyTeq        LinkedIn icon  Teq 


The post Starting the School Year Recycled appeared first on Teq.

STEM and Remote Learning in Early Childhood Education

When it was clear that remote learning was not going to be a short-term situation, we had to sit down and come up with a plan. As you know, creating a plan for early education, in any circumstance, requires careful and thoughtful analysis. With remote learning, we had to throw away many of our best practices and reinvent early education in way that was almost directly opposite to what we knew to be important and effective. In other words: how are we going to make sure our students receive the core values of early education from us, the classroom, and their peers… all through a screen?

Below, you will find several categories along with some solutions we’ve found to be helpful tactics for the current learning situation.

Delivery of instruction

The first thing we had to find a solution for was how we were going to deliver our lessons and instruction.
With a little brainstorming we can up with these solutions:

  • Video chat
  • Create YouTube or homemade videos
  • Digital tools like Google Classroom, Class Dojo, and Seesaw

STEM/Play choice board

The STEM choice board is a great way to engage students and to give them some control and ownership of their learning. It works much like a bingo board, and you can customize it to fit the activities you would like your students to accomplish. You can ask them to choose a few activities, or complete the whole board. While this is being presented as a remote learning solution, this is also a great way to bring student voice and choice to your classroom once you return to in-person instruction.

choice-board-image
For more information on student choice boards, check out our blog How to Create Engaging Choice Boards

Observations and documentation

As early educators we know one of the most accurate ways to evaluate our students is through observation. However, this can be challenging when not in the classroom with your students.

Here are some solutions we came up with:

  • Videos of your students engaging in their work
  • Submissions of non-digital work with Google Classroom
  • Play journals
  • Observing your students via video chat while they are engaged in their work

Group work

An important focus in early childhood education is social skills. Students learn how to navigate social situations through interaction and group work. This can be challenging in normal circumstances, but being in a remote environment poses a whole new challenge. Luckily, thanks to technology there are some great solutions for this — they’re also great ideas to keep using once you have returned to the classroom.

  • SMART Learning Suite Online
  • Collaborative work in Google Docs/Drawings
  • Breakout rooms
  • Small group meetings via video chat

At-home support

With so much learning now happening at home, we not only need to support our students, but also adults at home that are now assisting in the formal education. This can be quite overwhelming to a teacher who is already very busy. Below are some tips to help you manage this new responsibility without it taking up too much more of your time.

Materials and supplies

Not everyone has a classroom in their home, but students still need materials to create and learn. We know our youngest students learn best when they work with manipulatives and art materials, but how can we get these materials to our students? Explore some ideas below.

  • Get creative with the materials students are using
  • Create take-home play bags
  • Provide instructions around using recycled/common materials found around the house. For example, race cars or action figures can be used as math manipulatives, a toothbrush (not one they are currently using!) as a paint brush, and boxes and paper towel rolls as building materials. This may even inspire your students to be more creative or become interested in a new subject.

Whether you’re teaching from home, in the classroom, or practicing a hybrid learning model, these are just a few examples that you can use to make sure your students are learning the core values of early education while engaging in STEM fundamentals.

Further resources

For more information on any of the ideas discussed check out these resources:


For more tips, tricks, and tools for teaching in and out of the classroom, check out more articles on the Teq Talk blog.

We also offer virtual professional development, training, and remote learning support for educators with OTIS for educators. Explore the technology, tools, and strategies that can spark student success — no matter where teaching or learning are happening.

Teq is an experienced Google Workspace for Education Partner. If your school is purchasing Google Workspace for Education or Chromebooks, you may be eligible to receive free PD from Teq as part of the Google Service Offer program.

The post STEM and Remote Learning in Early Childhood Education appeared first on Teq.

Structured K-12 Project-Based Learning Programs

Structured K-12 Project-Based Learning Programs

Project-Based Learning (PBL) delivers proven academic benefits, but school districts face a systemic implementation challenge: pedagogical frameworks alone do not equal classroom-ready curriculum. According to recent educational reviews in 2026, when districts rely entirely on professional development (PD) workshops, teachers are left to build interdisciplinary units from scratch—often leading to high burnout and uneven adoption.

To achieve scalable, deeper learning across K-12 systems, curriculum committees are increasingly evaluating turnkey, commercial PBL alternatives to PBLWorks. This guide compares the leading structured PBL programs and provides an operational framework for selecting the right curriculum for your district.

What is the Difference Between PBL Frameworks and Turnkey Curricula?

A PBL framework provides the pedagogical theory and professional development for teaching through projects, while a turnkey curriculum provides the actual daily lesson plans, student workbooks, and assessments required for classroom execution.

Research demonstrates that structured PBL drives tangible results. A meta-analysis published by EasyClass AI (Chen & Yang, 2023) found that PBL produces an effect size of 0.441 on academic achievement, surpassing the standard 0.40 threshold for instructional efficacy. Furthermore, randomized controlled trials by the University of Southern California indicate that students in standards-aligned PBL courses outperform traditional peers by 8 percentage points (PBLWorks Research Synthesis).

However, the transition from theory to daily practice is where framework-only models struggle. Recent findings in the English Teaching and Linguistics Journal (2026) and Teaching Innovations (2025) identify major barriers to execution:

  • Excessive Prep Time: Teachers spend 30 to 50 hours designing a single authentic, interdisciplinary unit.

  • Assessment Complexity: Creating multi-criteria rubrics to measure both academic standards and durable skills is difficult for individual educators to scale.

  • Material Sourcing: Coordinating disparate physical tools, maker materials, and software licenses leads to logistical burnout.

Foundational organizations like PBLWorks have noted on the PBLWorks Blog that relying solely on PD workshops creates an unsustainable adoption timeline across the nation’s 4 million educators.

Review of PBL Options

1. iBlocks (by Teq): The Complete Turnkey Implementation Model

For districts seeking an out-of-the-box solution, iBlocks functions as an end-to-end PBL system that bridges pedagogical theory and daily classroom execution. Created by certified educators with over 125 combined years of classroom experience, the platform provides every structural artifact required for instruction without dictating proprietary hardware.

Every module includes a Skills Matrix mapping cross-curricular standards, an instructional framework, scaffolded student workbooks (print and digital), a step-by-step Teacher’s Facilitation Guide, and turnkey daily lesson plans. This architecture effectively removes the 40-hour curriculum development burden from educators, making district-wide K-12 PBL rollouts sustainable.

2. PBLWorks: The Professional Development Benchmark

PBLWorks remains the gold standard for teaching educators the underlying philosophy of deeper learning. Their offering is centered on professional development workshops and a digital unit platform. While excellent for districts prioritizing pedagogical coaching and teacher-led project design.

3. Defined Learning: The Digital Task Repository

Defined Learning offers a robust digital library of over 1,000 performance tasks spanning K-12 subjects. Its primary strength lies in career-connected tasks categorized by industry clusters with built-in rubrics.

4. Project Lead The Way (PLTW): The Specialized STEM Track

Project Lead The Way is a market leader for multi-year engineering and biomedical pathways. It offers a rigorous, highly standardized curriculum ideal for dedicated magnet programs and Career and Technical Education (CTE) tracks.

How Turnkey Solutions Improve Complex Engineering Units

The operational difference between theoretical frameworks and turnkey solutions is most visible when executing complex kinetic engineering challenges, such as Rube Goldberg projects.

In a framework-only approach, a teacher is given a driving question (e.g., “How can we build a machine to pop a balloon?”) but must independently generate the physics worksheets, calculate mechanical energy transfers, draft safety constraints, and source supplies.

Conversely, a turnkey solution like iBlocks provides a fully articulated Rube Goldberg design sequence aligned with NGSS and ELA/Math standards. Scaffolded student workbooks guide learners through the entire engineering design process—from problem identification and schematic drafting to iterative testing. This ensures that Rube Goldberg projects focus on academic mastery, such as kinetic energy calculations and failure-analysis documentation, rather than just chaotic building.

5 District Evaluation Criteria for PBL Adoption

When evaluating commercial alternatives to PBLWorks, district curriculum committees should assess solutions against these five operational pillars:

  1. Turnkey Usability: Does the program provide zero-prep student workbooks and daily teacher guides, or does it leave curriculum writing to the staff?

  2. Hardware Flexibility: Can the curriculum leverage the district’s existing technology investments (3D printers, micro:bits, robotics) without forcing proprietary hardware lock-in?

  3. Cross-Curricular Scope: Does the program cohesively integrate STEM, ELA, Math, and Social Studies into problem-based capstones?

  4. Teacher Enablement: Does the provider offer embedded facilitation support and pacing management to prevent implementation drop-off?

  5. Funding Versatility: Is the curriculum structured to qualify for diverse funding streams, including Title I, Perkins V (CTE), and summer learning enrichment grants?

Ultimately, the primary cause of PBL failure in K-12 districts is not a lack of teacher enthusiasm, but planning fatigue. By transitioning from framework-only professional development to comprehensive curriculum providers, school districts can ensure sustainable, scalable, and equitable deeper learning in every classroom.

Student-Made Gifts with Cricut

Student creating a project using Cricut cut out stencil

Students are constantly producing work and taking it home. This may happen less frequently in the upper grades, as students will sometimes bring home something like an art project.

However, there are many times when students will create projects to be sent home as a gift to family, friends, or caretakers on special occasions and holidays throughout the year. These occasions can be great opportunities for students to work on fine motor skills, artistic techniques, and practice handwriting or friendly letter writing. Additionally, this can provide a brain break from regular instruction.

Making the most of your time

Parents and caretakers love these handmade gestures, and some even save them for decades! On the teacher’s side of things, these projects can take a lot of time and commitment. From printing supplies to cutting out each individual piece for students, these lessons take a lot of preparation. Spending countless minutes with the industrial paper cutter worrying about accidentally cutting off a finger is not the best use of a teacher’s time. That’s where your Cricut can come in and be the real MVP of the preparation process!

Cricut is perfect for cutting out mass quantities of project materials without having to lift a scissor. You can use it to cut a wide-variety of things such as cardstock, sticker cardstock, felt, fabric, vinyl, and more. Simply design each piece in Cricut Design Space by adding your own elements or choosing from the available images, and choose the fonts, formatting, colors, etc. that you want.

Once everything has been formatted the way you want it to appear, proceed to the next step and actually make it! In the making stage, you can select the quantities of the project you need. Then, Cricut will automatically sort it onto the appropriate mats. Select the material type and follow the step-by step on-screen instructions to begin the cutting process. Make the most of your time and multitask by prepping other materials as the Cricut machine gets to work.

Cut out shapes such as pumpkins acorns, leaves, hearts, and circles
You can print materials that adhere to themes or events, such as shapes for a fun fall activity.


Different sized squares to use for Cricut crafts
Preparing your materials ahead of time will save you tons of work once you start the activity with students.

Don’t just limit yourself to cutting out materials! You can even streamline other processes by using scoring or perforating accessories to create materials that easily fold or tear away for cards, banners, hats, and more. Markers and pens can also be used to add written text or drawings, so that projects have a more hand-created feel to them.

Unique student gifts

Using the Cricut cutting machine can help streamline other processes. But did you know other tools like the Mug Press or Autopress can help students to create projects that would not be feasible otherwise?

One of my favorite projects to do is having students create custom mugs using Infusible Ink markers and the Mug Press. Students can also create coasters using the infusible ink pens and the Autopress. Both of these activities allow students to have complete creative control over their products. Let the Cricut cut copy paper to the precise size needed for the coasters and mugs.

Students get to draw the designs they want to appear on the mugs or coasters while you only need to heat press the items to bring them to life. The result is a tangible item that looks impressive and will last for years to come. Using similar techniques, students can design and create whatever they can imagine on surfaces like tote bags, t-shirts, pencil cases, and more.

Decorated coasters
Coasters created using Cricut coaster blanks, Infusible Ink markers, and the Cricut Mug Press.


Decorated mugs for different occasions
Mugs created using Cricut mug blanks, Infusible ink Markers, and Cricut Autopress.

Utilizing permanent vinyl

Another way to help push students’ creativity is by using permanent vinyl to customize canvas paintings, consumer products like water bottles, flower pots, and boxes. Students will practice skills like peeling, scraping, transferring, etc. New sticker paper by Cricut can transform photos, hand-drawn art, student-designed graphic art, and other images into unique stickers. These can be added to a variety of different projects.

A decorated cup that says "You rock!"
Customized gifts are a great way for students to show appreciation to those who are most important to them.


A decorated flower pot that says "I love mommy"
Cricut gifts can be made for any occasion or holiday, such as a flower pot for Mother’s Day.

There are so many possibilities for enhancing classroom projects. What will you and your students create today? For more inspiration, be sure to check out the Cricut courses on OTIS for educators. Plus, check out our downloadable instructional guides and tutorials in our Edu Resources section.


For more tips, tricks, and tools for teaching in and out of the classroom, check out more content on the Teq Talk blog or our YouTube channels OTIS for educators and Tequipment.

We also offer virtual professional development, training, and support with OTIS for educators. Explore the technology and strategies that spark student success — no matter where teaching or learning are happening!

Follow us on social:

  edteq           Twitter icon  OTIS4educators  |  Teq Products  |  iBlocks         facebook icon  OTIS4educators  |  MyTeq        LinkedIn icon  Teq 


The post Student-Made Gifts with Cricut appeared first on Teq.

TCEA 2023 is Around the Corner!

TCEA Logo | Jan 30 - Feb 2 | San Antonio, TX | Teq and OTIS logos

Texas Computer Education Association (TCEA), the largest non-profit edtech association in the United States, is gearing up to host their annual conference! With a solid track record of over 40 years in the education sector, this organization aims to advance teaching and learning through the use of technology. TCEA Convention & Exposition is a major event on the educational calendar; thousands of attendees come together to hone their craft, share ideas, and learn together.

Details about the 2023 conference

This year’s conference has big things in store! The TCEA Convention & Exposition is being held in San Antonio at the Henry B. Gonzalez Convention Center from January 30th through February 2nd. This year promises diversity of thought, exceptional resources, and meaningful connections. Teq is looking forward to contributing to this year’s conference. We’ll be at booth #261/360 in the exhibition hall; stop by to chat edtech, PBL, and educator PD.

What to expect from Teq

We’re thrilled to be showcasing some incredible edtech like SMART interactive flat panels, screen-free robotics like KIBO and KUBO, and block-case coding robotics kits from Ozobot and WonderWorkshop. Chat with our team members about how to integrate these fun and inspirational edtech tools in your classroom. One of the best ways to get longevity out of your classroom tech is to incorporate it in meaningful activities that align with your curriculum and goals. There’s no better way to do this than with project-based learning, which is why we created iBlocks — project-based learning experiences that inspire students to solve really world issues and create projects worthy of showing off. All this is accomplished without requiring teachers to spend an inordinate amount of time planning. Our library of topics is over 40 strong with options for all grade levels from K-12. In addition, we’ll be discussing our professional development platform, OTIS for educators. OTIS offers courses on how to effectively integrate technology and pedagogy. Between our on-demand library and calendar of live sessions, we make it easy to access hundreds of courses, with topics on STEM, SEL, literacy, ENL/ELL, and more.

We can’t wait speak with Texas educators at this year’s TCEA Convention. Drop by to say hi, chat, learn more about PBL, play with a robot, or even just snag some swag!


For more tips, tricks, and tools for teaching in and out of the classroom, check out more content on the Teq Talk blog or our YouTube channels OTIS for educators and Tequipment.

We also offer virtual professional development, training, and support with OTIS for educators. Explore the technology and strategies that spark student success — no matter where teaching or learning are happening!

Follow us on social:

  edteq           Twitter icon  OTIS4educators  |  Teq Products  |  iBlocks         facebook icon  OTIS4educators  |  MyTeq        LinkedIn icon  Teq 


The post TCEA 2023 is Around the Corner! appeared first on Teq.

Teq is Coming to Illinois for IDEAcon 2023


Teq is heading to Illinois for IDEAcon, one of the Midwest’s largest annual edtech conferences. Presented by IDEA, the Illinois Digital Educators Alliance, we’ll be joining the many different presenters, thought leaders, and educators from around the world to engage, teach, and inspire!

Event Details

We are so excited to be able to reach educators and learners alike to discuss pedagogical practices and the latest classroom technology. Taking place from February 13th to February 15th, IDEAcon will be held at the Renaissance Schaumburg Convention Center Hotel in Schaumburg, IL. We will be set up at booth #321/323 in the Exhibit Hall to discuss everything from our iBlocks project-based learning experiences, top-notch edtech products, and our online PD platform, OTIS for educators.

What Teq Will Bring

We will be showcasing some amazing edtech products, such as SMART interactive display panels, high-tech 3D printers from Ultimaker, screen-free robots like KIBO and KUBO, coding kits and resources from Ozobot, Wonder Workshop, and pi-top, plus more. Additionally, chat with our team about iBlocks, our student-led and teacher-guided approach to project-based learning. Created to teach students how to tackle real-world topics such as finance, environmentalism, and robotics, iBlocks are prime PBL experiences developed by teachers, for teachers. For optimal professional development, make sure to ask about our online platform, OTIS for educators, offering courses, resources, micro-credentials, and skills covering all things technology and pedagogy. With easy access to hundreds of on-demand and live courses created by our curriculum team, OTIS carries everything from STEM, SEL, PBL, ENL/ELL, and more.

We cannot wait to speak to educators and presenters from all over at this year’s IDEAcon. Make sure to say hi, stop by for a chat, watch a demonstration, or even to grab some of our free swag.


For more tips, tricks, and tools for teaching in and out of the classroom, check out more content on the Teq Talk blog or our YouTube channels OTIS for educators and Tequipment.

We also offer virtual professional development, training, and support with OTIS for educators. Explore the technology and strategies that spark student success — no matter where teaching or learning are happening!

Follow us on social:

  edteq           Twitter icon  OTIS4educators  |  Teq Products  |  iBlocks         facebook icon  OTIS4educators  |  MyTeq        LinkedIn icon  Teq 


The post Teq is Coming to Illinois for IDEAcon 2023 appeared first on Teq.

Top Ten 3D Printing Terms You Should Know

3D printing designs are created with layers of material being laid down on top of each other in an additive process. Many schools and educators are investing into this technology to reinforce skills in the engineering and design process. It’s easy to understand the overall process of how 3D works, but it’s even easier when we understand proper 3D printing terminology. Here are ten words you must know to help you become confident when you’re talking about and teaching 3D printing.  

3D Printing Terms:

  • Overhang: A part of a 3D model that is either partially or fully unsupported underneath. Overhangs of more than 45 degrees need support.
  • Bridge: An overhang across two points, drooping in the middle.
  • Wall Thickness: The distance between one surface and the other side of that surface. Note that there’s a limitation to the thickness of a wall based on the extruder’s nozzle diameter. It’s recommended to go twice the size of the nozzle.
  • Orientation: The location of an object on the plane, including x, y, and z axes. We recommend rotating your model so that it’s in the best position to print.
  • Slicing: The process by which the 3D model file is broken up into layers in a software program called a “slicer”. The slicer generates what is known as a g-code which then tells the 3D printer exactly how to move while printing.
  • Support: To help with overhangs or bridging, support material can be generated to ensure your design is printed properly. This is a temporary structure that can then be removed or dissolved in water depending on the type of support material that you use.
  • Filament: The material used to print your design. PLA (Polyactic Acid) is used to print the design and PVA (PolyVinyl Alcohol) is used to generate support.
  • Infill:  Determines how dense or hollow a 3D model is. To create a fully solid object, the infill density must be at 100%. The lower the infill density, the lighter and more hollow your object will be.
  • Shells: The outer walls that make up the perimeter of the 3D model. 
  • CAD: An acronym that stands for computer-aided design. CAD is software that helps you generate or create your 3D Design.

If you’re looking to get started with 3D printing, be sure to review these words and help your students understand them as well. The more you use your 3d printer and CAD software, the more you will find yourself needing to use these terms. Do you have any other terms or tips about 3D printing for beginners? Please share in the comments below! Be sure to check out our STEM category on OTIS for educators for great courses on the Ultimaker, MakerBot, Tinkercad, lesson ideas, and more!


For more tips, tricks, and tools for teaching in and out of the classroom, check out more articles on the Teq Talk blog.

We also offer virtual professional development, training, and remote learning support for educators with OTIS for educators. Explore the technology, tools, and strategies that can spark student success — no matter where teaching or learning are happening.


The post Top Ten 3D Printing Terms You Should Know appeared first on Teq.

Turnkey K-8 PBL Modules: Complete Teacher Guides and Scaffolded Lesson Plans

Project-based learning (PBL) delivers unparalleled student engagement by fostering critical thinking, problem-solving, and collaboration. However, implementing PBL in elementary and middle school classrooms faces a persistent bottleneck: a severe lack of teacher planning time. Whether an educator is helping students engineer a Rube Goldberg machine or design a sustainable community, translating conceptual inquiry models into daily, actionable lesson plans requires extensive resources. Turnkey K-8 PBL modules eliminate this trial-and-error burden by providing educators with complete, lesson plans, student-facing workbooks, aligned rubrics, and paired materials kits necessary to manage multi-week units seamlessly.

What are Turnkey K-8 PBL Modules?

Turnkey PBL modules are end-to-end instructional curriculum packages that provide everything educators need to execute inquiry-based lessons out of the box. Unlike traditional PBL frameworks that only offer pedagogical philosophy and conceptual templates, turnkey systems bridge the execution gap. They convert high-level design concepts into concrete instructional pathways, mapping disciplinary standards to daily pacing guides, pre-configured hardware kits, and scaffolded student materials.

The K-8 PBL Implementation Gap: Why Time is the Biggest Barrier

The primary barrier to high-quality project-based learning in elementary and middle schools is not a lack of teacher enthusiasm, but a severe deficit in preparation time. Recent research highlights how various constraints make DIY curriculum design nearly impossible for the average public school teacher.

Elementary teachers receive an average of only 47 minutes of daily planning time, while secondary teachers average approximately 51 minutes, according to the National Council on Teacher Quality (NCTQ). Broader data confirms that public school teachers average just 266 minutes of dedicated planning per week (EdSurge, 2024).

This lack of time directly impacts classroom innovation. A comprehensive 2025 review by TNTP revealed that over 60% of teachers report burnout driven by heavy workloads and time consumed by non-instructional tasks like curriculum assembly and materials sourcing. Furthermore, qualitative research published in ERIC / AABRI analyzing K-8 educators found that while teachers view PBL as an essential instructional pathway, the lack of structured curricular materials remains their greatest obstacle. Without turnkey resources, educators under pressure to meet strict state standards often abandon open-ended projects due to pacing anxiety and fear of lost instructional time (Edutopia).

6 Structural Pillars of a Turnkey PBL Ecosystem

To make inquiry-based instruction scalable and manageable within strict bell schedules, turnkey curriculum systems replace fragmented lesson creation with six foundational pillars:

  1. Skills Matrix & Standards Alignment: Maps disciplinary standards (NGSS, CCSS Math/ELA, CTE) across vertical grade bands and project phases, clarifying exact competencies at each milestone.

  2. Instructional Framework: Outlines the core narrative arc of the unit, from the anchor phenomenon and driving question to prototyping and the final capstone showcase.

  3. Comprehensive Teacher’s Guide: Contains step-by-step facilitation prompts, anticipated student misconceptions, pacing controls, and structured discussion starters.

  4. Scaffolded Lesson Plans & Workbooks: Provides step-by-step print and digital workbooks guiding learners through the engineering design cycle, research synthesis, and reflective journaling.

  5. Student Self-Assessments & Rubrics: Features objective, multi-tier rubrics evaluating technical mastery alongside durable 21st-century skills like collaboration and design iteration.

  6. Paired Materials & Technology Kits: Standardizes physical components and hardware (e.g., robotics kits, 3D printing tools) aligned directly with project challenges.

How to Scaffold a Rube Goldberg Invention Project

Designing a Rube Goldberg machine is a classic example of complex K-8 STEM integration. However, without explicit scaffolding, building a Rube Goldberg invention often results in chaotic tinkering rather than rigorous physical science learning. Turnkey scaffolding structures this design challenge into measurable, standards-aligned learning phases, as demonstrated by iBlocks Rube Goldberg Machines learning pathways.

Phase 1: Phenomenon Exploration and Ideation

Instruction begins with a driving question: How can we combine simple machines and energy transfer to accomplish a simple task through an intentionally overcomplicated chain reaction? Students explore kinetic versus potential energy and analyze the six classic simple machines. Scaffolded workbooks provide vocabulary prompts, diagrams, and brainstorming matrices.

Phase 2: Engineering Design & Iterative Prototyping

Teams work under specific constraints, such as incorporating a minimum number of simple machines or energy transformations . The Teacher’s Guide supports this phase with facilitator check-in questions, troubleshooting tips, and best practices for integrating physical making materials.

Phase 3: Testing and Rubric Assessment

Students log all trial runs to identify any bottlenecks and refine their prototypes. Summative assessments and rubrics then evaluate the design process, prototype reliability across consecutive trials, and team collaboration.

Choosing the Right PBL Approach: Frameworks vs. Turnkey Systems

School and district leaders evaluating PBL implementation must understand the operational differences between foundational frameworks and comprehensive turnkey systems.

While high-level PBL frameworks like PBLWorks outline what authentic learning looks like, they can require massive time investments from educators. Conversely, turnkey K-12 project-based learning systems like iBlocks (by Teq) provide the exact instructional scaffolding required for sustainable, school-wide execution. By delivering standards-aligned, grade-sequenced units complete with embedded implementation videos iBlocks diminishes the variance between novice and veteran teachers.

Key Dimension

Turnkey PBL System (e.g., iBlocks)

Primary Focus

Complete, modular, ready-to-teach K-12 PBL courses and units.

Lesson-Level Planning

Fully articulated daily lesson plans are included out of the box.

Student Materials

Dedicated Student Workbooks (print & digital) mapped to every phase.

EdTech & Hardware

Seamless integration with STEM tech (e.g., 3D printing, robotics) directly tied to units.

Pacing Management

Built-in pacing guides and digital controls to monitor class progress.

Scaling Authentic Learning

The primary barrier to high-quality project-based learning in elementary and middle schools is preparation time. Turnkey PBL modules solve this dilemma by providing fully articulated lesson plans, student workbooks, and aligned rubrics that free educators to focus on coaching inquiry rather than building curriculum from scratch. Whether students are engineering a complex Rube Goldberg invention or tackling local environmental issues, turnkey ecosystems ensure that rigorous, standards-aligned STEM integration is accessible, equitable, and easily manageable within the realities of today’s K-8 classrooms.

Using iBlocks in Bridging Next-Gen Standards and the Portrait of a Graduate 


If you’ve been keeping up with the latest from Albany, you know our “to-do” lists just got a lot longer. We’re all trying to wrap our heads around two big frameworks: the Next Generation Learning Standards (NGLS)—the “what” of our daily lessons—and the Portrait of a Graduate (PoaG, or PoG)—the “who” we want our students to be when they walk across that stage. That’s why we created this guide on using iBlocks to bridge Next-Gen Standards and the Portrait of a Graduate.
Dive into our guide on how iBlocks bridge the gap between Next-Gen Standards and the Portrait of a Graduate.
A Movement with Deep Roots: From States to a National Theme
It’s helpful to remember that we aren’t alone in this. The “Portrait of a Graduate” concept didn’t just appear out of thin air; it has a rich history rooted in the individual efforts of states across the country. Over the last decade, districts from Virginia to California began realizing that a high school diploma needed to represent more than just “seat time” or a passing test score. Over 20 states have adopted frameworks to define student success beyond traditional academics. What started as a local grassroots conversation about “21st-century skills” has evolved into a powerful, common national theme. Across the U.S., there is a shared recognition that the world our students are entering is fundamentally different from the one we grew up in. By adopting its own PoaG, New York is joining a massive collective effort to redefine success. We are moving toward a common goal: ensuring every student, regardless of their zip code, graduates with durable skills—like empathy, critical thinking, and adaptability—that the modern world demands. Yet, as teachers and administrators, it often feels like we’re being asked to do two different jobs at once. How are we supposed to hit every academic benchmark while also making sure our kids are becoming empathetic Global Citizens and Creative Innovators? At Teq, we don’t see these as separate initiatives. Honestly, they’re just two sides of the same coin.
Why Content Needs Context (And Why We’re All Tired)
We’ve all seen “initiative fatigue” in our buildings. The Next-Gen Standards give us the rigor, but without context, it can feel like we’re just teaching to a test. On the flip side, the Portrait of a Graduate is a beautiful vision, but without a plan, those six attributes usually stay stuck on a hallway poster. Project-Based Learning (PBL) is the “how” that brings them together. When we give students a real-world problem to solve, they start using those Next Gen Standards as tools—not just facts to memorize—to reach those Portrait of a Graduate goals. It’s about making the learning stick.
iBlocks: The Teacher-Friendly Solution
We built iBlocks because we know that high-quality PBL is incredibly hard to design from scratch while you’re also grading, planning, and managing a classroom. An iBlock isn’t “one more thing” on your plate; it’s a pre-designed, flexible pathway that does the heavy lifting of alignment for you.
Here’s how we’re helping you bridge that gap:
1. Rigor You Can Trust (NGLS + Academically Prepared)
Every iBlock starts with a Skills Matrix. We know you need to justify every minute of instructional time, so we’ve mapped every module directly to specific NYS Next Gen Standards. Whether your high schoolers are navigating Financial Literacy or your K-2 kids are researching a Class Pet, they’re hitting the standards by doing the work.

2. Space for “The Messy Middle” (Creative Innovator + Critical Thinker)
The Portrait of a Graduate asks for innovators, and we know that innovation requires a little bit of failure. Through our Design Challenge Flow—like in the Rube Goldberg or prosthetic hand projects—students research, build, fail, and try again. They aren’t just reading about the engineering design process; they’re living it.

3. Real Skills for Real Audiences (Effective Communicator)
Communication is more than just a presentation; it’s about craft. In the Design a Comic Book iBlock, students explore advanced literacy and narrative techniques. Every iBlock wraps up with a Capstone Presentation, giving students the chance to pitch their ideas and justify their choices to a real audience. It’s exactly the kind of “soft skill” mastery the state is looking for.

4. Empathy in Action (Global Citizen)
Being a Global Citizen is a big ask for a teenager. In the Prosthetics iBlock, we take it from abstract to actual. Students explore how technology and ethical design can change lives. They see firsthand that their “school skills” (Next Gen) can solve “world problems” (PoaG).

5. Building Resilience (Reflective and Future-Focused)
Social-Emotional Learning (SEL) is often the hardest part of the Portrait to prove. We’ve built Self-Assessments and Rubrics right into the student workbooks. Students stop and reflect on how they worked with their team and how they bounced back from a setback. It turns that internal growth into something you can actually see and measure.
What Success Looks Like: iBlocks in Action
When we talk about the Portrait of a Graduate, we’re talking about tangible student outcomes. Here is what achieving those PoaG attributes looks like when a student completes an iBlock:
  • The K-2 “Advocate”: In the Class Pet iBlock, a student doesn’t just choose an animal; they become an Effective Communicator. Success looks like a first grader standing in front of their peers, using a coded robot to demonstrate how to care for a living creature, and using evidence to “pitch” their choice to the class.
  • The Middle School “Storyteller”: In the Design a Comic Book iBlock, success is a student who has moved beyond basic reading to become a Critical Thinker. In this iBlock students analyze how visual palette and pacing influence emotion, culminating in a 10-page original narrative that shows—not just tells—their perspective on a community issue.
  • The High School “Engineer”: In the Prosthetics iBlock, success is a senior who has failed four times to get a tension cable to work but doesn’t give up. They are a Creative Innovator and a Reflective Learner. Students can explain the physics of the grip (NGLS) and the ethical importance of low-cost medical design (PoaG) in the same breath.
Let’s Build the Graduate Together
The goal for all of us is to send kids out into the world who are ready for whatever comes next. With iBlocks, you aren’t just “checking boxes” for the state. You’re creating a classroom where the Next Gen Standards and the Portrait of a Graduate are working together in every single lesson.
Move Beyond Basic Standards and Start Building the Graduate
We’d love to hear about the vision you have for your students. Let’s start a conversation and see how iBlocks can help you make it happen. The four titles mentioned in this article are available as samples for reviewing iBlocks.
For more tips, tricks, and tools for teaching in and out of the classroom, check out more content on the Teq Talk blog or our YouTube channels OTIS for educators and Tequipment. We also offer virtual professional development, training, and support with OTIS for educators. Explore the technology and strategies that spark student success — no matter where teaching or learning are happening! Follow us on social:

  edteq           Twitter icon  OTIS4educators  |  Teq Products  |  iBlocks         facebook icon  MyTeq        LinkedIn icon  Teq 


Voice & Choice for Field Day Activities

Students bouncing on balls outside

Ready, set, go! It’s time for a field day! You may remember participating in field day as a kid. Maybe, in more recent times, you’ve hosted a field day for your own students. Either way, field day is a great way to unwind at the end of the school year, participate in interactive activities, and celebrate the summer season ahead! Let’s explore what field day is and how we can empower our students through voice and choice for field day activities.

What is field day all about?

Field day is an exciting event that is held across the country for many schools, usually with athletic activities. It can also incorporate different challenges, community involvement, artistic activities, and so much more. Field day is the perfect opportunity for students to show their school spirit and celebrate all that they have accomplished throughout the school year. Typically, field day takes place outside, but can also take place inside a gymnasium or even virtually if necessary.

Field day is also more than just an exciting event for students. There are so many different skills that are accomplished through the planning and execution of a field day event. Here are just a few of the skills that you may see students work on throughout field day events:

  • Physical activity
  • Friendly competition
  • Teamwork
  • Communication
  • Problem solving
  • Working outside the classroom
  • Following rules and guidelines
  • Maintaining appropriate behaviors

Promoting student voice and choice

As you can see, field day is more than just athletic competitions and allows for students to work through many different skills. We know the importance of voice and choice in classroom activities, so why not incorporate this into the field day experience? Voice and choice offers a variety of possibilities for students to complete tasks, projects, and other activities. By giving students voice and choice, it helps to create trust, encourage participation, and give students an active presence both in and out of the classroom. It also gives students agency as they plan a school event. Additionally, it allows students to feel a sense of pride and school spirit. Here a few ideas to try with your students:

Design field day apparel

This art-focused activity allows students to play an active role in creating a shirt (or other article of clothing) that best represents themselves, their class, and their school spirit. Consider using a design tool such as Canva or Google Drawings to have students design their shirt or have them utilize paper and drawing/coloring tools to sketch their ideas.

Example of a field day shirt design
Get as creative as you want! You can even have students design apparel with different colors, representative of field day teams.

Develop a class mascot

Similar to the previous idea, this gives students creative freedom to create something that best represents their class for the field day event. They can work in teams, vote on the mascot, and even create a costume to bring it to life!

Create flyers, posters, and decorations

These tools can also be used for the actual field day event or to promote the event days in advance. Students can each take on a different component of the class poster to best represent themselves and express themselves in a unique way.

Make a vision board

A vision board is another great way for students to have a voice in the field day process. They can each create one to showcase their goals and ideas for field day and then show it off to the rest of their class. This allows you to see what students are looking forward to and what they would like to include in field day.

Example of a field day vision board with different apparel designs, activities, and color schemes.
Vision boards are helpful to map out your ideas all in one space, especially for those who learn better with visual aids.

Create a station

Voice and choice is in full swing as students brainstorm ideas for their own field day station. They will give it a name, discuss materials needed, draw a picture of what it looks like, and of course, describe the activity. This is also an excellent chance to see what students are interested in and, once again, have them vote on which field day station(s) they may want to participate in.

Example of a station creation form for students to fill out
This is a great way to give students autonomy over what activities they are/aren’t interested in, as well as get them excited if their idea is chosen.

Take your pick from a choice board

Create your own or share the one below with students. Give them the option to pick a certain number of events that they would like to participate in during the field day event.

Example of a field day choice board with various activities
With choice boards, each student will get to pick activities they want, this way, everyone gets at least 1 of their choices.

As you can see, field day is the perfect opportunity to give your students voice and choice. Hopefully you are feeling inspired to put a unique twist on the standard field day plan and try out some of these new ideas. Be sure to check out our accompanying OTIS course, Bringing Student Voice to Field Day, as well as many other courses in the OTIS Course Library.


For more tips, tricks, and tools for teaching in and out of the classroom, check out more content on the Teq Talk blog or our YouTube channels OTIS for educators and Tequipment.

We also offer virtual professional development, training, and support with OTIS for educators. Explore the technology and strategies that spark student success — no matter where teaching or learning are happening!

Follow us on social:

  edteq           Twitter icon  OTIS4educators  |  Teq Products  |  iBlocks         facebook icon  OTIS4educators  |  MyTeq        LinkedIn icon  Teq 


The post Voice & Choice for Field Day Activities appeared first on Teq.

Uncategorized